
As an avid user and enthusiast of Blogger, I can confidently say that it is a fantastic platform for blogging and website creation. Over the years, I’ve rolled out content through Blogger and have been extremely satisfied with its features and functionalities.
Recently, I discovered that popups can play a significant role in growing email lists and improving click-through rates (CTRs).
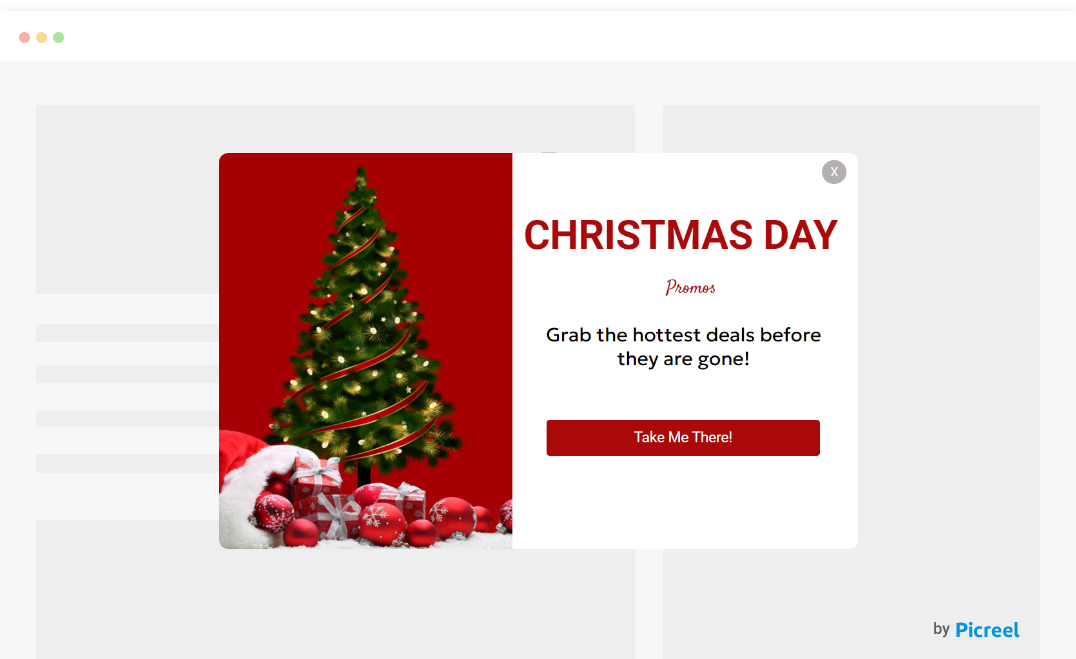
Intrigued by this potential, I explored the options for Blogger and compared them to a standardized popup tool called Picreel. Here is what my Picreel popup looks like in Blogger:
In this blog post, we will delve into the differences between the Blogtimenow popup extension of Blogger and Picreel, as well as provide step-by-step instructions for creating popups using both methods.
But first, let’s take a look at the comparison table below, which outlines the key criteria for evaluating Blogger’s own popup and Picreel as a specialized popup tool:
| Criteria | Blogger Popup | Picreel Popup |
|---|---|---|
| Conversion Rate Optimization | ❌It offers basic conversion rate optimization features | ✅Picreel provides advanced conversion optimization features, including exit-intent popups, personalized popups, and AB testing |
| Segmentation | ❌No audience segmentation options | ✅Segmentation based on user behavior, location, and other factors |
| Integrations | ❌Can only connect with Blogger websites. | ✅Integrates with various marketing tools, such as email marketing software, CRM systems, and e-commerce platforms |
| Social Media Integration | ❌No social media integration functionalities | ✅Social media integration, including social share buttons, to increase page visits and reach |
| Design and Customization | ❌Limited design customization options | ✅Extensive design customization options to match the brand and website's style and colors |
Based on my personal experience and analysis of the above comparison, I highly recommend using Picreel for creating popups. Here are the top three reasons why:
- More features: Picreel offers a wide range of features that surpass the limited options available in Blogger’s built-in popup. From advanced targeting options to customizable templates, Picreel provides a comprehensive set of tools that allow you to create engaging and effective popups.
- Better customization options: While Blogger’s popup builder provides basic customization options, Picreel takes it a step further with advanced customization capabilities. With Picreel, you can tailor your popups to match your branding and design preferences, resulting in a seamless user experience.
- Integrates with various website platforms: Unlike Blogger’s popup, which is limited to the Blogger platform, Picreel can be seamlessly integrated with a variety of website platforms. This flexibility allows you to use Picreel across different websites without requiring any additional setup or integration efforts.
With that said, let’s proceed with the tutorial on how to create popups using these two methods: Blogger’s built-in popup and Picreel.
Method 1: Using Blogtimenow Popup Extension
Blogger offers a built-in popup builder that enables you to create popups directly within the platform. Here’s a step-by-step guide on how to create a popup:
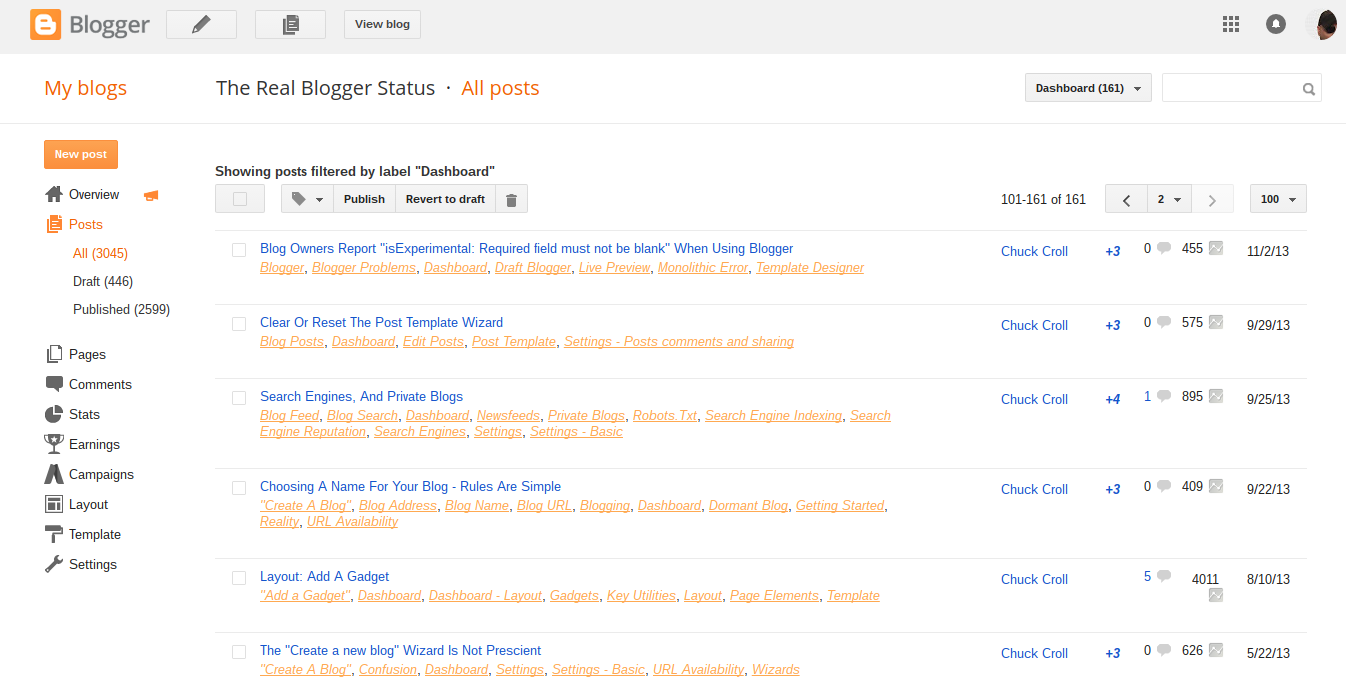
1. Login to your Blogger account. Go to the Dashboard and click on “Layout.”
2. Locate the section where you want to add the popup window, either in the sidebar or footer. Click on “Add a Gadget” for that section.
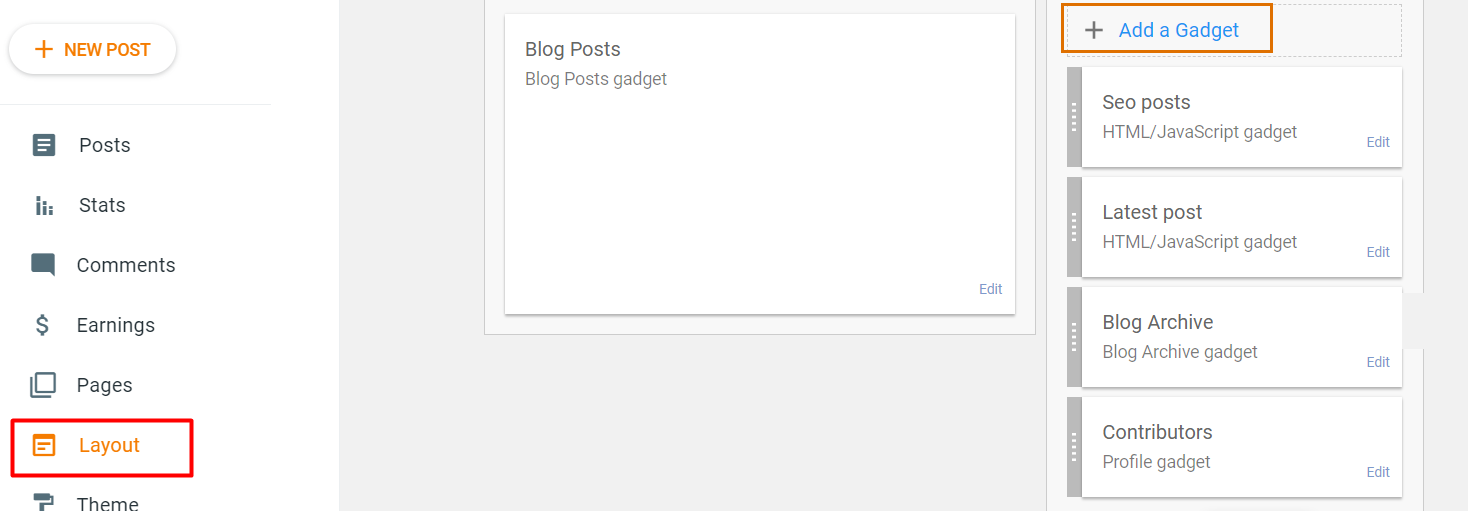
3. In the gadget options, choose the “HTML/JavaScript” option. Now, let’s add the necessary script for the popup window. From the scraped information, find the following code snippet:
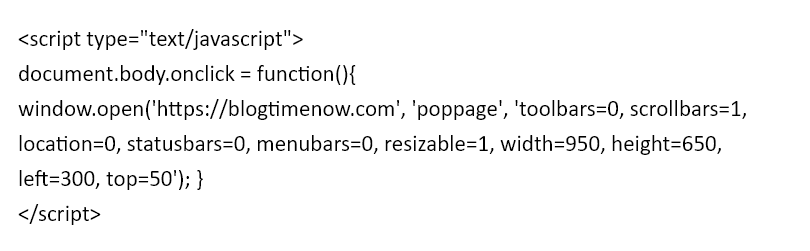
4. Copy the above script and paste it into the content area of the HTML/JavaScript gadget.
5. Before saving, make sure to replace the “https://blogtimenow.com” URL in the script with the desired URL that you want the popup to open.
6. Additionally, customize the width and height of the popup window according to your preferences.
7. Finally, click on the “Save” button to apply the changes.
8. Now, when users click somewhere on your blog, the popup window will open, pointing to the specified URL.
Method 2: Using Picreel Popup Builder
Picreel is a popup maker that works across multiple platforms, providing you with a versatile solution for creating popups.
Watch this video tutorial on how you can create a popup using Picreel:
Here are step-by-step instructions on creating an Blogger popup using Picreel:
Here’s how you can create a popup using Picreel:
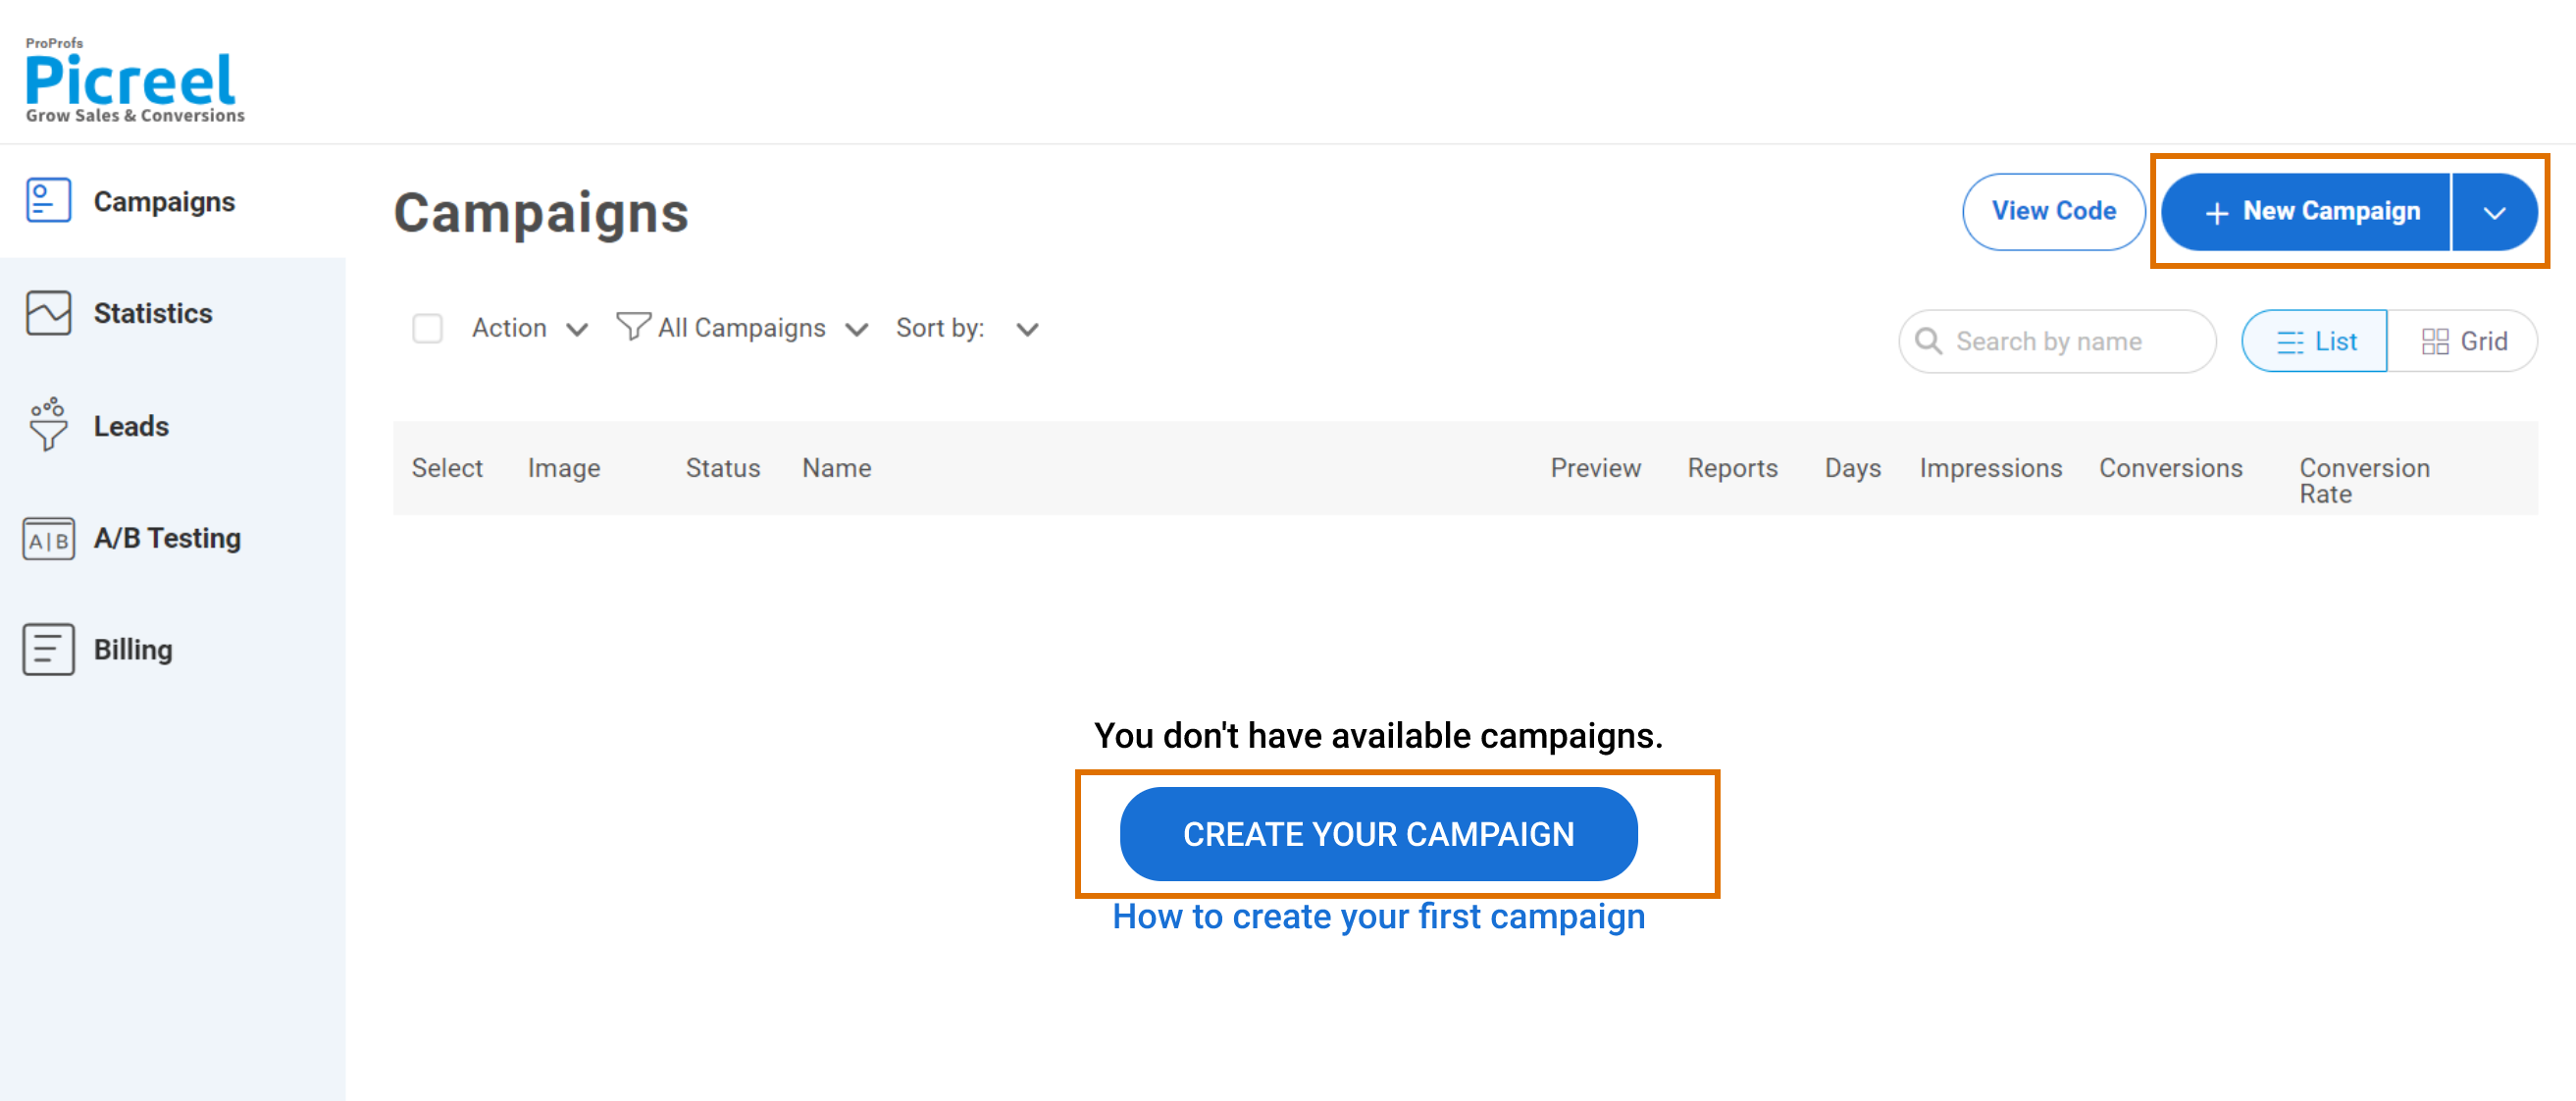
1. Sign up for a Picreel account and log in.
2. Go to the “Campaigns” menu and click “New Campaign” from the top right. You can select the templates option from the drop-down or start from scratch.
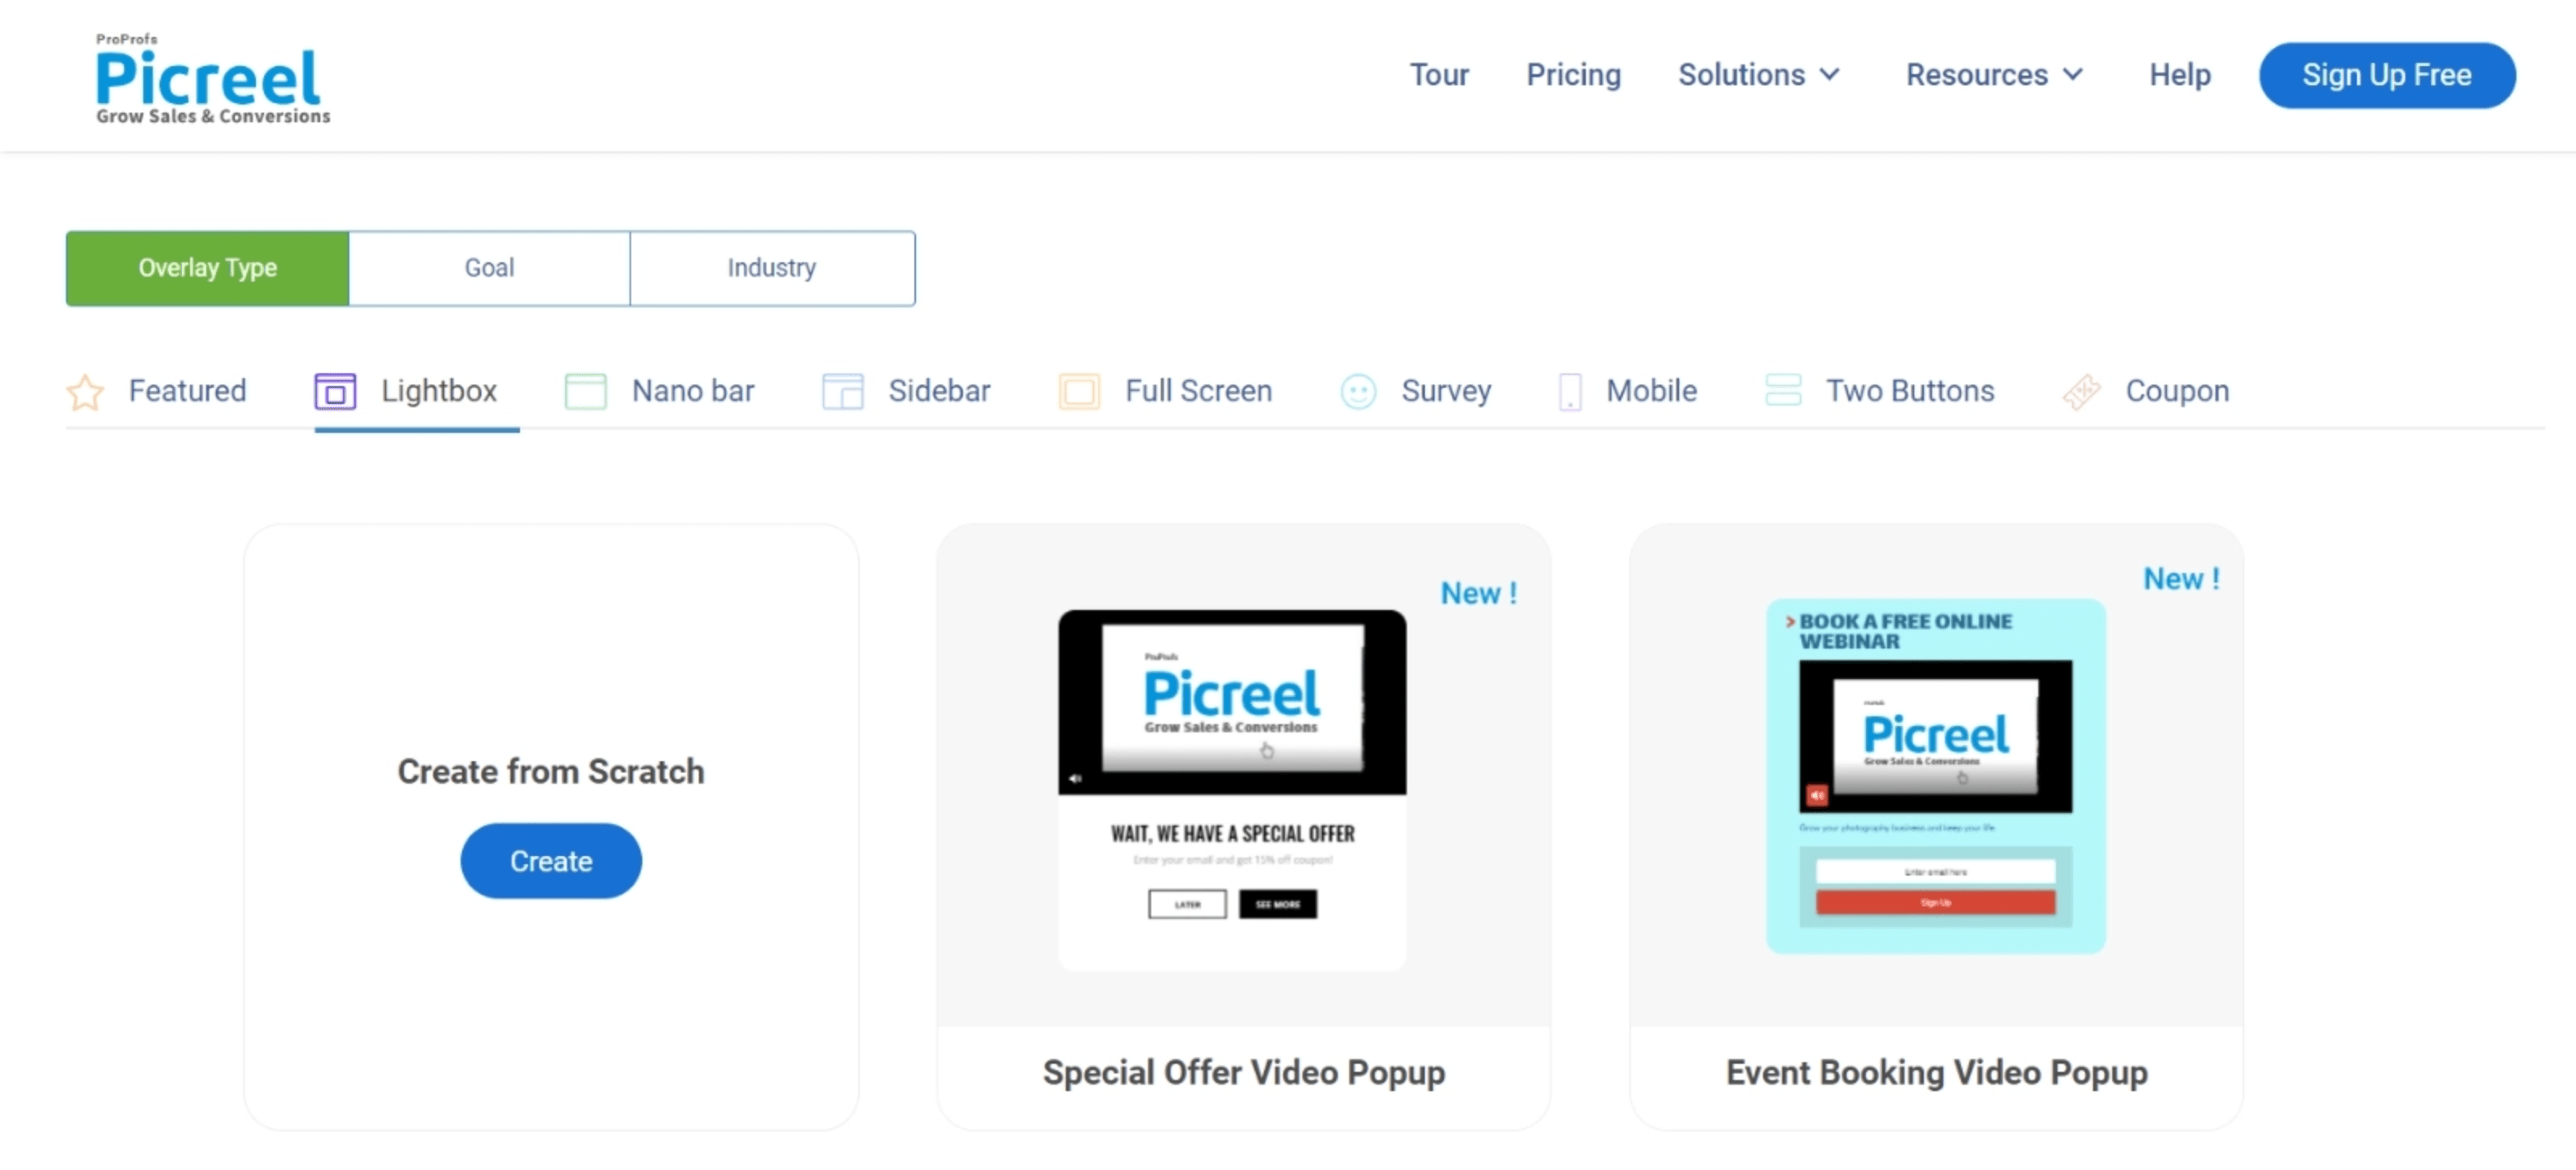
3. From the templates menu, choose the type of popup you want to create.
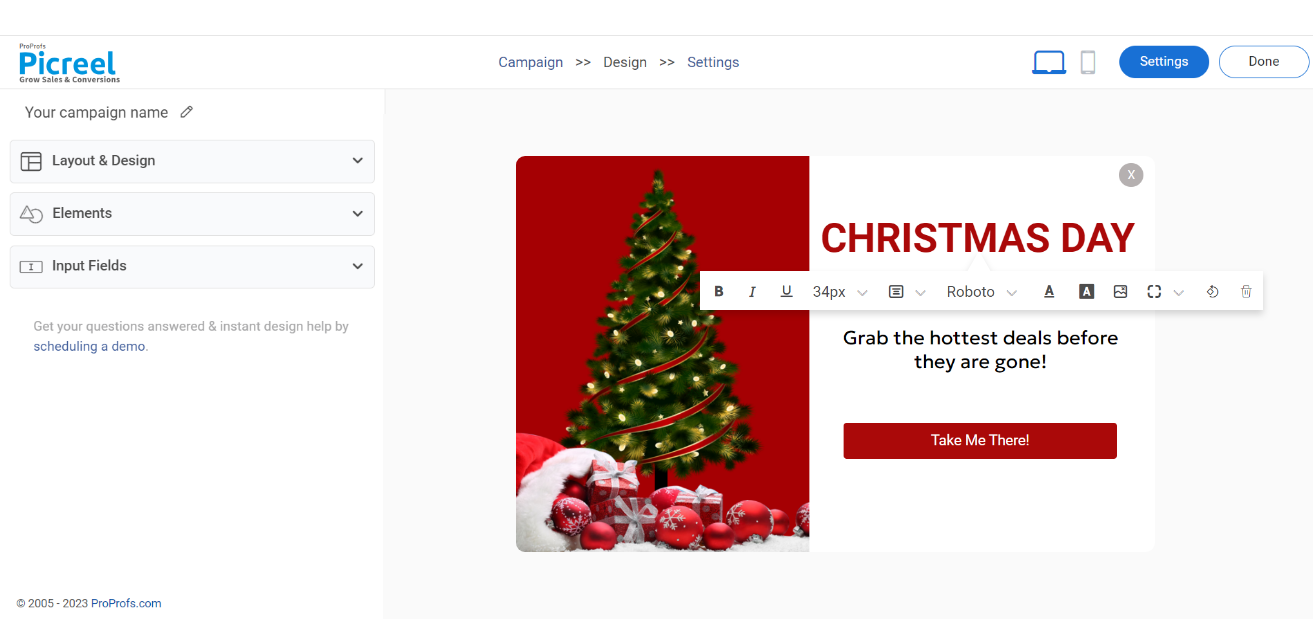
4. Once you select the design, customize it according to your preferences.
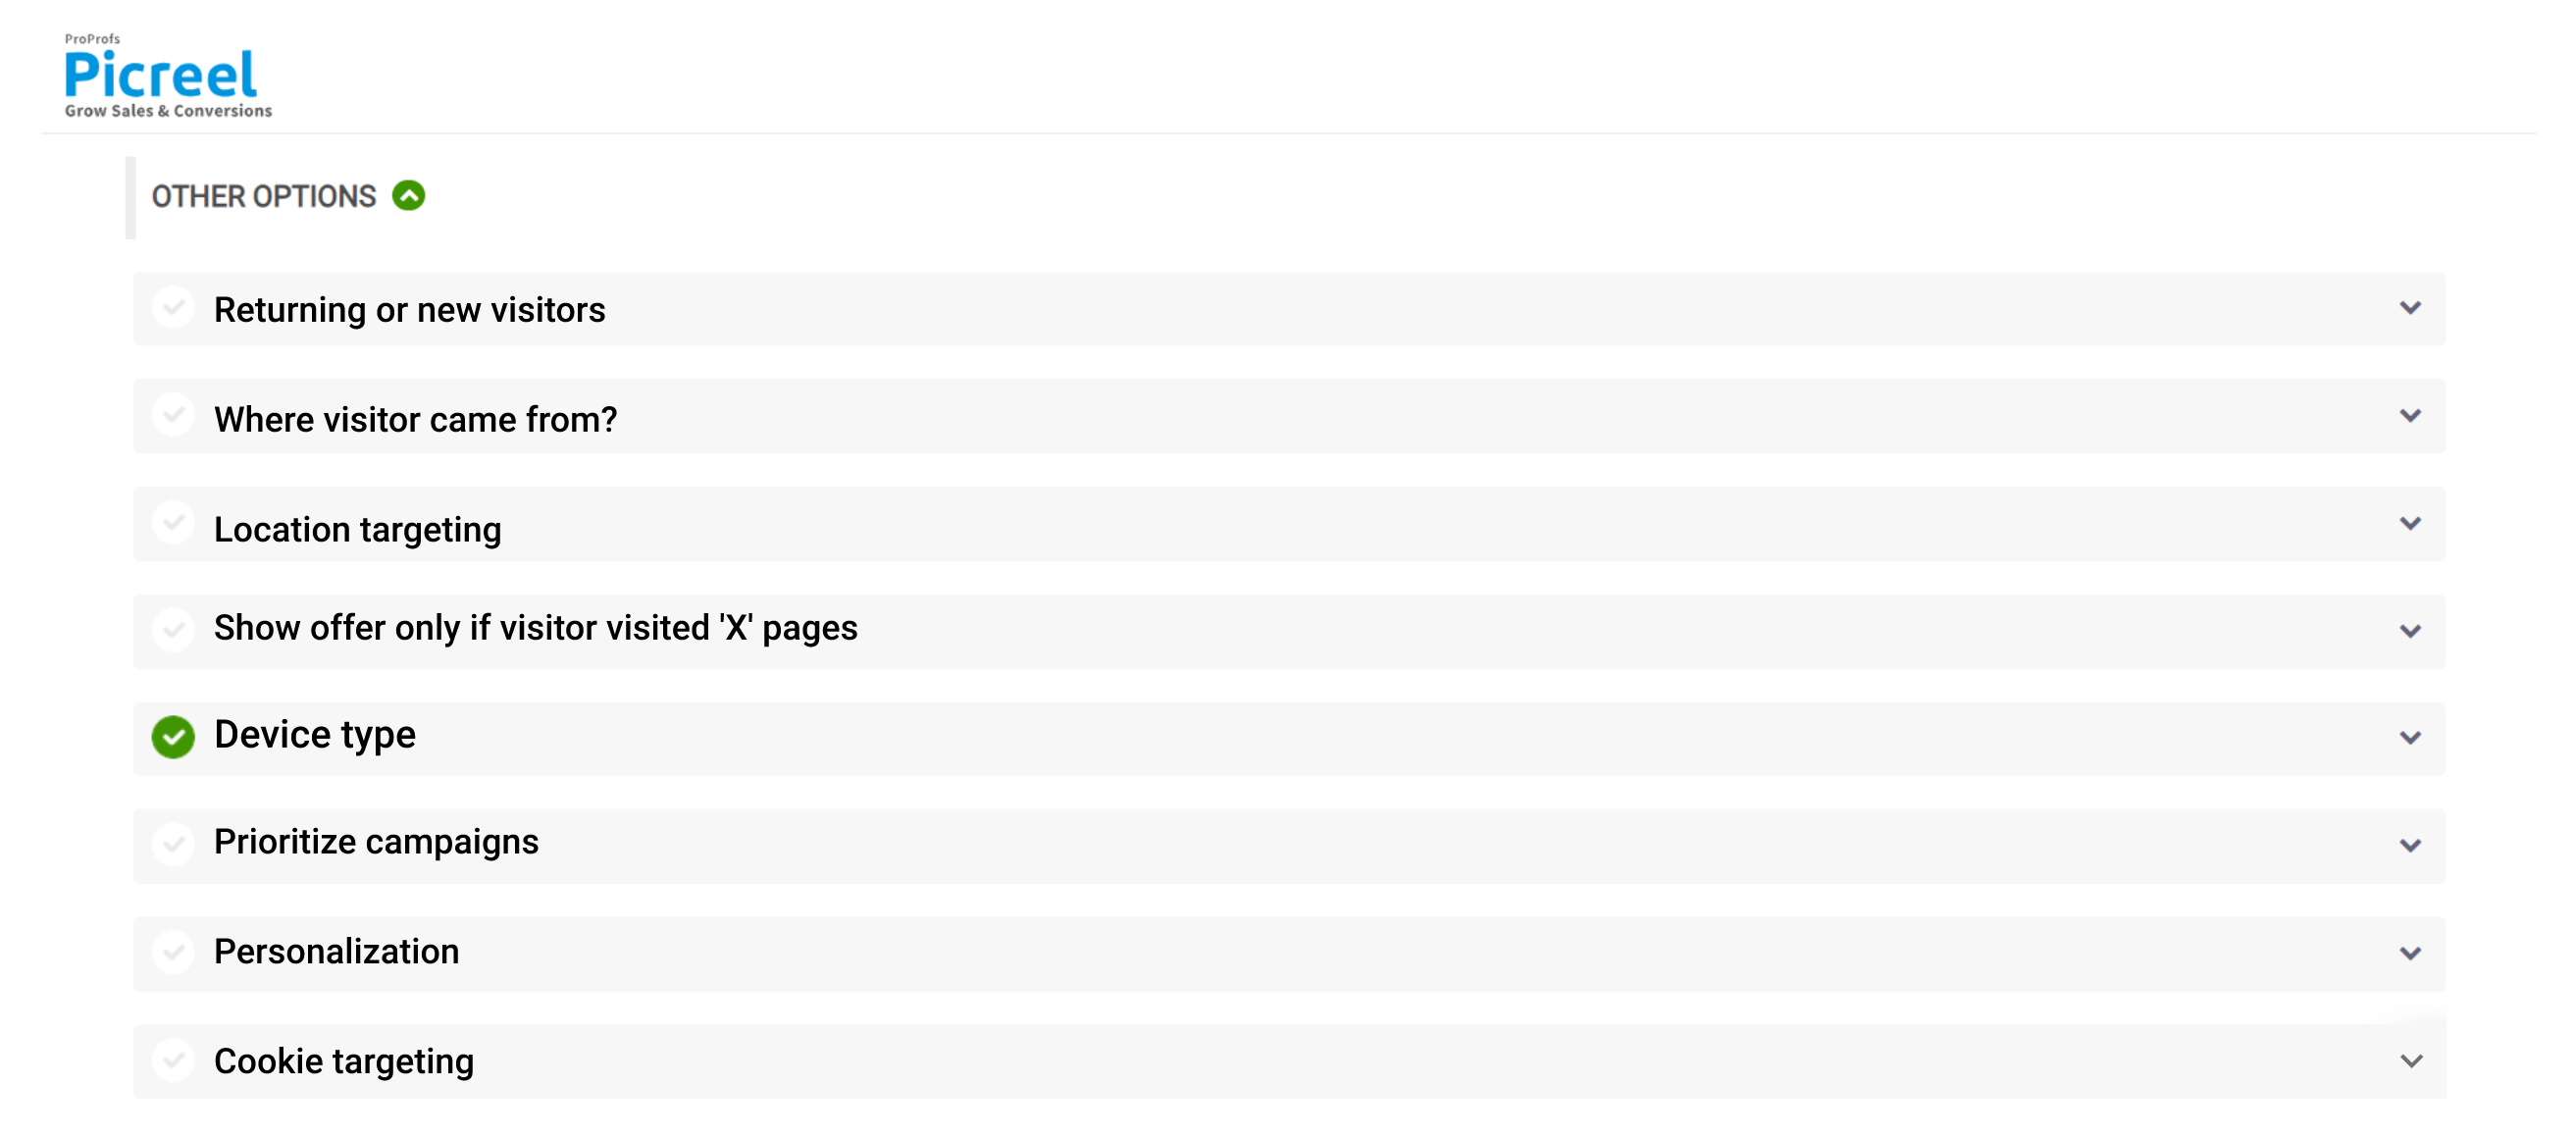
5. Configure your targeting and trigger options to specify when and where you want your popup to appear.
6. Click “Save” to activate your popup.
Embedding Picreel HTML Code Inside Blogger
To embed a Picreel popup on your Blogger website, follow these steps:
1. Navigate to campaigns and click “View Code.”
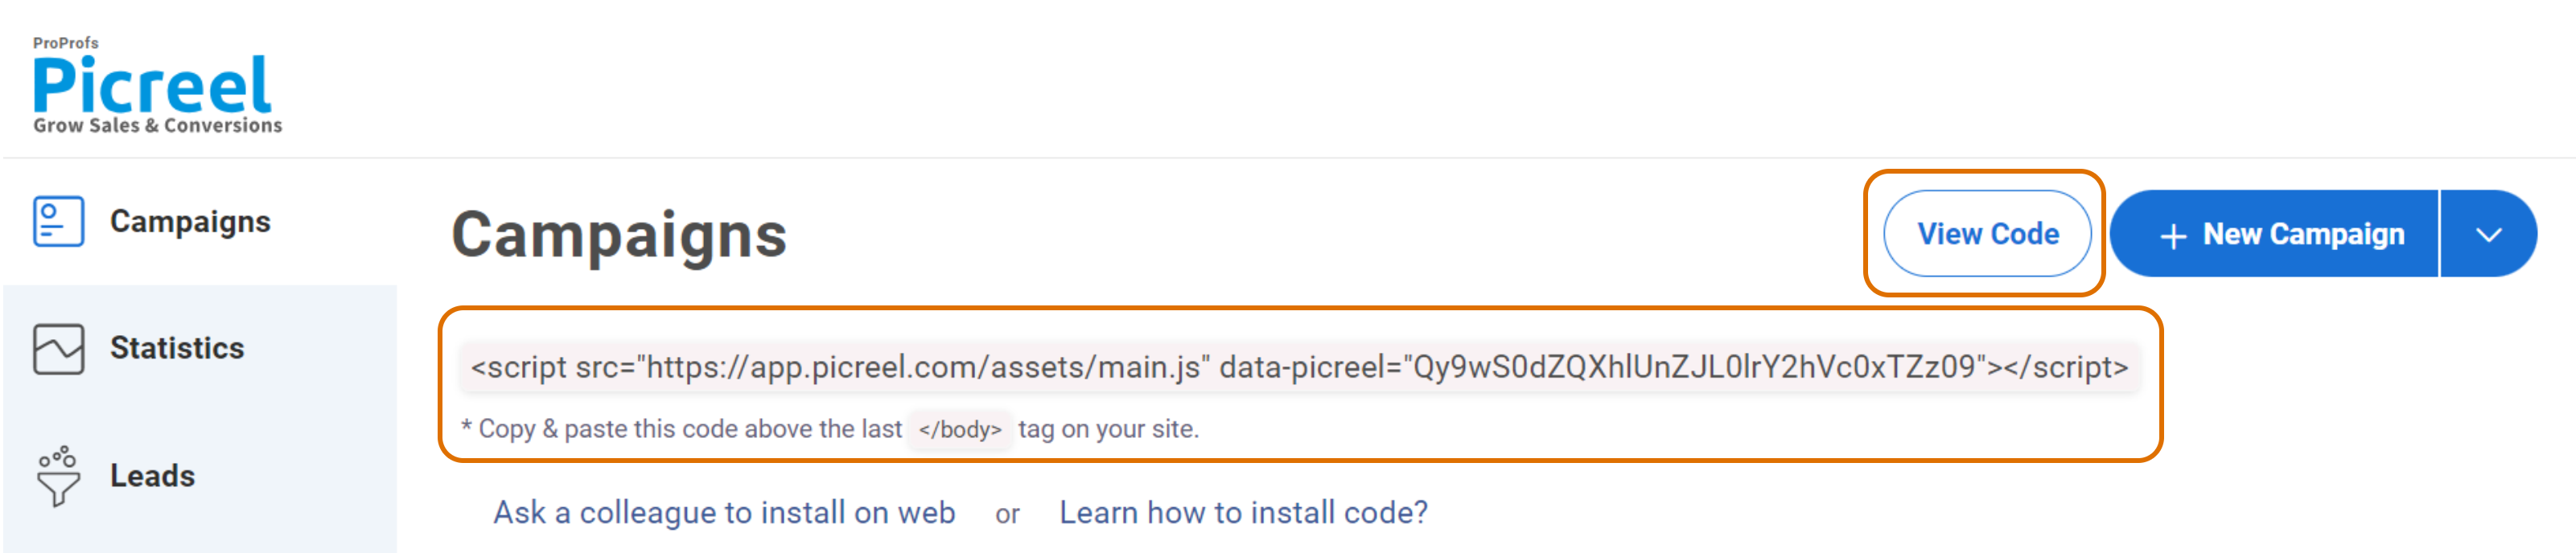
2. Click on the code to copy it.
3. Log in to your Blogger account and navigate to the page or post to which you want to add the embedded visualization.
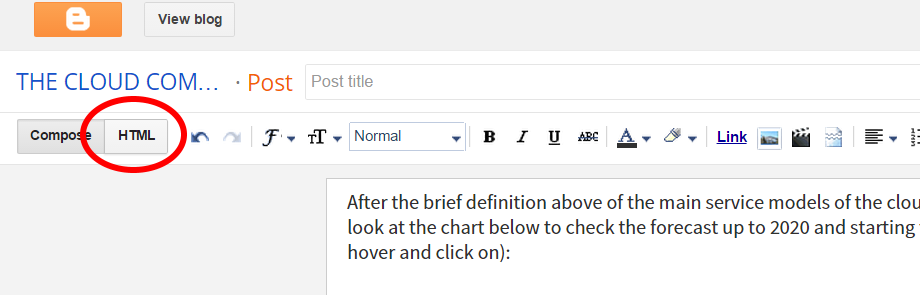
4. In the text editor, click on the “HTML” button. This button will switch you to the HTML editor view.
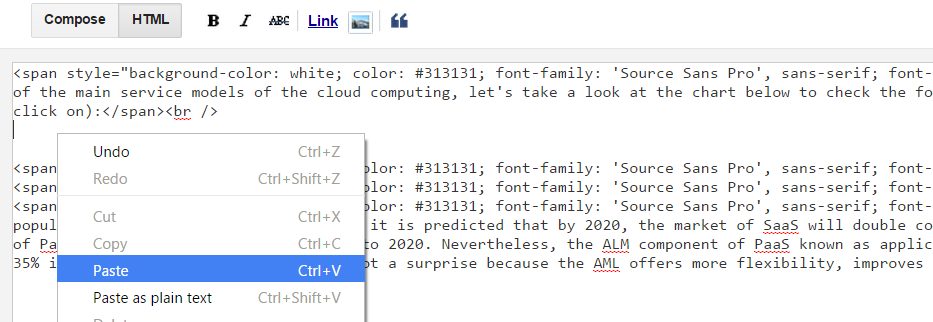
5. Paste the embed code you copied in the HTML editor.
6. Click on the “Compose” button to switch back to the visual editor. You should now see the embedded visualization in your post or page.
7. Preview or publish your post or page to verify that the embedded visualization appears correctly, and adjust the dimensions or placement if necessary.
Read More - Best Popup Maker Tools: Top 8 Choices to Boost Conversions
Which Is a Better Method: Method 1 or 2?
Ultimately, the choice between Method 1 and Method 2 depends on your specific needs and preferences. However, considering the long-term benefits and advanced features offered by Picreel, it is generally preferred.
Picreel provides a forever-free plan for startups and small businesses, allowing you to create popups using all premium features. If you require additional functionality and customization, there are also affordable paid options starting as low as $9.99 per month.
That being said, if you prefer to use the limited options available with Blogtimenow without the need for additional integrations, you can do that with the extension.
The ultimate goal is to create compelling popups that drive user engagement and conversions, regardless of the chosen method. Experiment, test, and optimize your popups to achieve the best results for your website or blog.
FREE. All Features. FOREVER!
Try our Forever FREE account with all premium features!
 We'd love your feedback!
What did you like & how can we make it even better?
 Thanks for your feedback!
 Ask Your Question
Have a question? Get expert help to make your decision easier.