
I have always been a huge fan of intuitive and powerful website builders and I’ve been exploring quite a few of them, including Webflow. That’s when I discovered that popups can greatly enhance my website by helping to grow my email list and improve click-through rates (CTRs).
From what I know, there are two methods to create a popup in Webflow: using Webflow’s own popup builder and using a popup tool like Picreel. In fact, here’s an example of how my Picreel popup looks like on Webflow:
But does Webflow allow you to create popups? Yes, Webflow does offer the capability to create popups Let’s take a look at the difference between the two options based on several criteria:
| Criteria | Webflow Popup | Picreel Popup |
|---|---|---|
| Customization | ✅ Webflow offers limited design customization options, such as changing the color and fonts. | ✅ Picreel offers extensive design customization options, such as the ability to create custom templates and add CSS styles. |
| Exit-Intent Popup | ❌ Webflow does not offer an exit-intent popup feature. | ✅ Picreel offers an exit-intent popup feature that appears when a user is about to leave the website. |
| A/B Testing | ❌ A/B testing is not available in Webflow popups. | ✅ Picreel provides A/B testing functionality for optimizing popup performance. |
| Targeting Options | ✅ Webflow offers basic page URL targeting options, which means a popup appears on a specific page. | ✅ Picreel provides advanced behavior-based targeting options, such as triggers based on mouse movement or scroll behavior. |
| Analytics | ❌ Webflow offers basic analytics tracking, such as number of impressions and conversions. | ✅ Picreel provides advanced analytics and reporting features, such as conversion funnel visualization and heatmap analysis. |
Based on my personal experience, I highly recommend using Picreel for creating popups. Here are the top three reasons why Picreel stands out:
- Better Customization: With Picreel, you have extensive customization options, allowing you to create visually appealing and tailored popups that match your website’s branding and design.
- Advanced Targeting: Picreel offers advanced targeting options, such as exit-intent triggers and page-specific targeting. These features greatly increase the effectiveness of your popups in engaging visitors and converting them into subscribers or customers. Learn more about advanced targeting from this help center page.
- Multi-platform Support: Unlike Webflow’s own popup feature, which is limited to Webflow websites, Picreel works on multiple platforms, giving you the flexibility to use it on different websites you own or manage.
Now, let’s explore the step-by-step process for creating popups using both methods.
Method 1: Using Webflow’s Built-in Popup
Webflow provides a built-in popup builder that you can easily utilize. Follow these steps to create a popup:
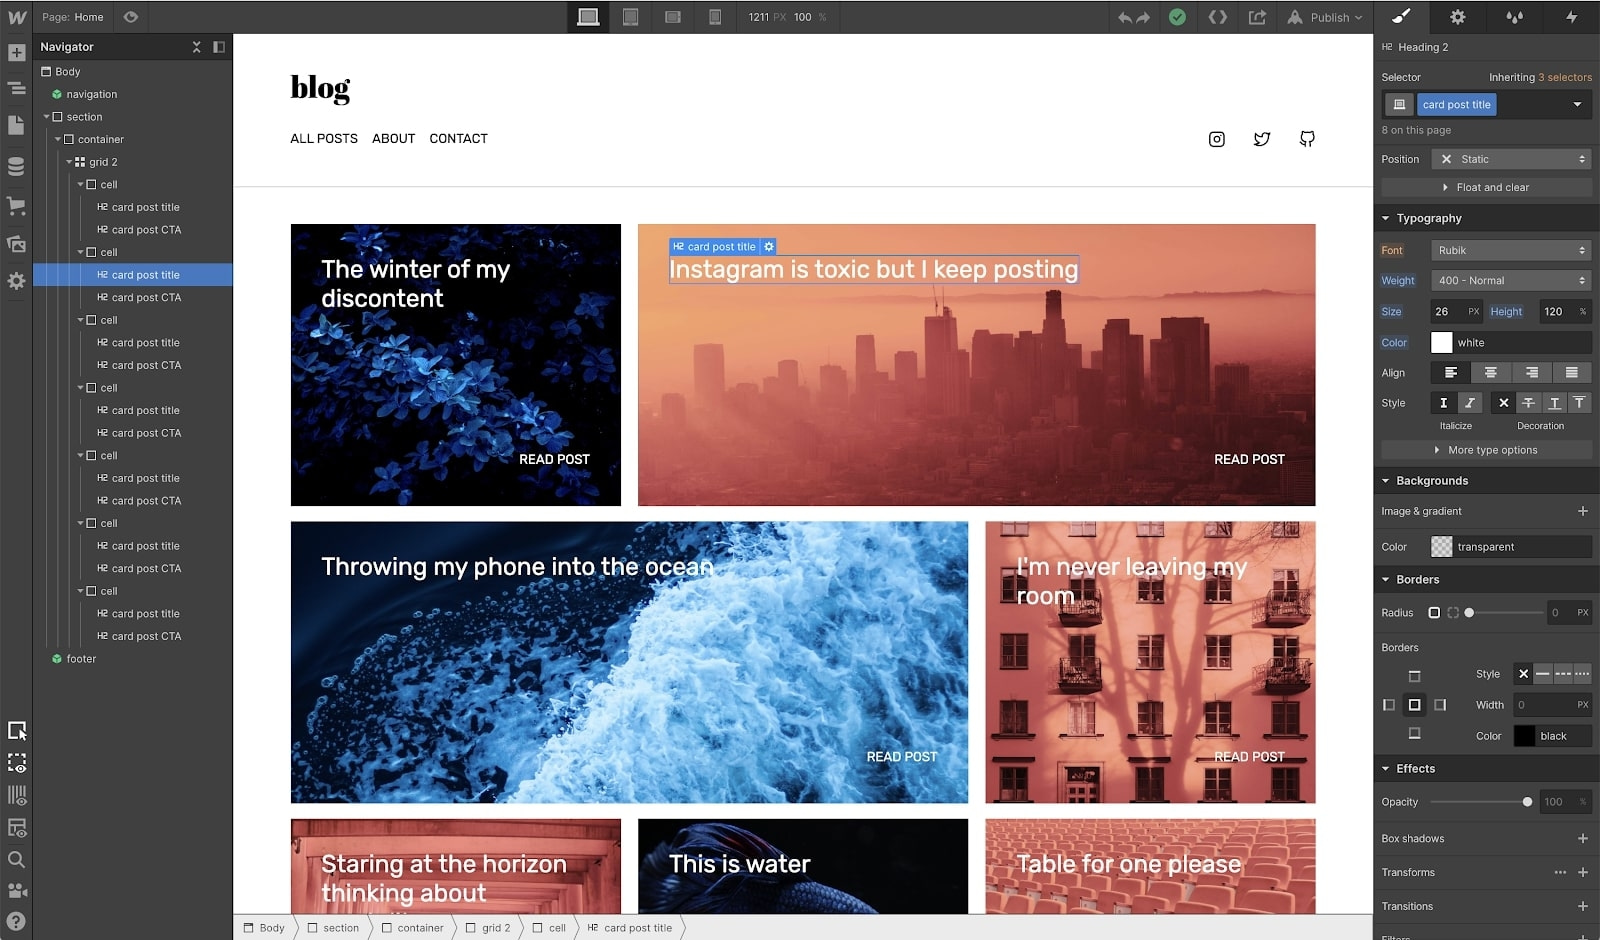
1. Drag a “Div Block” element onto your Webflow page. This will serve as the wrapper for the popup modal.
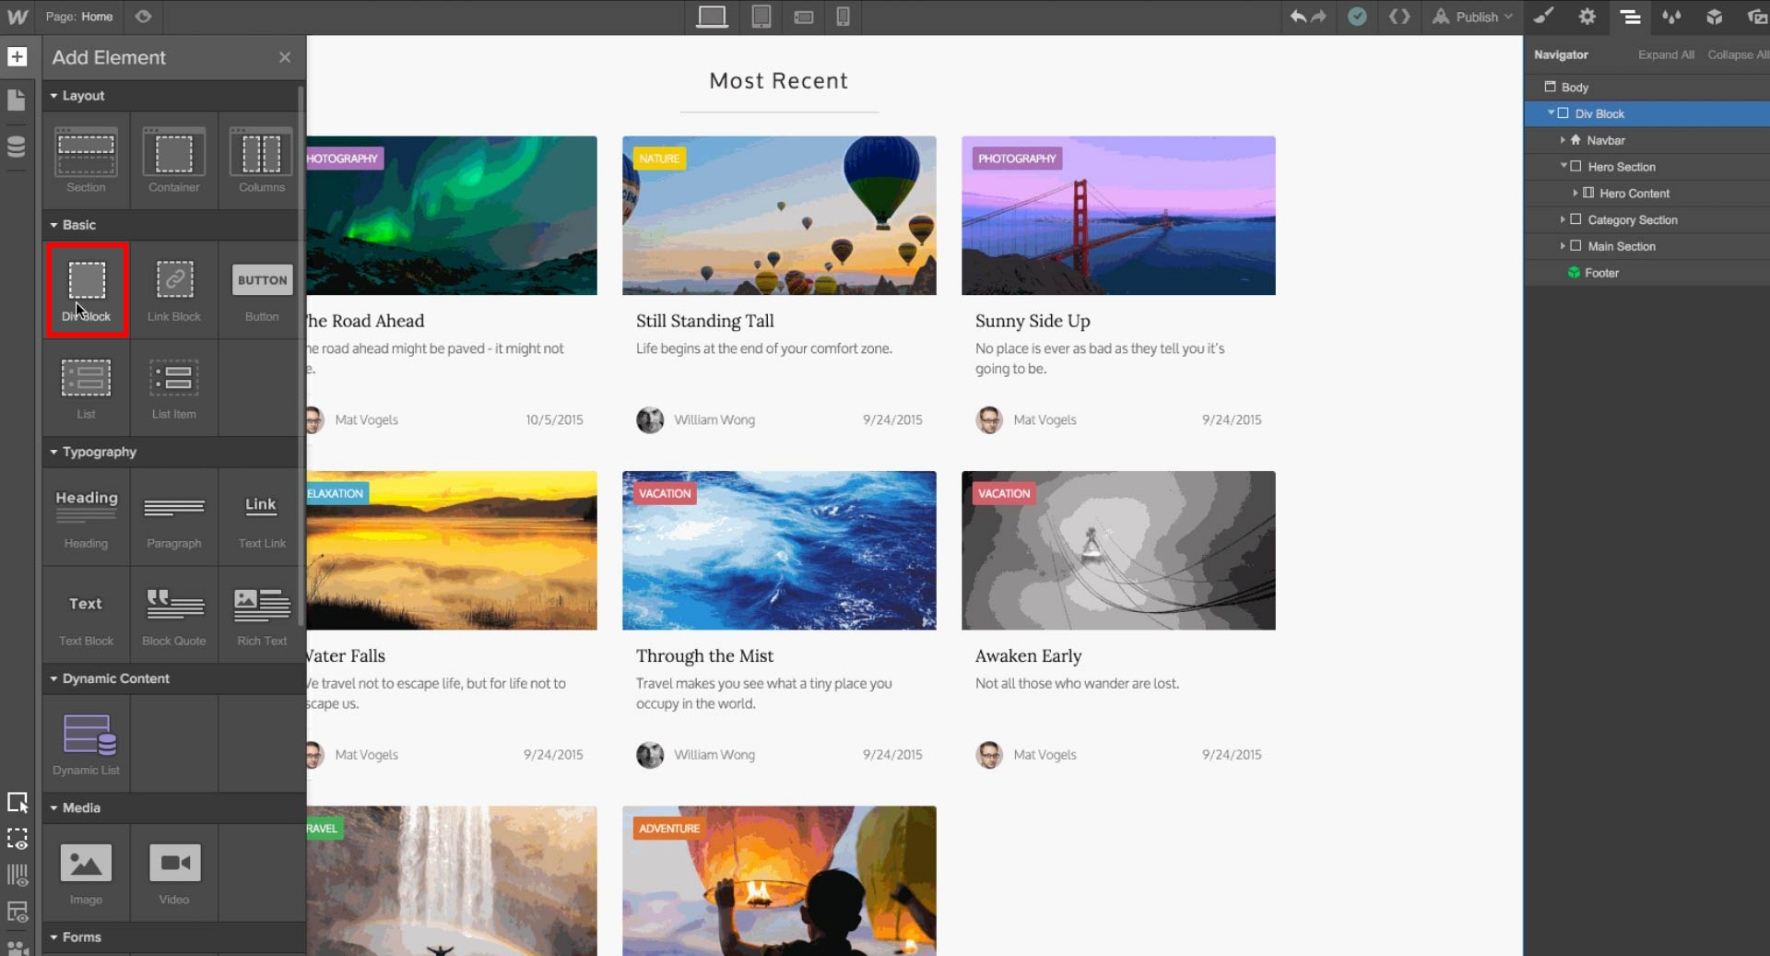
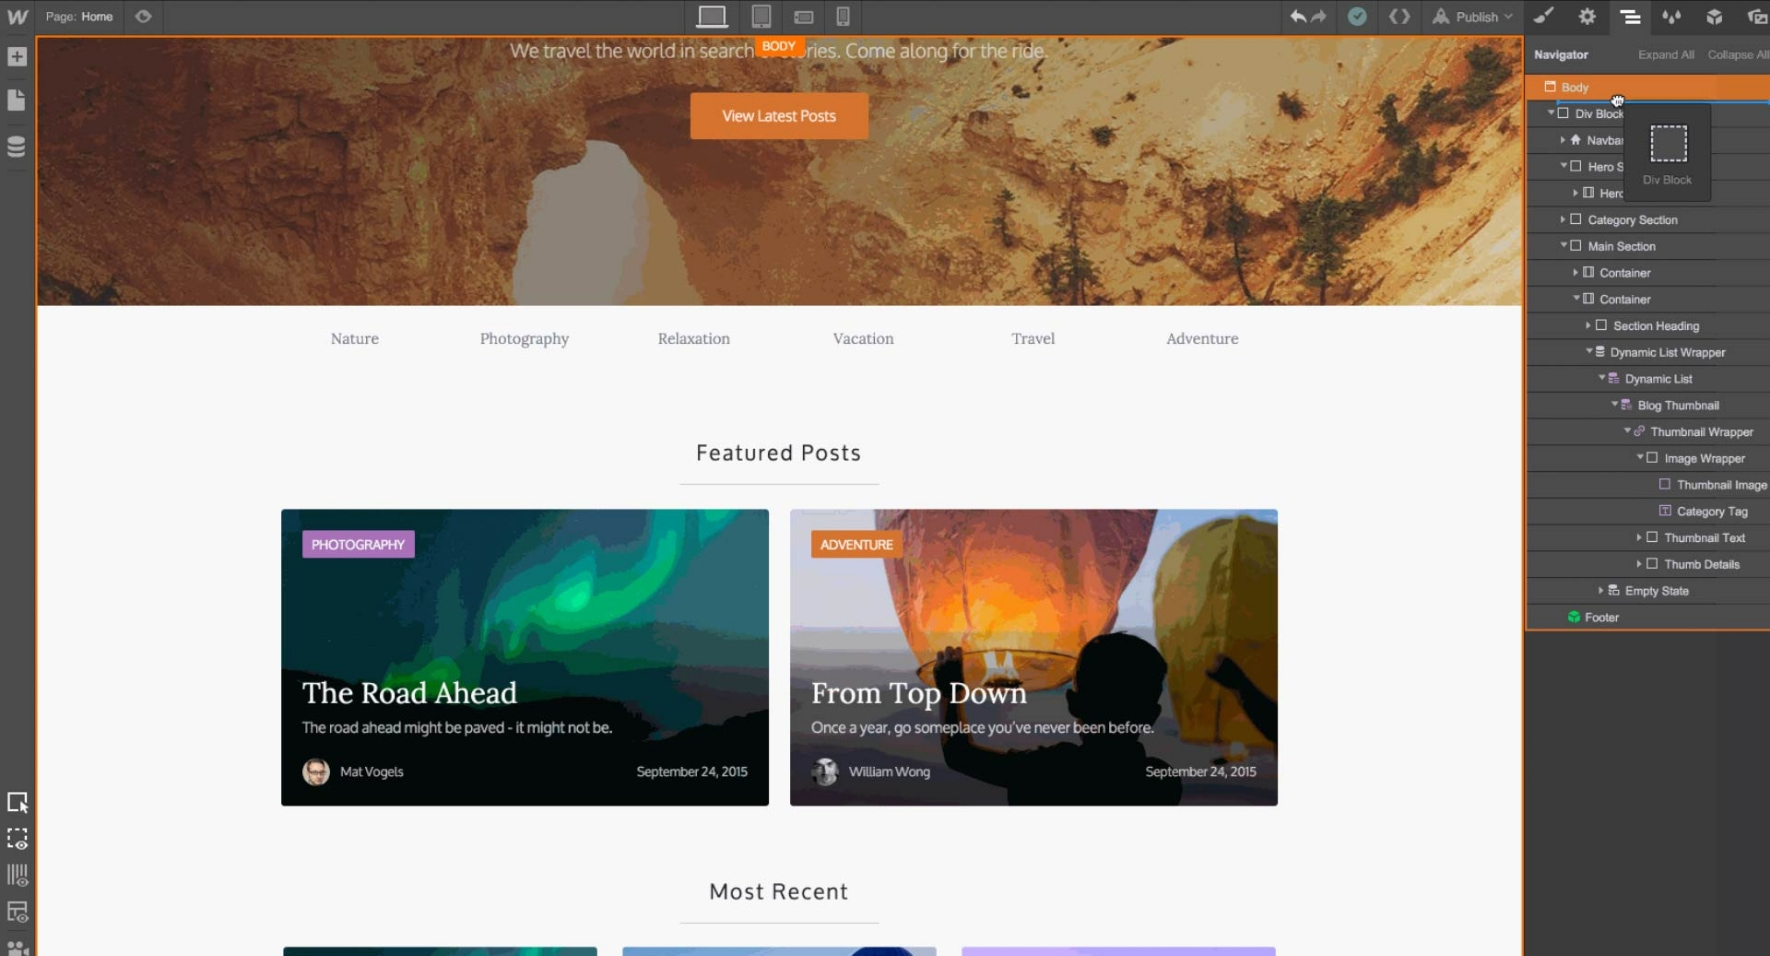
2. Position the “Div Block” at the top of your page’s body using the “Navigator” pane.
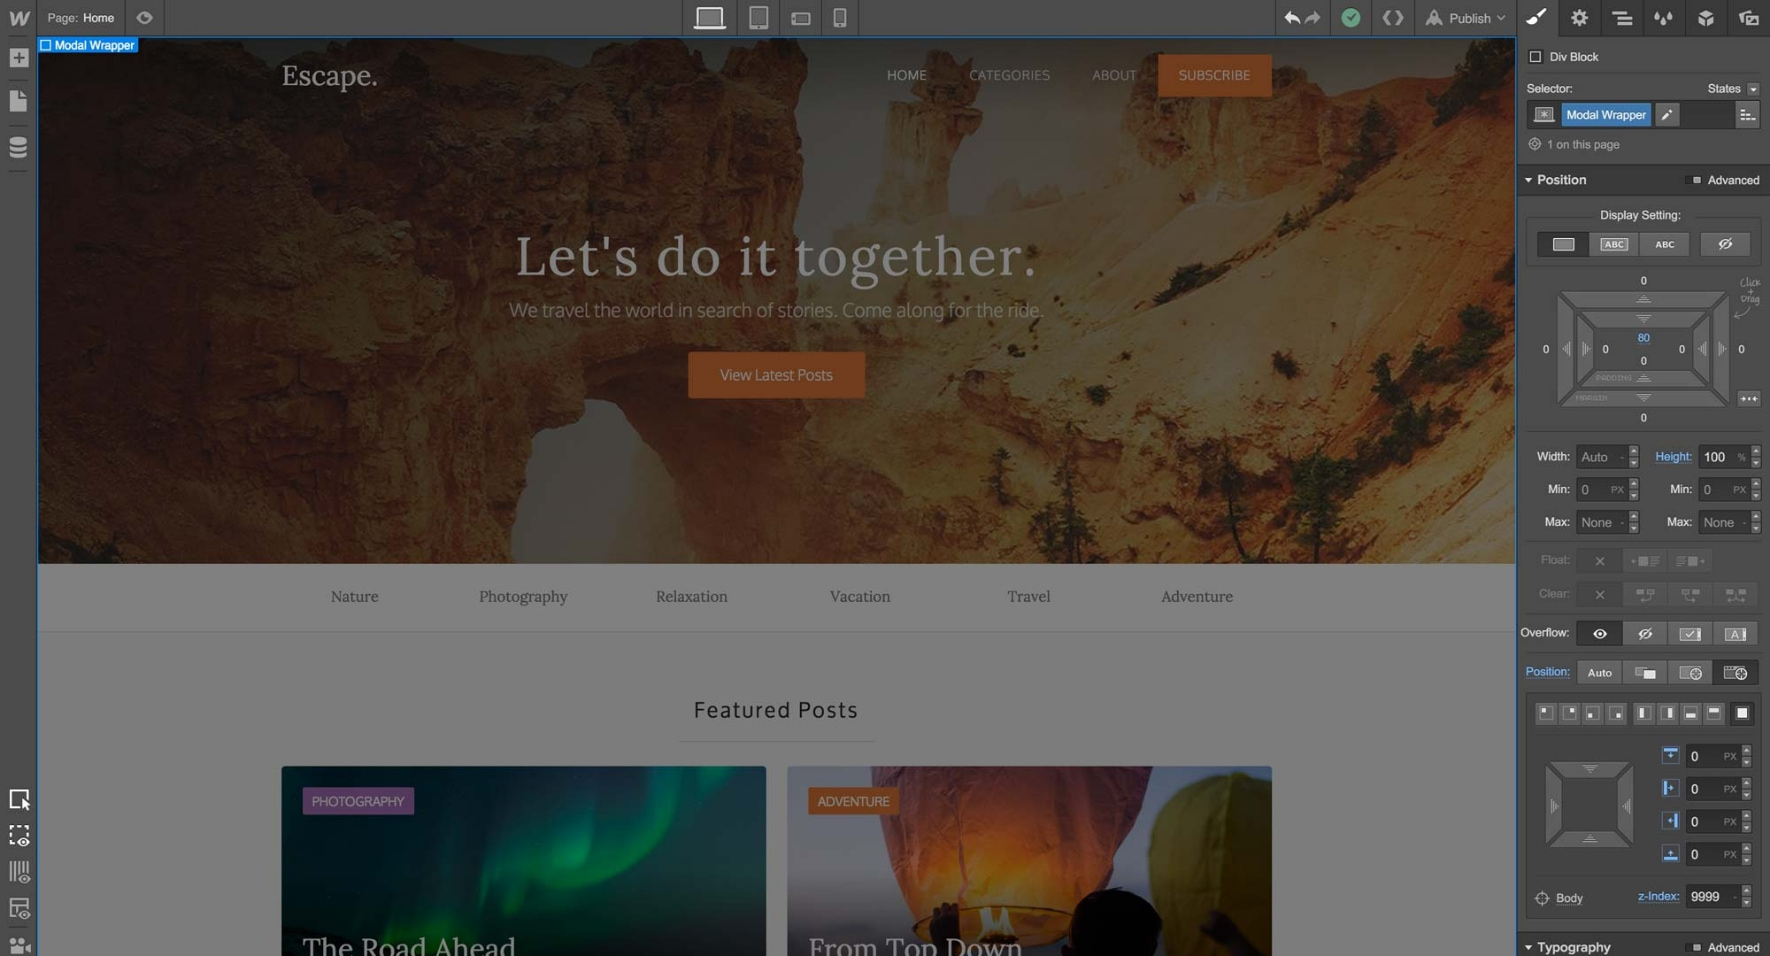
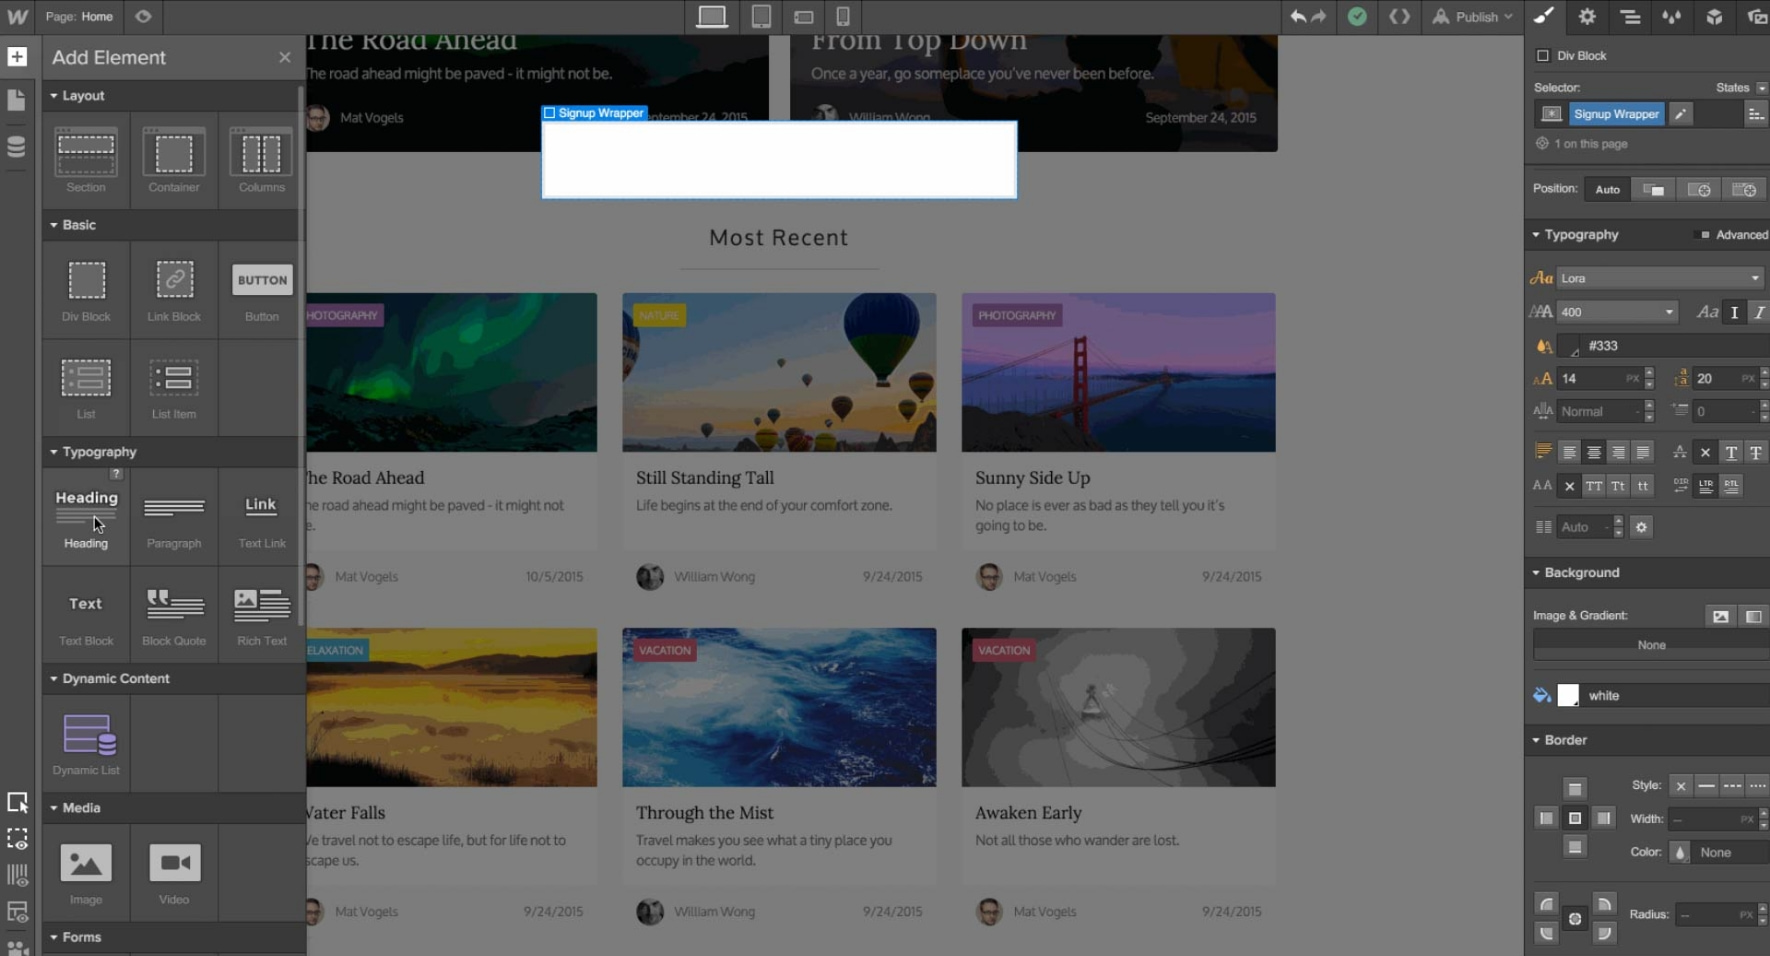
3. Give the Div Block a class name, e.g., “Modal Wrapper,” and Style the wrapper by setting properties such as top padding, height, position (fixed cover full), text-align, and background color.
4. Customize the form elements by assigning appropriate classes to them. For example, you can create a class called “Form Field” for the email input field and style it with properties like height and border.
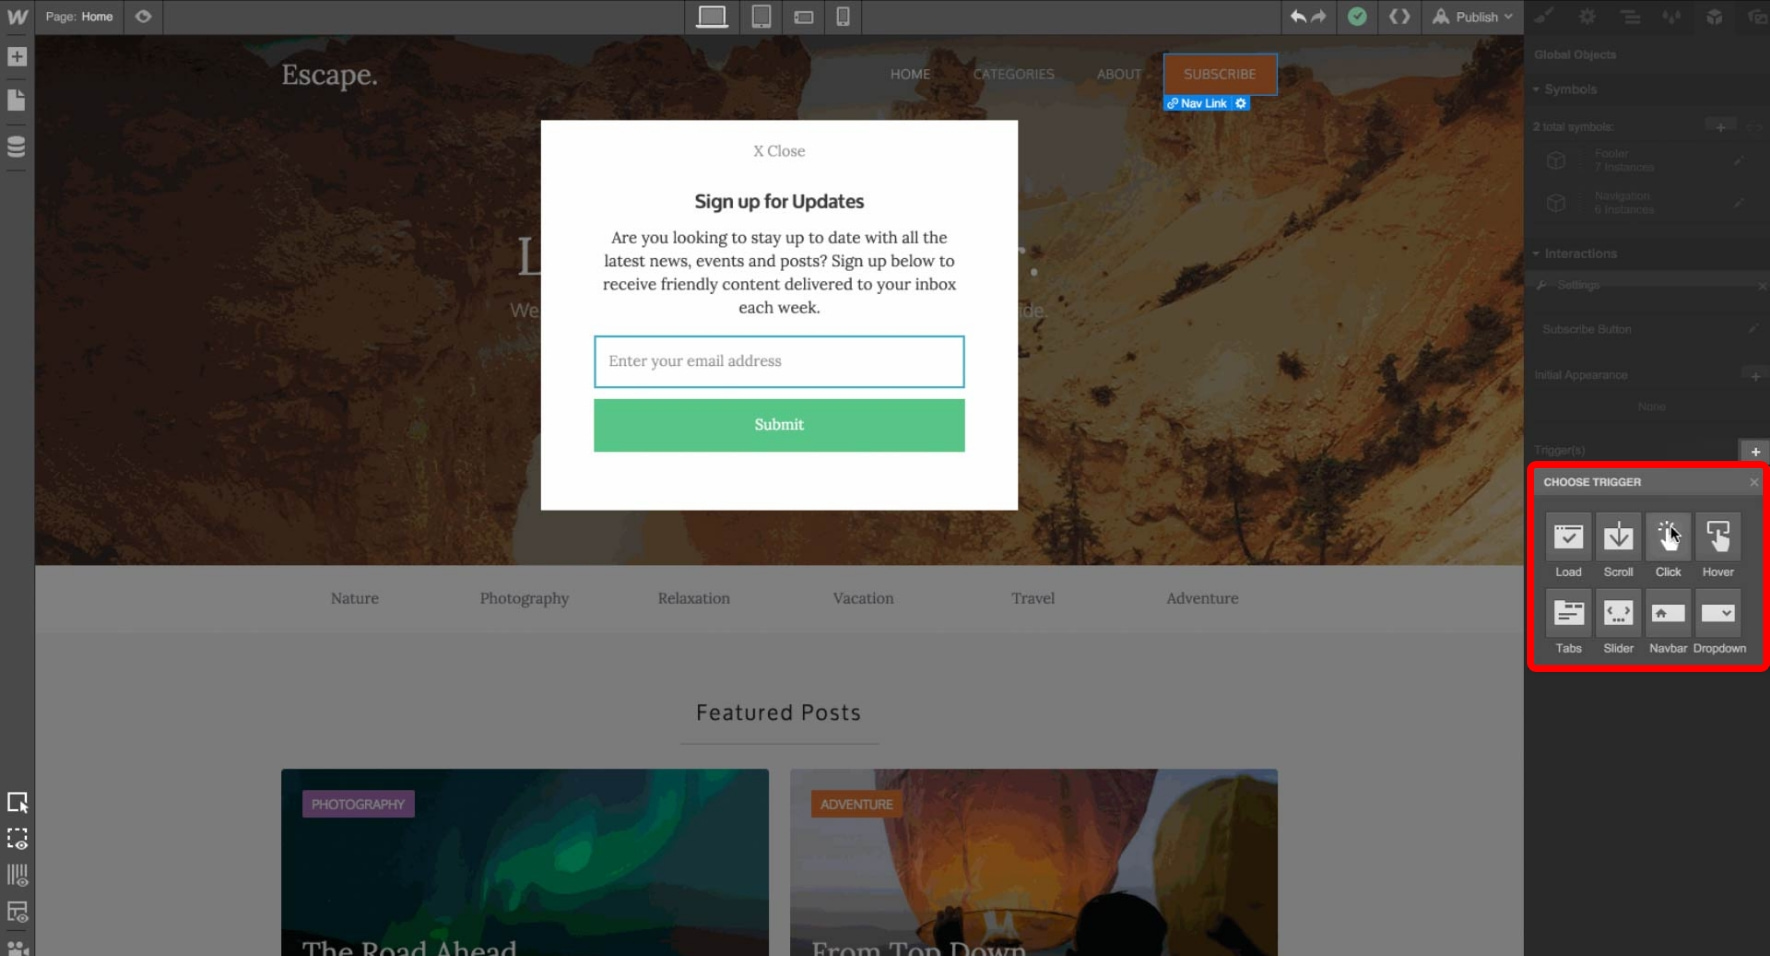
5. Add interactions to the Modal Wrapper, Subscribe Button, and Close Link. To do this, select the respective elements and click on the “Add Interaction” button.
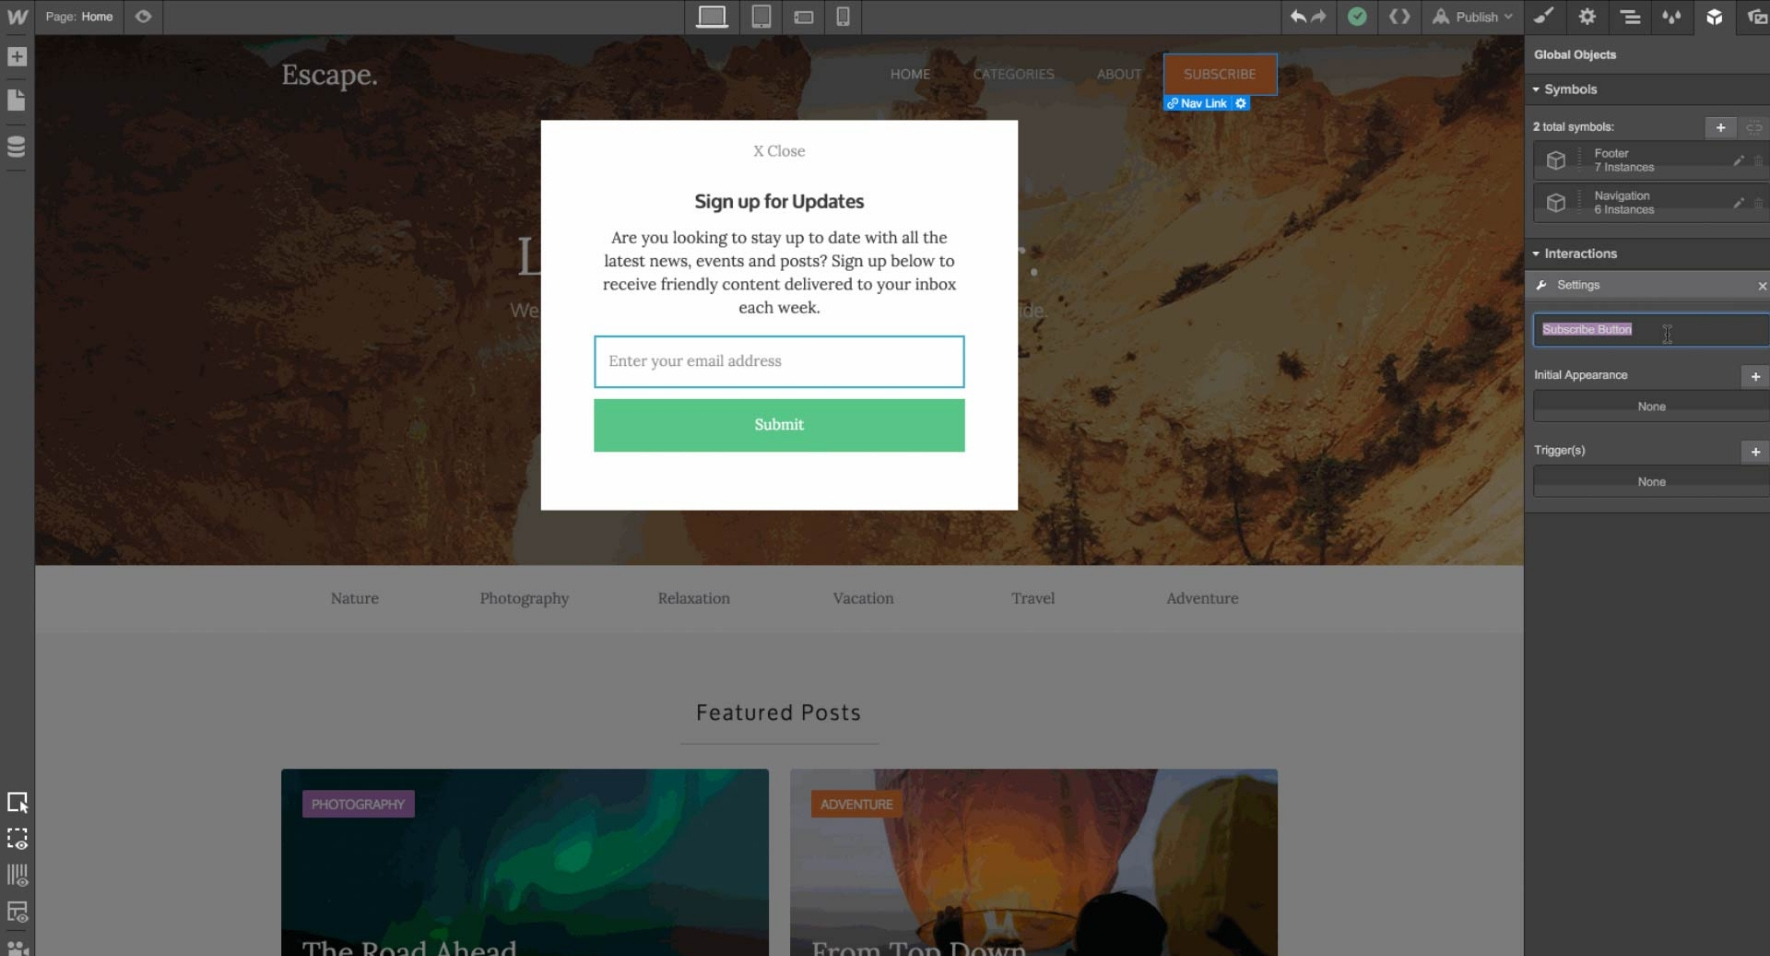
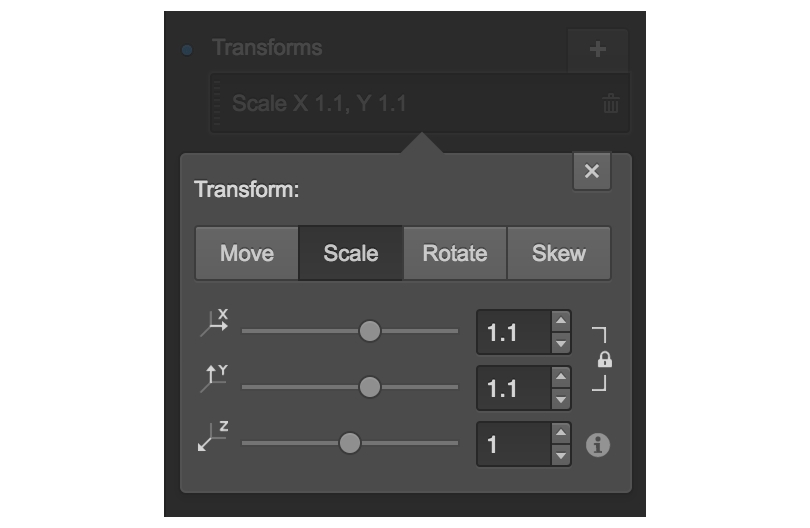
6. For the Modal Wrapper interaction, set the Initial Appearance to scale 1.1, opacity 0, and display none. This ensures that the modal doesn’t appear when the page loads.
7. For the Subscribe Button interaction, set up a Click Trigger to affect the Modal Wrapper element. Set the First Click to display block, scale 1, and opacity 100. Leave the Second Click empty.
8. For the Close Link interaction, set up a Click Trigger to affect the Modal Wrapper element. Set the First Click to scale 1.1 and opacity 0, and the Second Click to display none.
9. Preview your page to test the popup functionality
Method 2: Using Picreel Popup Builder
Picreel is a popup maker that works across multiple platforms, providing advanced features and customization options.
Watch this video tutorial on how you can create a webflow popup using Picreel:
Here are step-by-step instructions on creating a popup using Picreel:
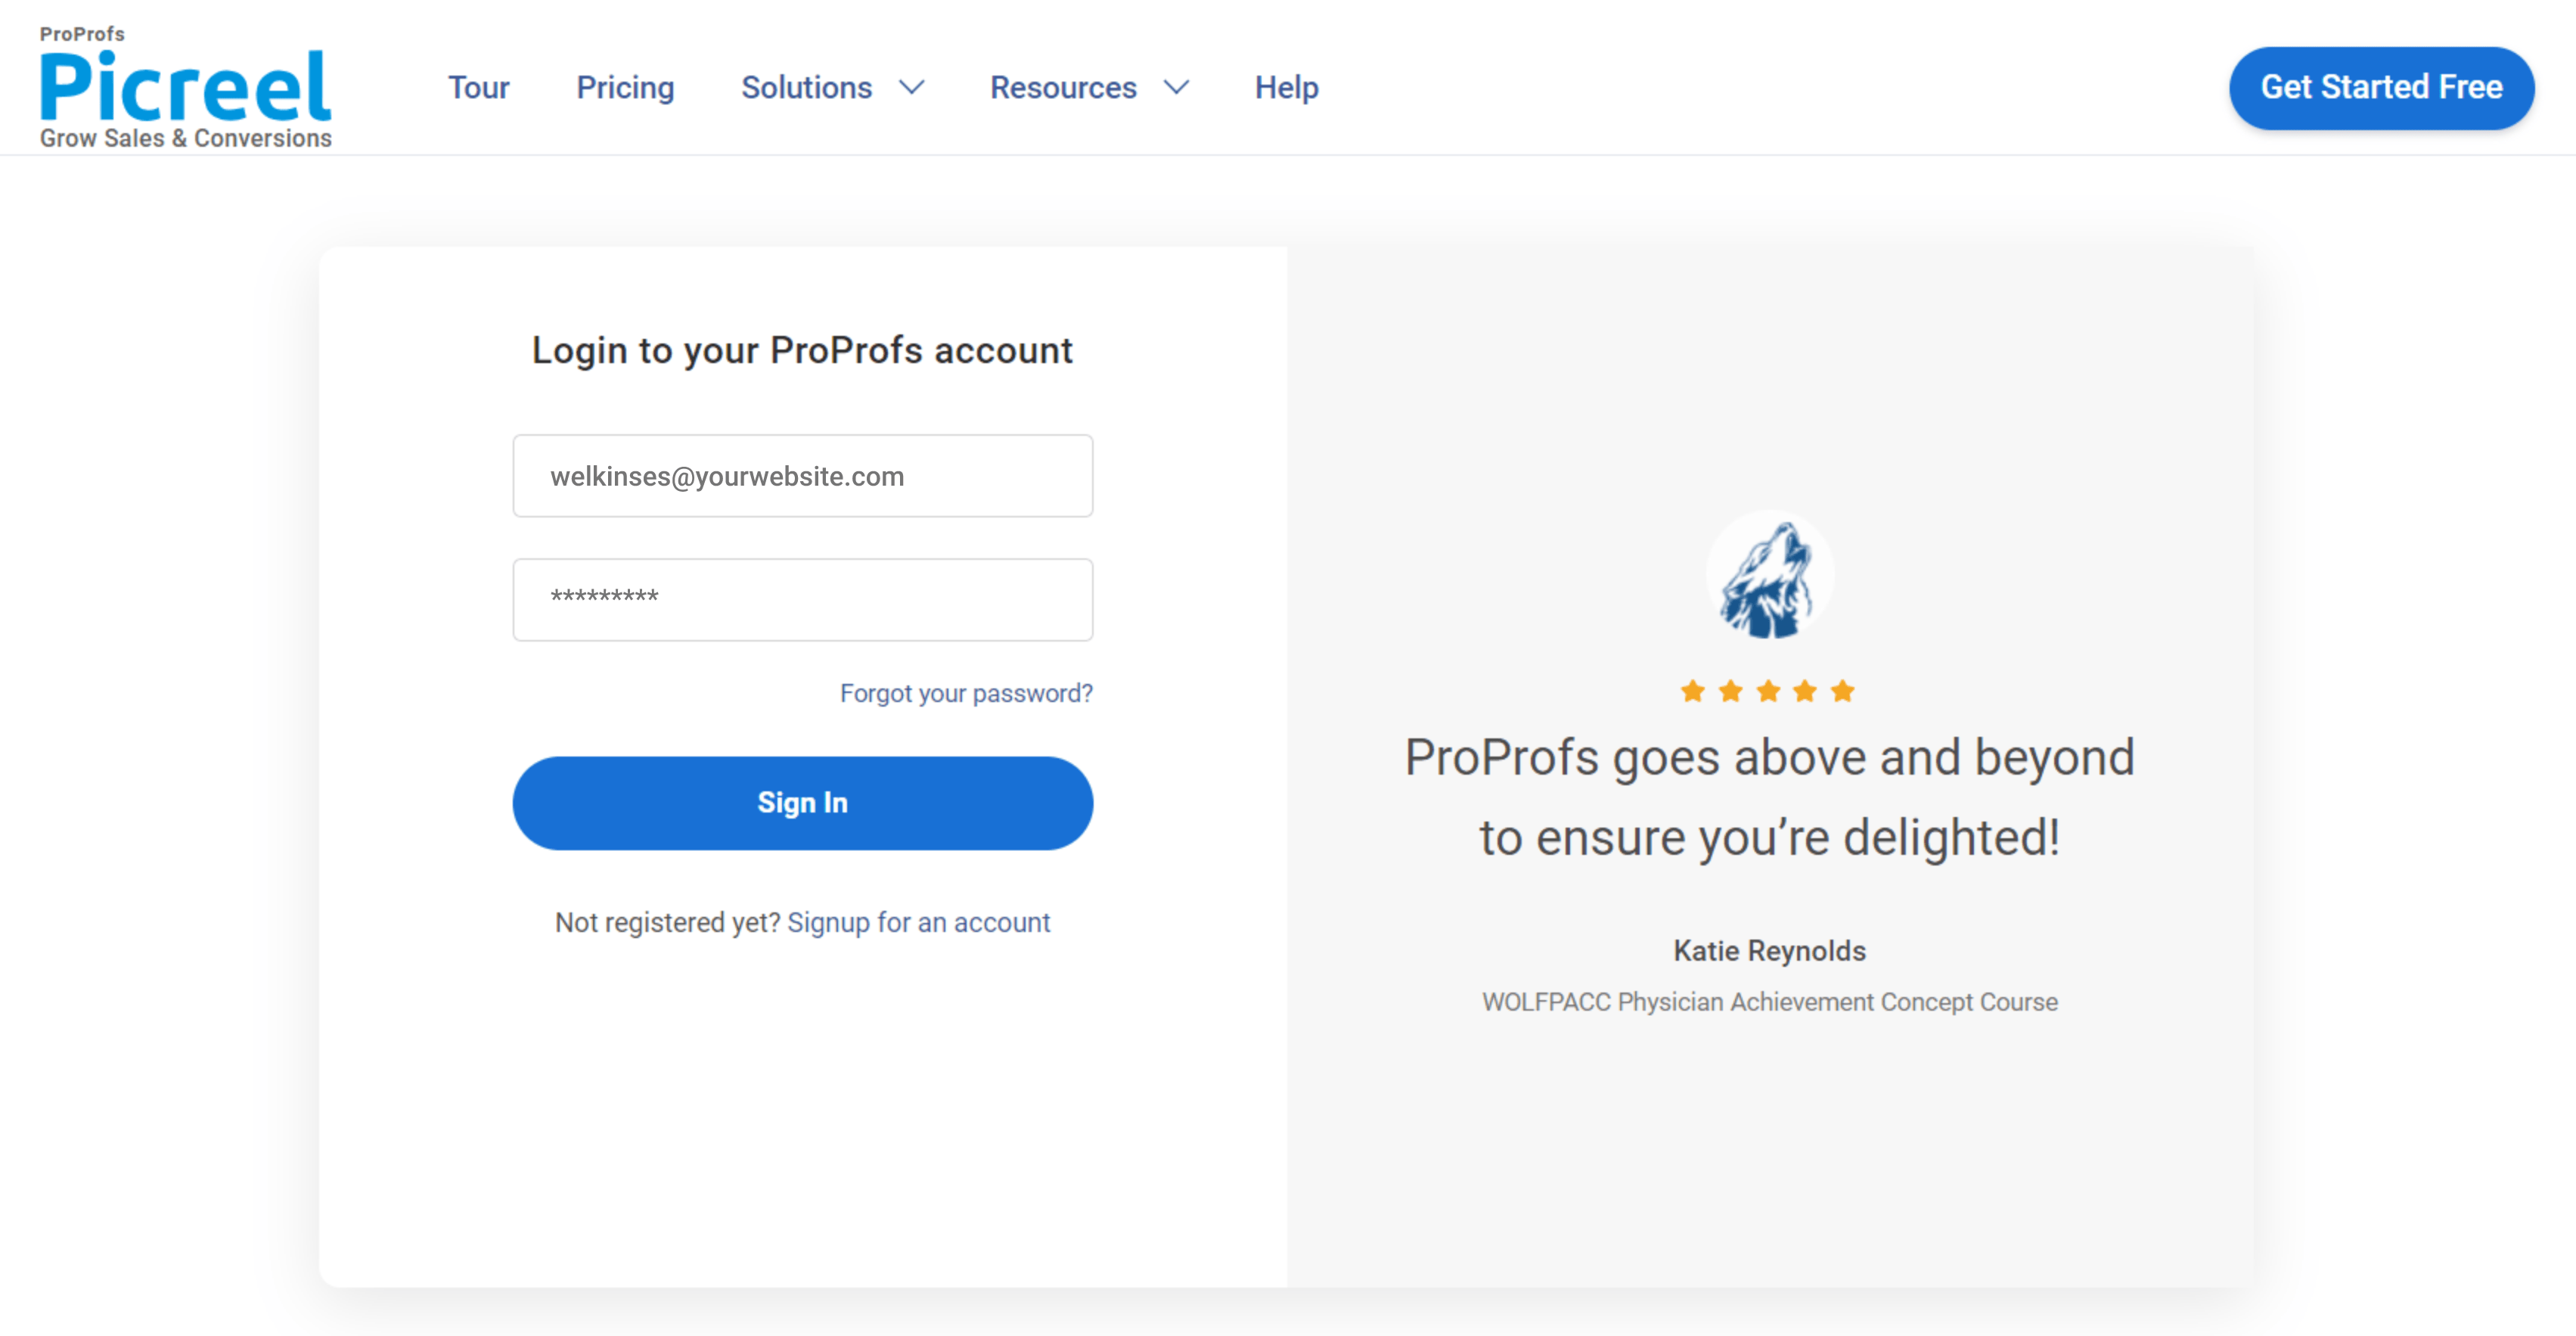
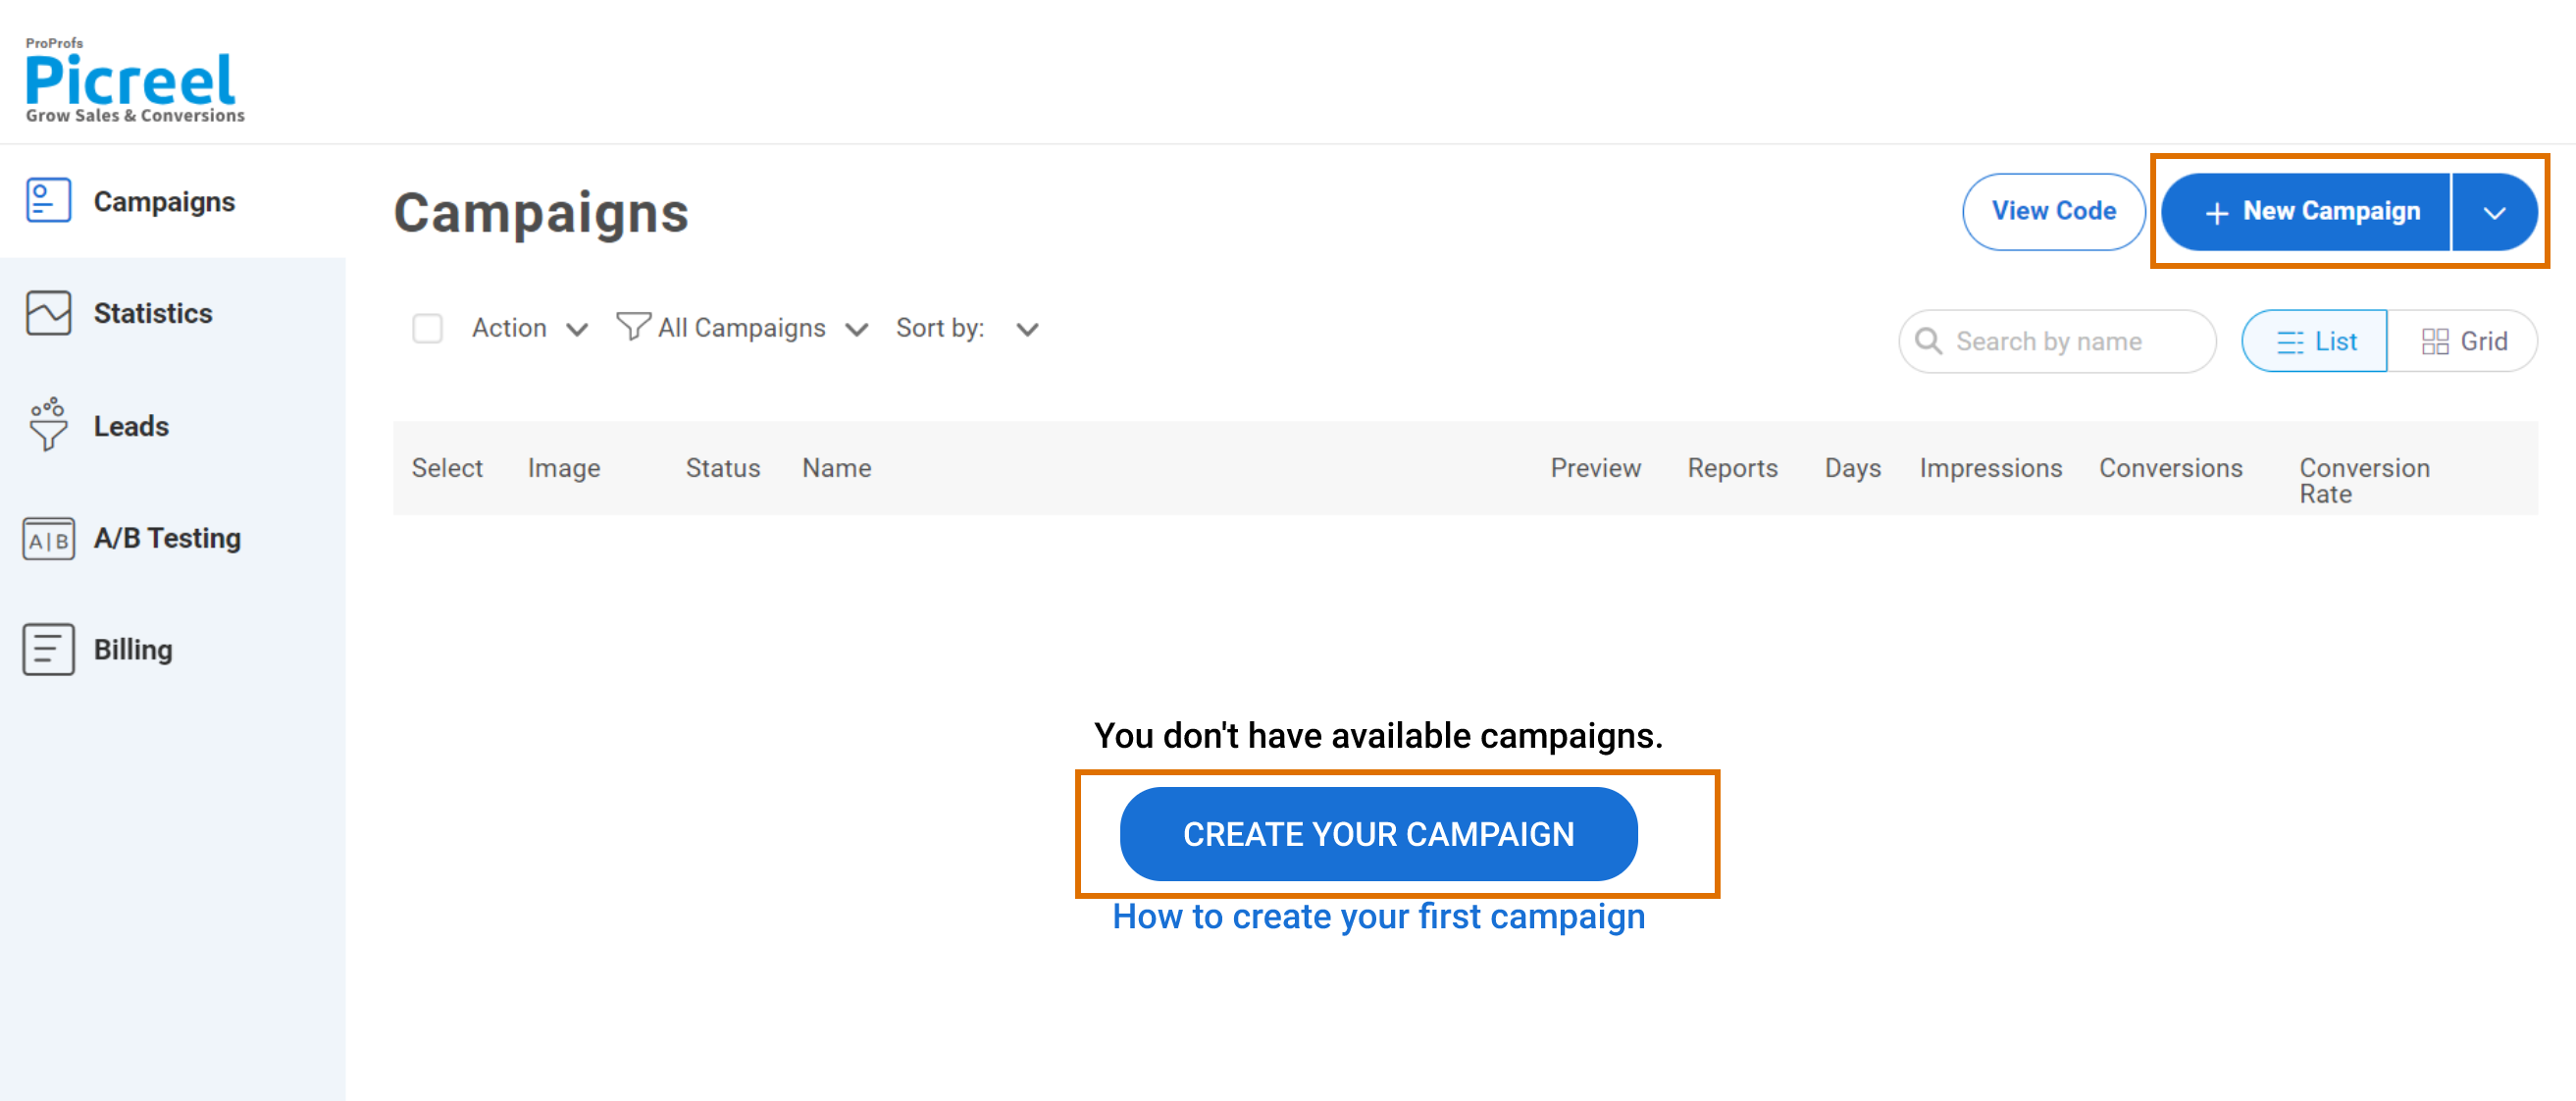
1. Sign up for a Picreel account and log in.
2. Go to the “Campaigns” menu and click “New Campaign” from the top right. Also, you can select the templates option from the drop-down or start from scratch.
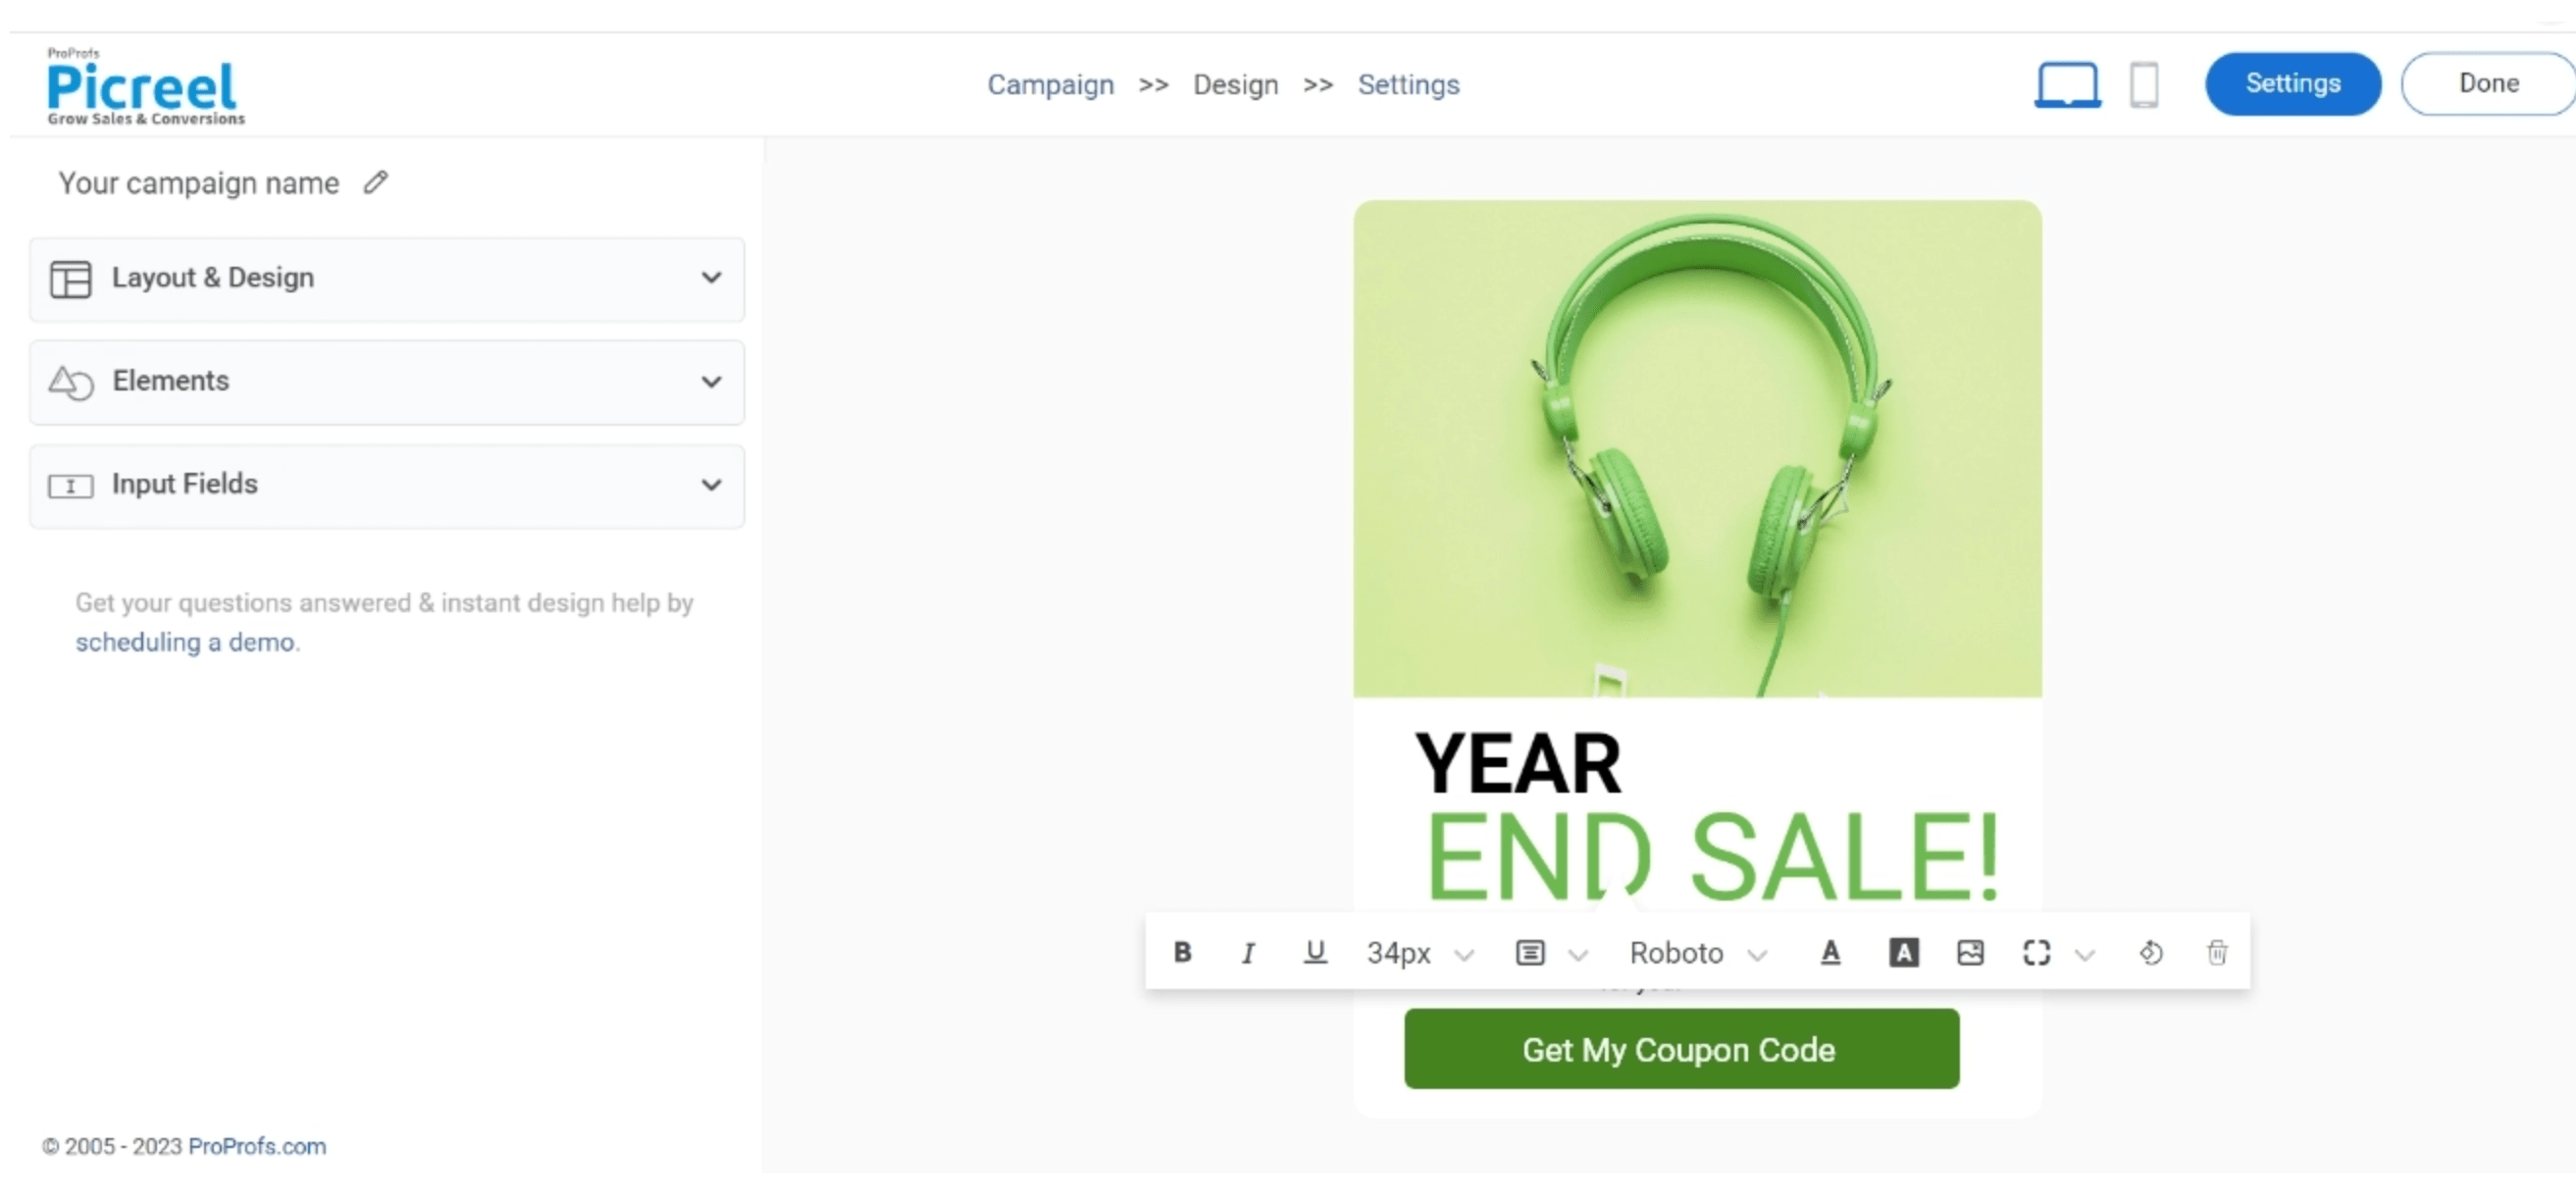
3. From the templates menu, choose the type of popup you want to create.

4. Once you select the design, customize it according to your preferences.
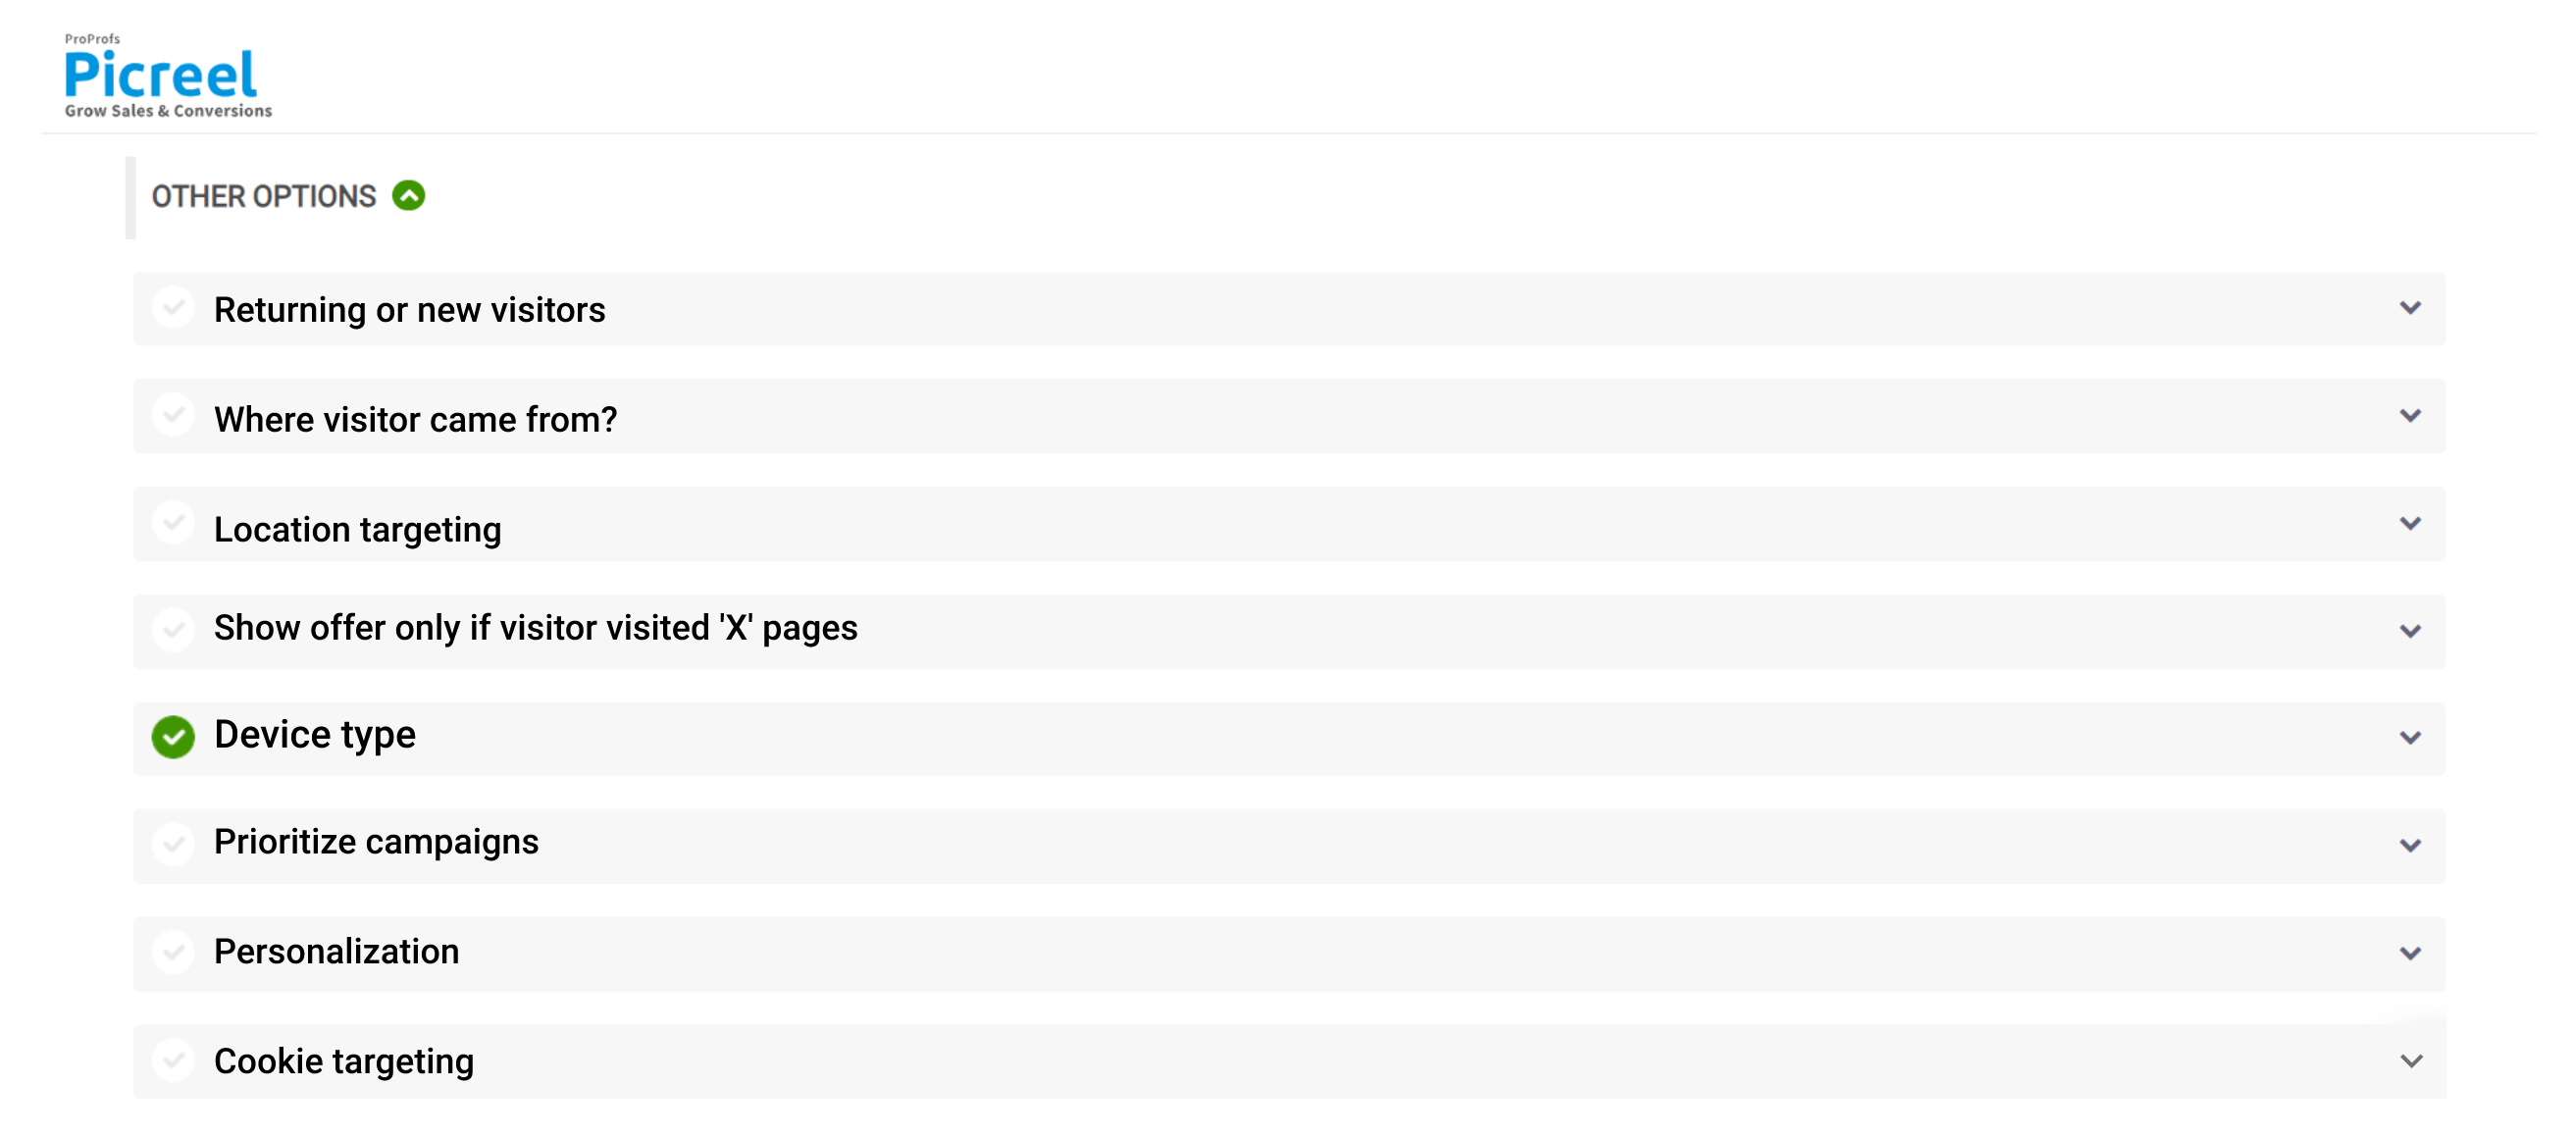
5. Configure your targeting and trigger options to specify when and where you want your popup to appear.
6. Click “Save” to activate your popup.
Embedding Picreel HTML Code Inside Webflow
To embed a Picreel popup on your Webflow website, follow these steps:
1. Navigate to campaigns and click on “View Code.”
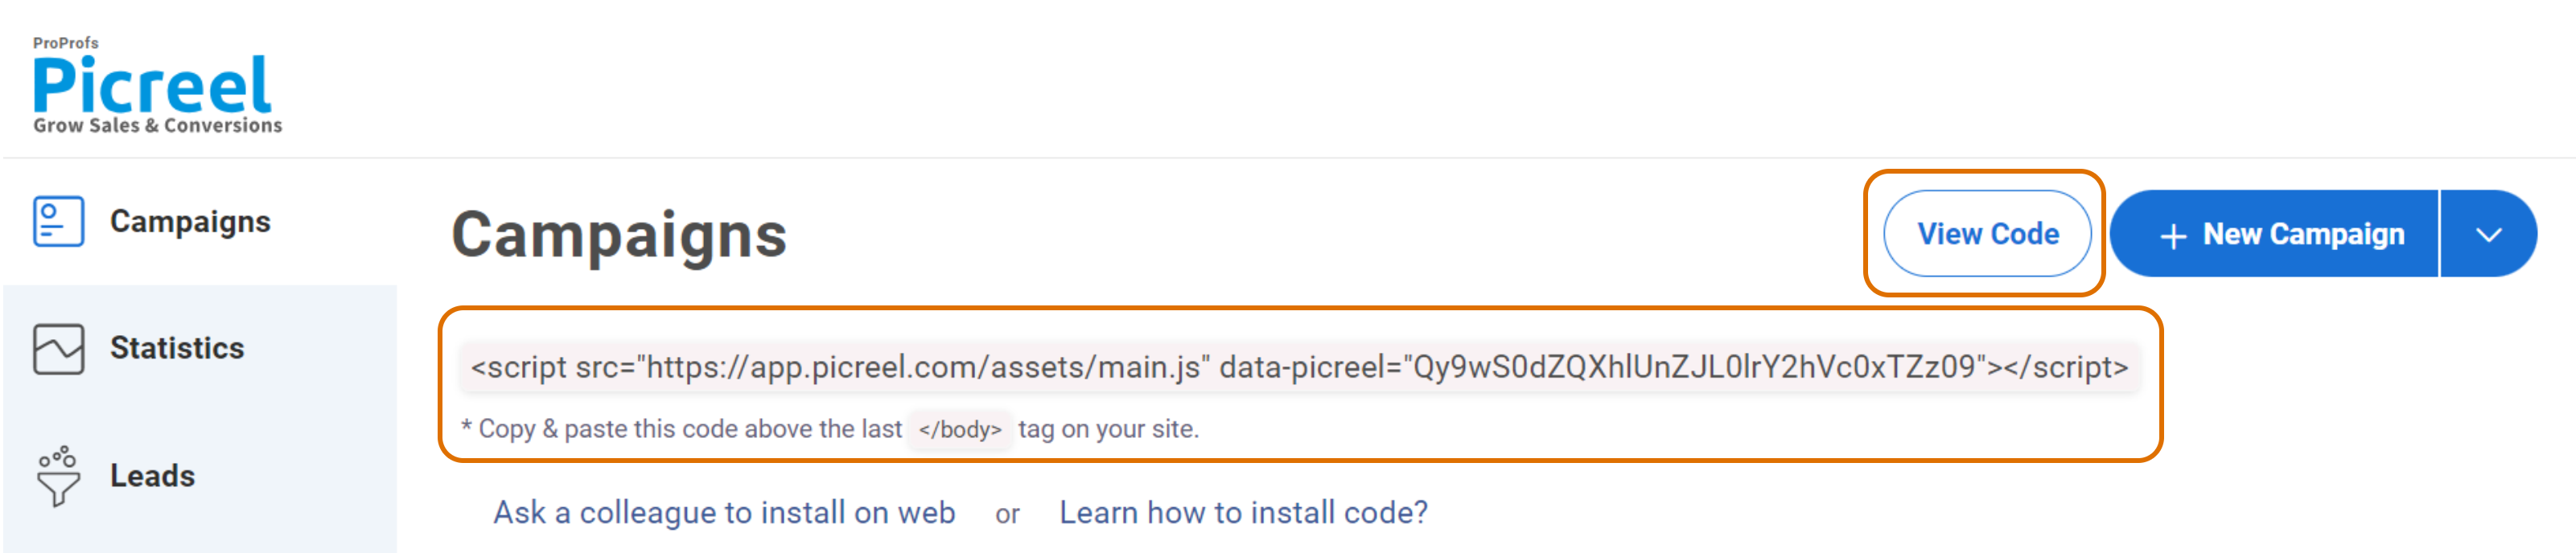
2. Click on the code to copy it.
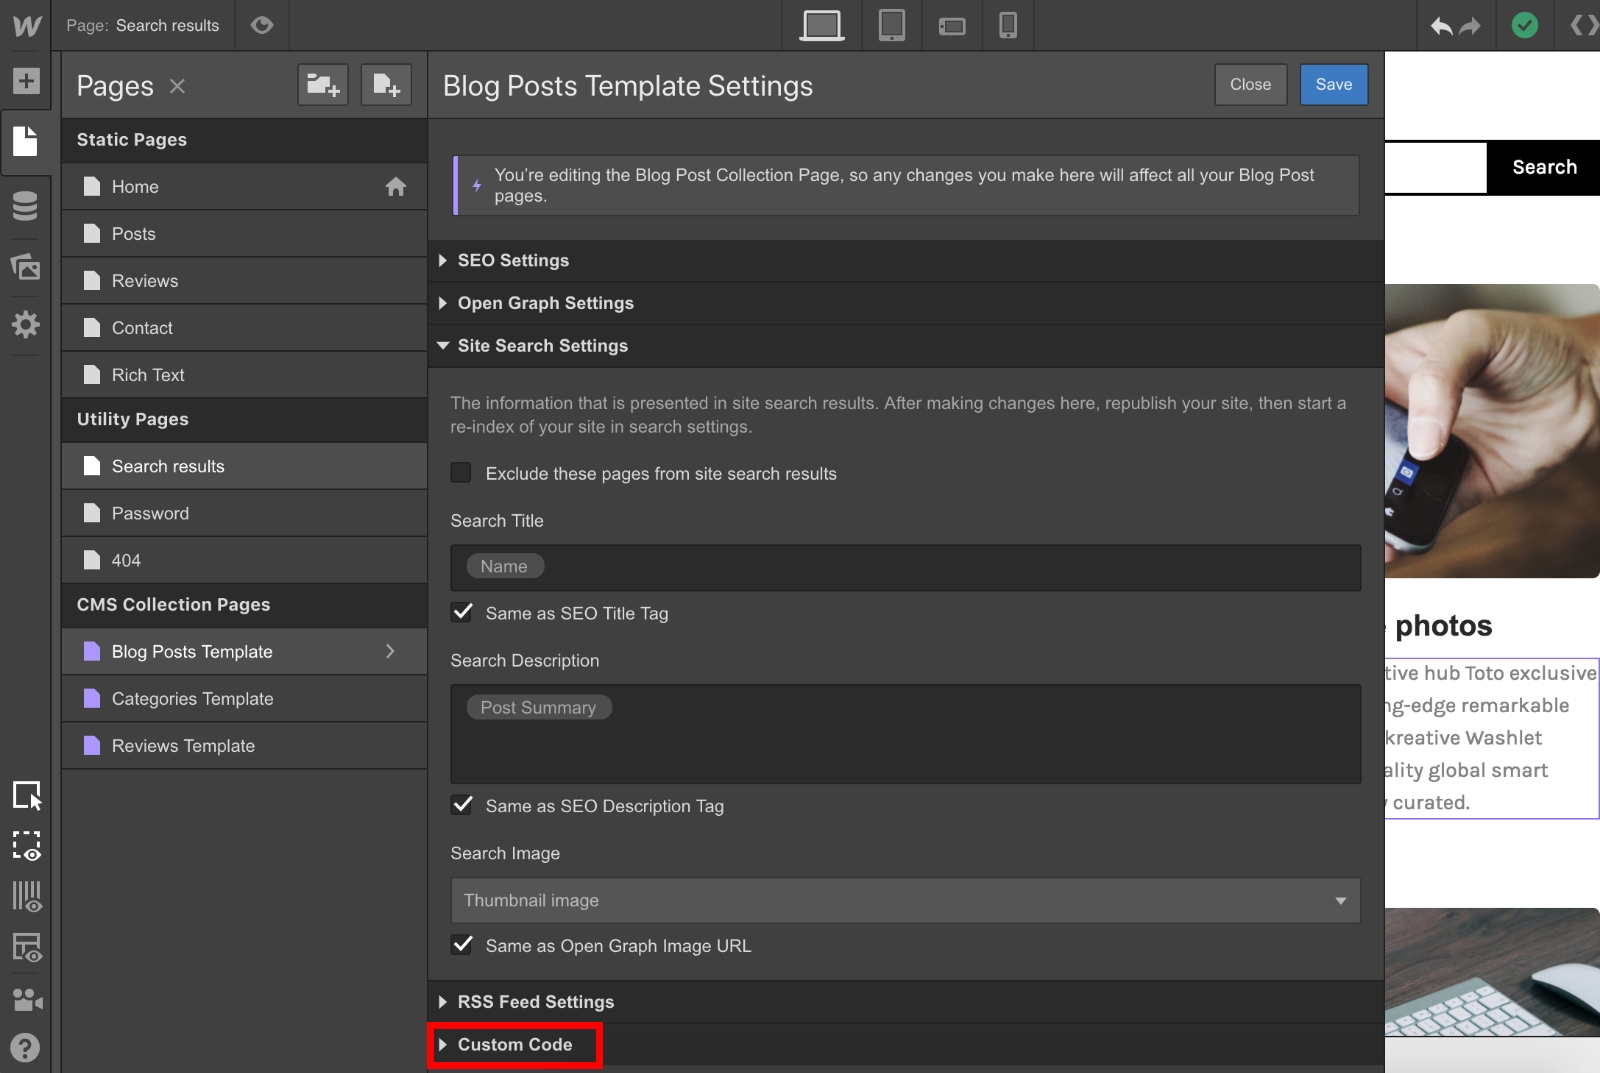
3. Go to your Webflow dashboard and select the site you want to add custom code to.
4. In the left-hand menu, click on ‘Site Settings‘ and navigate to the ‘Custom Code‘ tab.
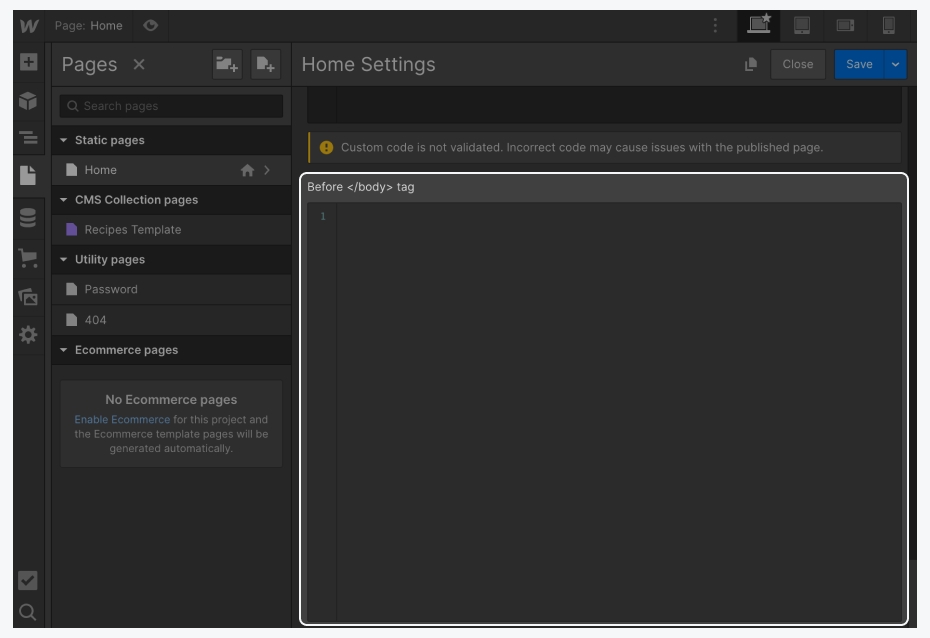
5. Under the ‘Head Code‘ section, you can paste any custom code that you want to include in the head tag of your website.

6. Under the ‘Footer Code‘ section, paste any custom code that you want to include before the closing </body> tag.
7. Click ‘Save Changes’ to apply the code to your website.
Read More - Best Popup Maker Tools: Top 8 Choices to Boost Conversions
Which Is a Better Method: Method 1 or 2?
When considering which method is better, it’s important to view the long-term benefits.
Picreel is the preferred choice because it offers a popup tool that remains intact irrespective of the platform you use. Its advanced features and extensive triggers provide more opportunities to engage visitors and achieve better results.
Also, Picreel comes with a forever-free plan for startups and small businesses and allows you to create unlimited popups with all premium features. I feel the free version does the job, however, you can always look for paid options that start as low as $9.99/month.
Ultimately, the choice is yours based on your goals, budget, and preferences.
FREE. All Features. FOREVER!
Try our Forever FREE account with all premium features!
 We'd love your feedback!
What did you like & how can we make it even better?
 Thanks for your feedback!
 Ask Your Question
Have a question? Get expert help to make your decision easier.