
Finding it challenging to capture your website visitors’ attention and keep them engaged? The good news is that I have found a solution – HTML popups. I’ve been using them for years, and they have worked for me. But lately, I wanted them to be more out-of-the-box and interactive.
So, I combined HTML, CSS, and JavaScript, and the results were amazing. I was amazed by how engaging and interactive my popups started looking. The best part? They also helped me grow my email list, achieve an average conversion of around 4%, and boost click-through rates.
But hey, not everyone is a coder, right? If you are one of them, consider switching to a popup builder like Picreel. It is a much simpler and faster option. You can create popups without all the hassles and embed them using a ready-made HTML code.
To help you make an informed choice, I’ve thoroughly explored both methods of creating popups: HTML/CSS/Javascript and the Picreel popup builder.
Method 1: Using HTML/CSS/JavaScript
Here are the steps to build an HTML popup page using HTML, CSS, and JavaScript:
- Building the HTML structure
- Customizing the popup with CSS
- Making the popup interactive with JavaScript
A preview of the HTML popup window after running all the codes:

Image Source: Picreel
1. Building the HTML Structure
To begin with, create the structure of the HTML popup box. Here, you can include the HTML popup message, title, overlay, and close button. Now, as we’ll be using CSS to further style the popup, you must link your HTML and CSS files.
HTML Code (Popup Structure)
<!DOCTYPE html>
<html lang=”en”>
<head>
<meta charset=”UTF-8″>
<meta name=”viewport” content=”width=device-width, initial-scale=1.0″>
<title>Popup Example</title>
<link rel=”stylesheet” href=”styles.css”>
</head>
<body>
<button id=”openPopup”>Open Popup</button>
<div id=”popup” class=”hidden”>
<div class=”popup-content”>
<span id=”closePopup” class=”close”>×</span>
<h2>Welcome to Our Website!</h2>
<p>Subscribe to our newsletter for updates.</p>
<button>Subscribe</button>
</div>
</div>
<script src=”script.js”></script>
</body>
</html>
2. Customizing the Popup With CSS
Next, create a CSS file to define the visuals of your HTML popup alert. Once you have a separate CSS file, start customizing the popup. You can add codes for colors, animations, and dimensions as per your website’s design.
CSS Code (Popup Customization)
/* styles.css */
body {
font-family: Arial, sans-serif;
margin: 0;
padding: 0;
display: flex;
justify-content: center;
align-items: center;
height: 100vh;
background-color: #f4f4f9;
}
button {
padding: 10px 20px;
background-color: #007bff;
color: white;
border: none;
border-radius: 5px;
cursor: pointer;
}
button:hover {
background-color: #0056b3;
}
#popup {
position: fixed;
top: 0;
left: 0;
width: 100%;
height: 100%;
background-color: rgba(0, 0, 0, 0.5);
display: flex;
justify-content: center;
align-items: center;
}
.popup-content {
background-color: white;
padding: 20px;
border-radius: 10px;
width: 300px;
text-align: center;
box-shadow: 0 4px 8px rgba(0, 0, 0, 0.2);
}
.hidden {
display: none;
}
.close {
position: absolute;
top: 10px;
right: 15px;
font-size: 18px;
cursor: pointer;
}
3. Making the Popup Interactive With JavaScript
Now, it’s time to create a JavaScript file to define how your popup will interact with visitors on your website. You can use the event listeners function to control the opening and closing of the HTML popup form.
JavaScript Code (Popup Interactivity)
// script.js
document.getElementById(“openPopup”).addEventListener(“click”, function() {
document.getElementById(“popup”).classList.remove(“hidden”);
});
document.getElementById(“closePopup”).addEventListener(“click”, function() {
document.getElementById(“popup”).classList.add(“hidden”);
});
window.addEventListener(“click”, function(event) {
const popup = document.getElementById(“popup”);
if (event.target === popup) {
popup.classList.add(“hidden”);
}
});
Note: These codes are just for reference.
Method 2: Using Picreel Popup Builder
If you want to bypass coding, Picreel can help you create a popup in minutes without writing a single line of code. It works across website platforms, offers flexible customization, and integrates with CRM tools for automated email marketing.
Let’s quickly see how to create popup with Picreel in minutes:
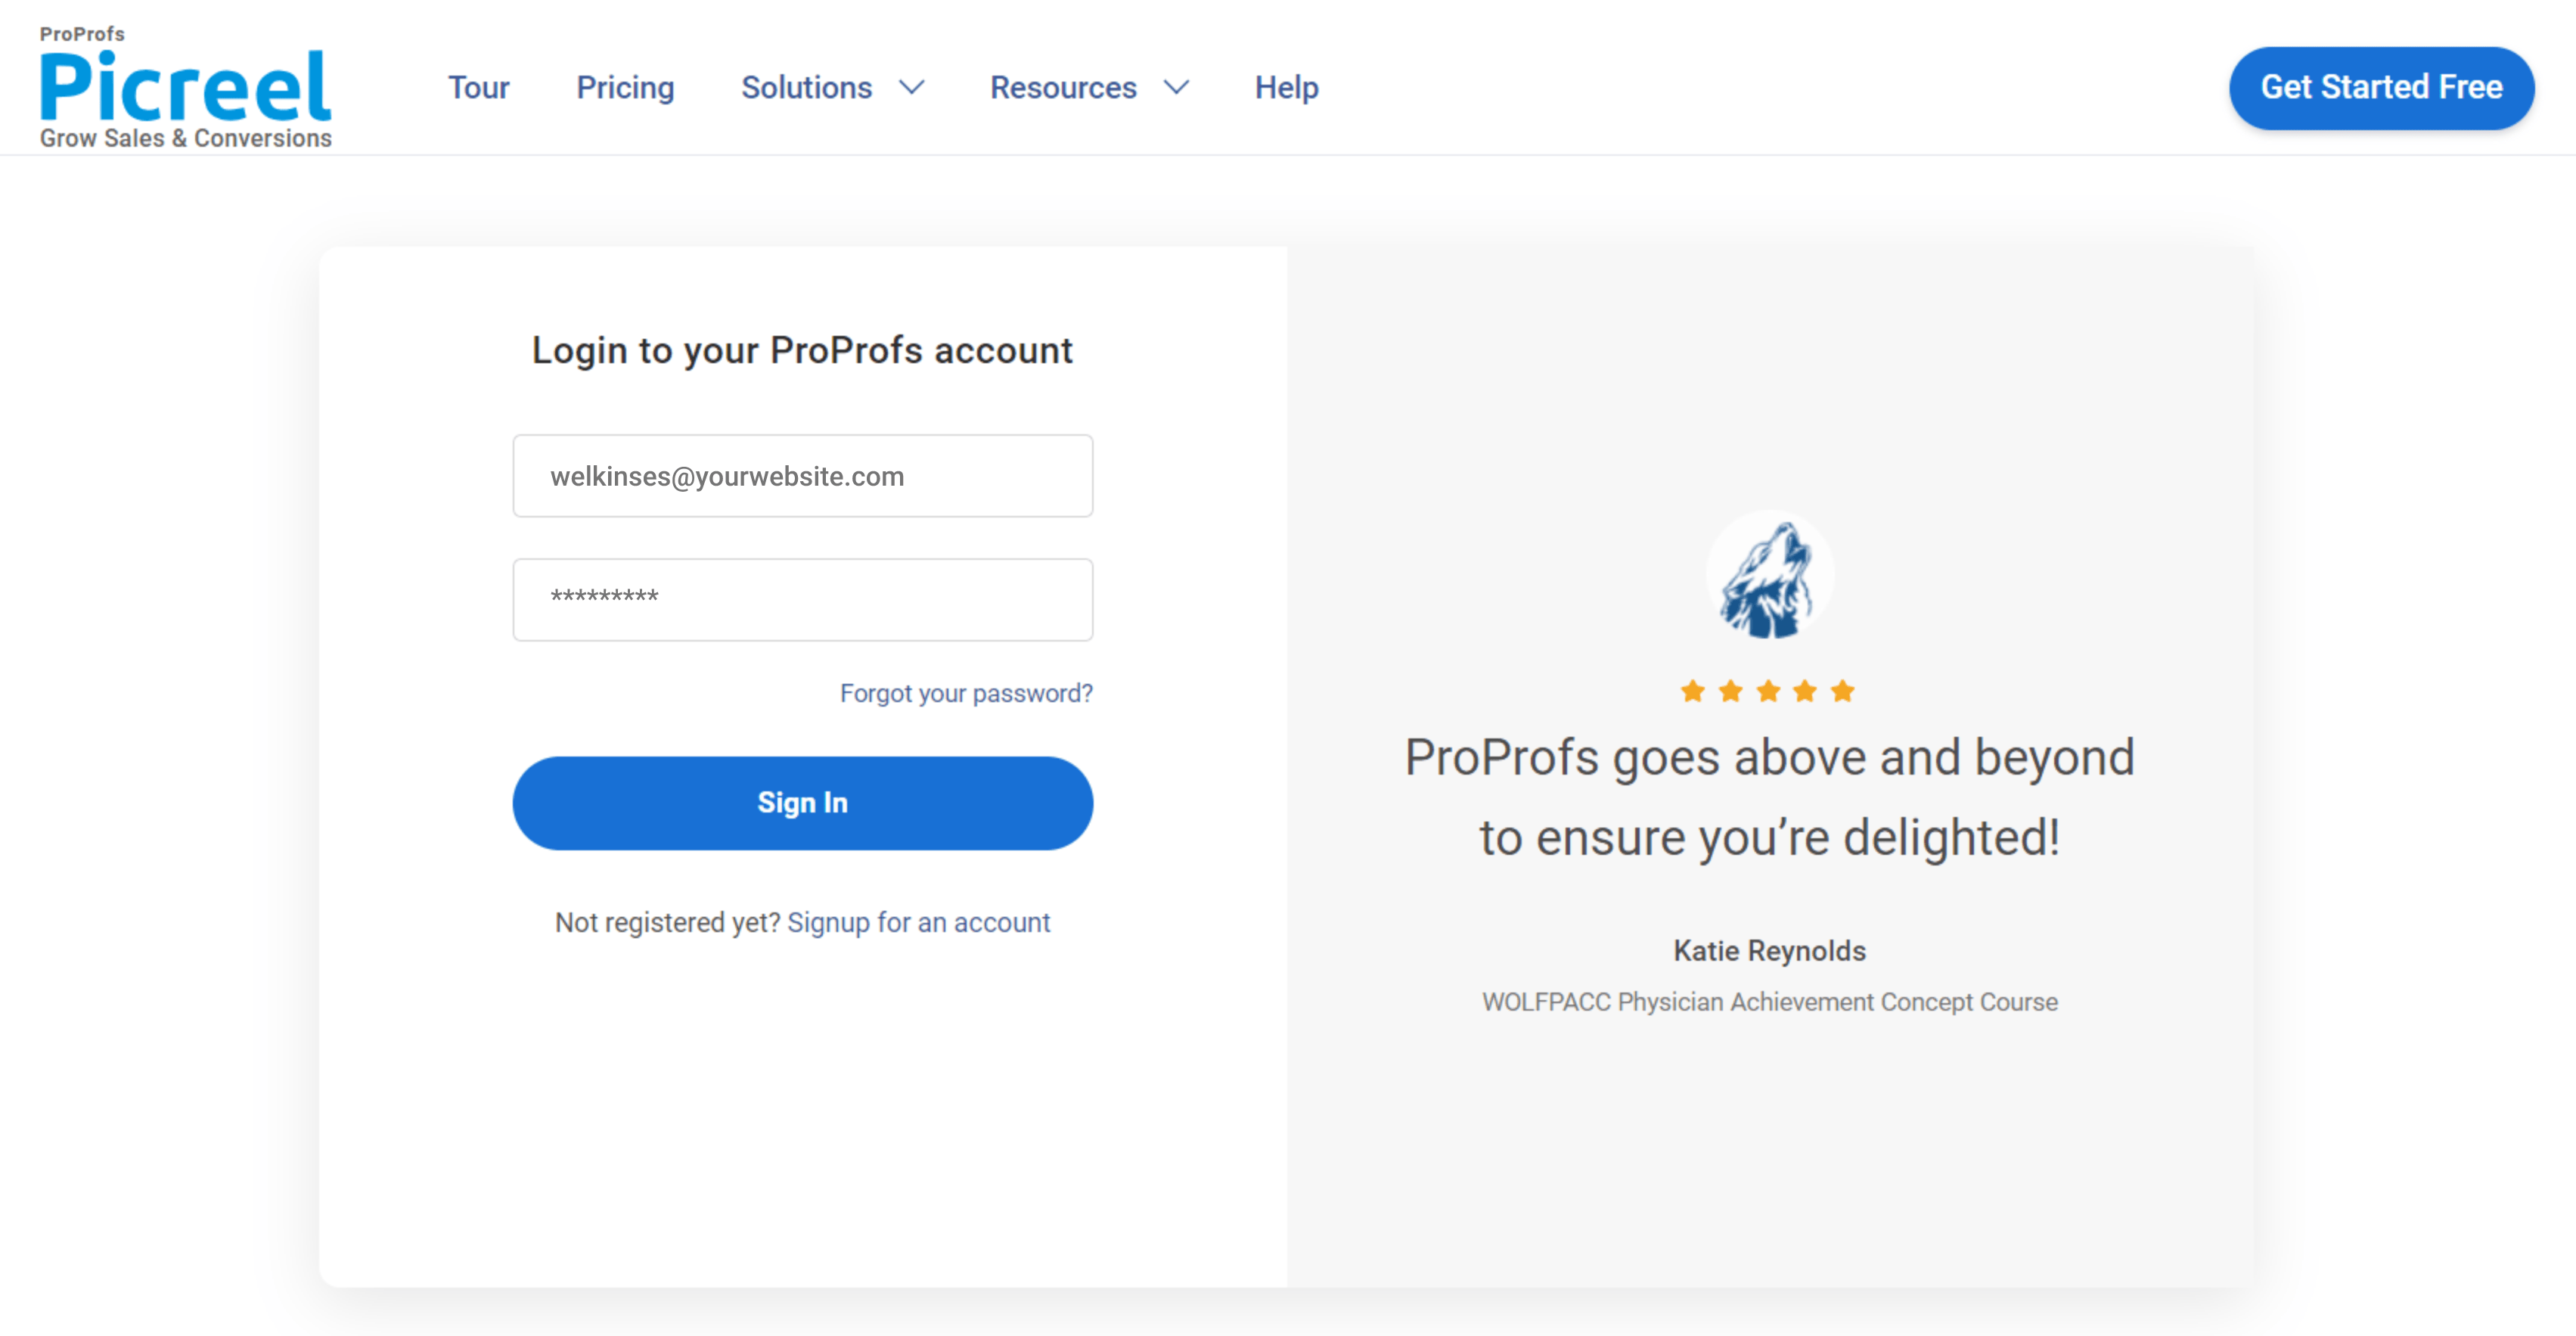
Step 1: Log In to Your Account
Sign in to your Picreel account. If you don’t have one yet, create your forever-free Picreel account.
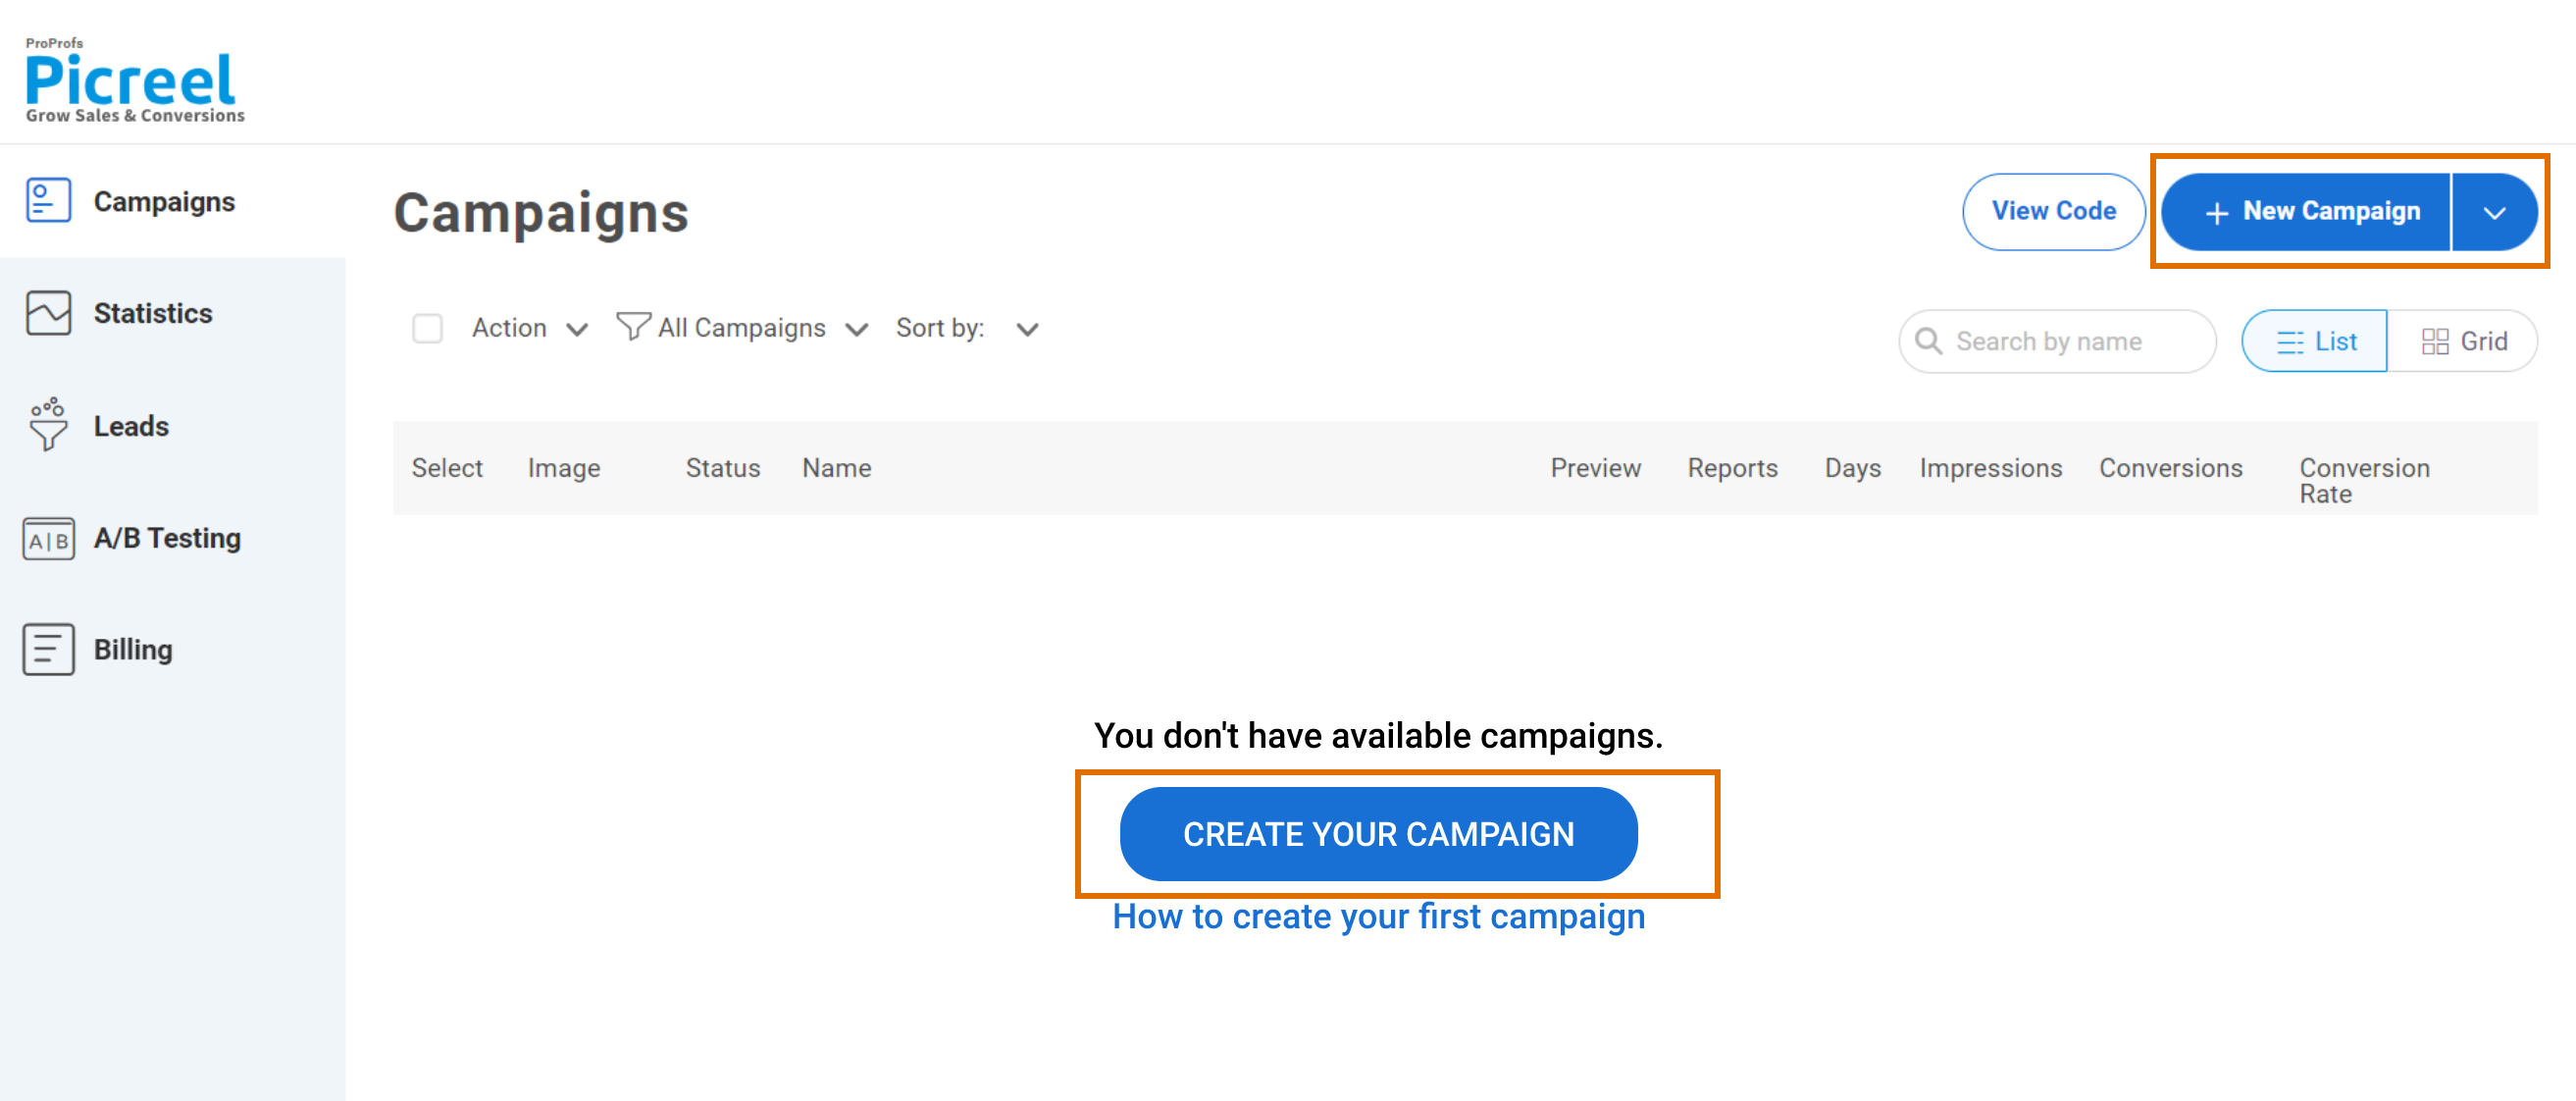
Step 2: Start a New Campaign
Go to the “Campaigns” option and click “New Campaign” in the top right corner. Also, you can choose the templates option from the drop-down menu or start from scratch.
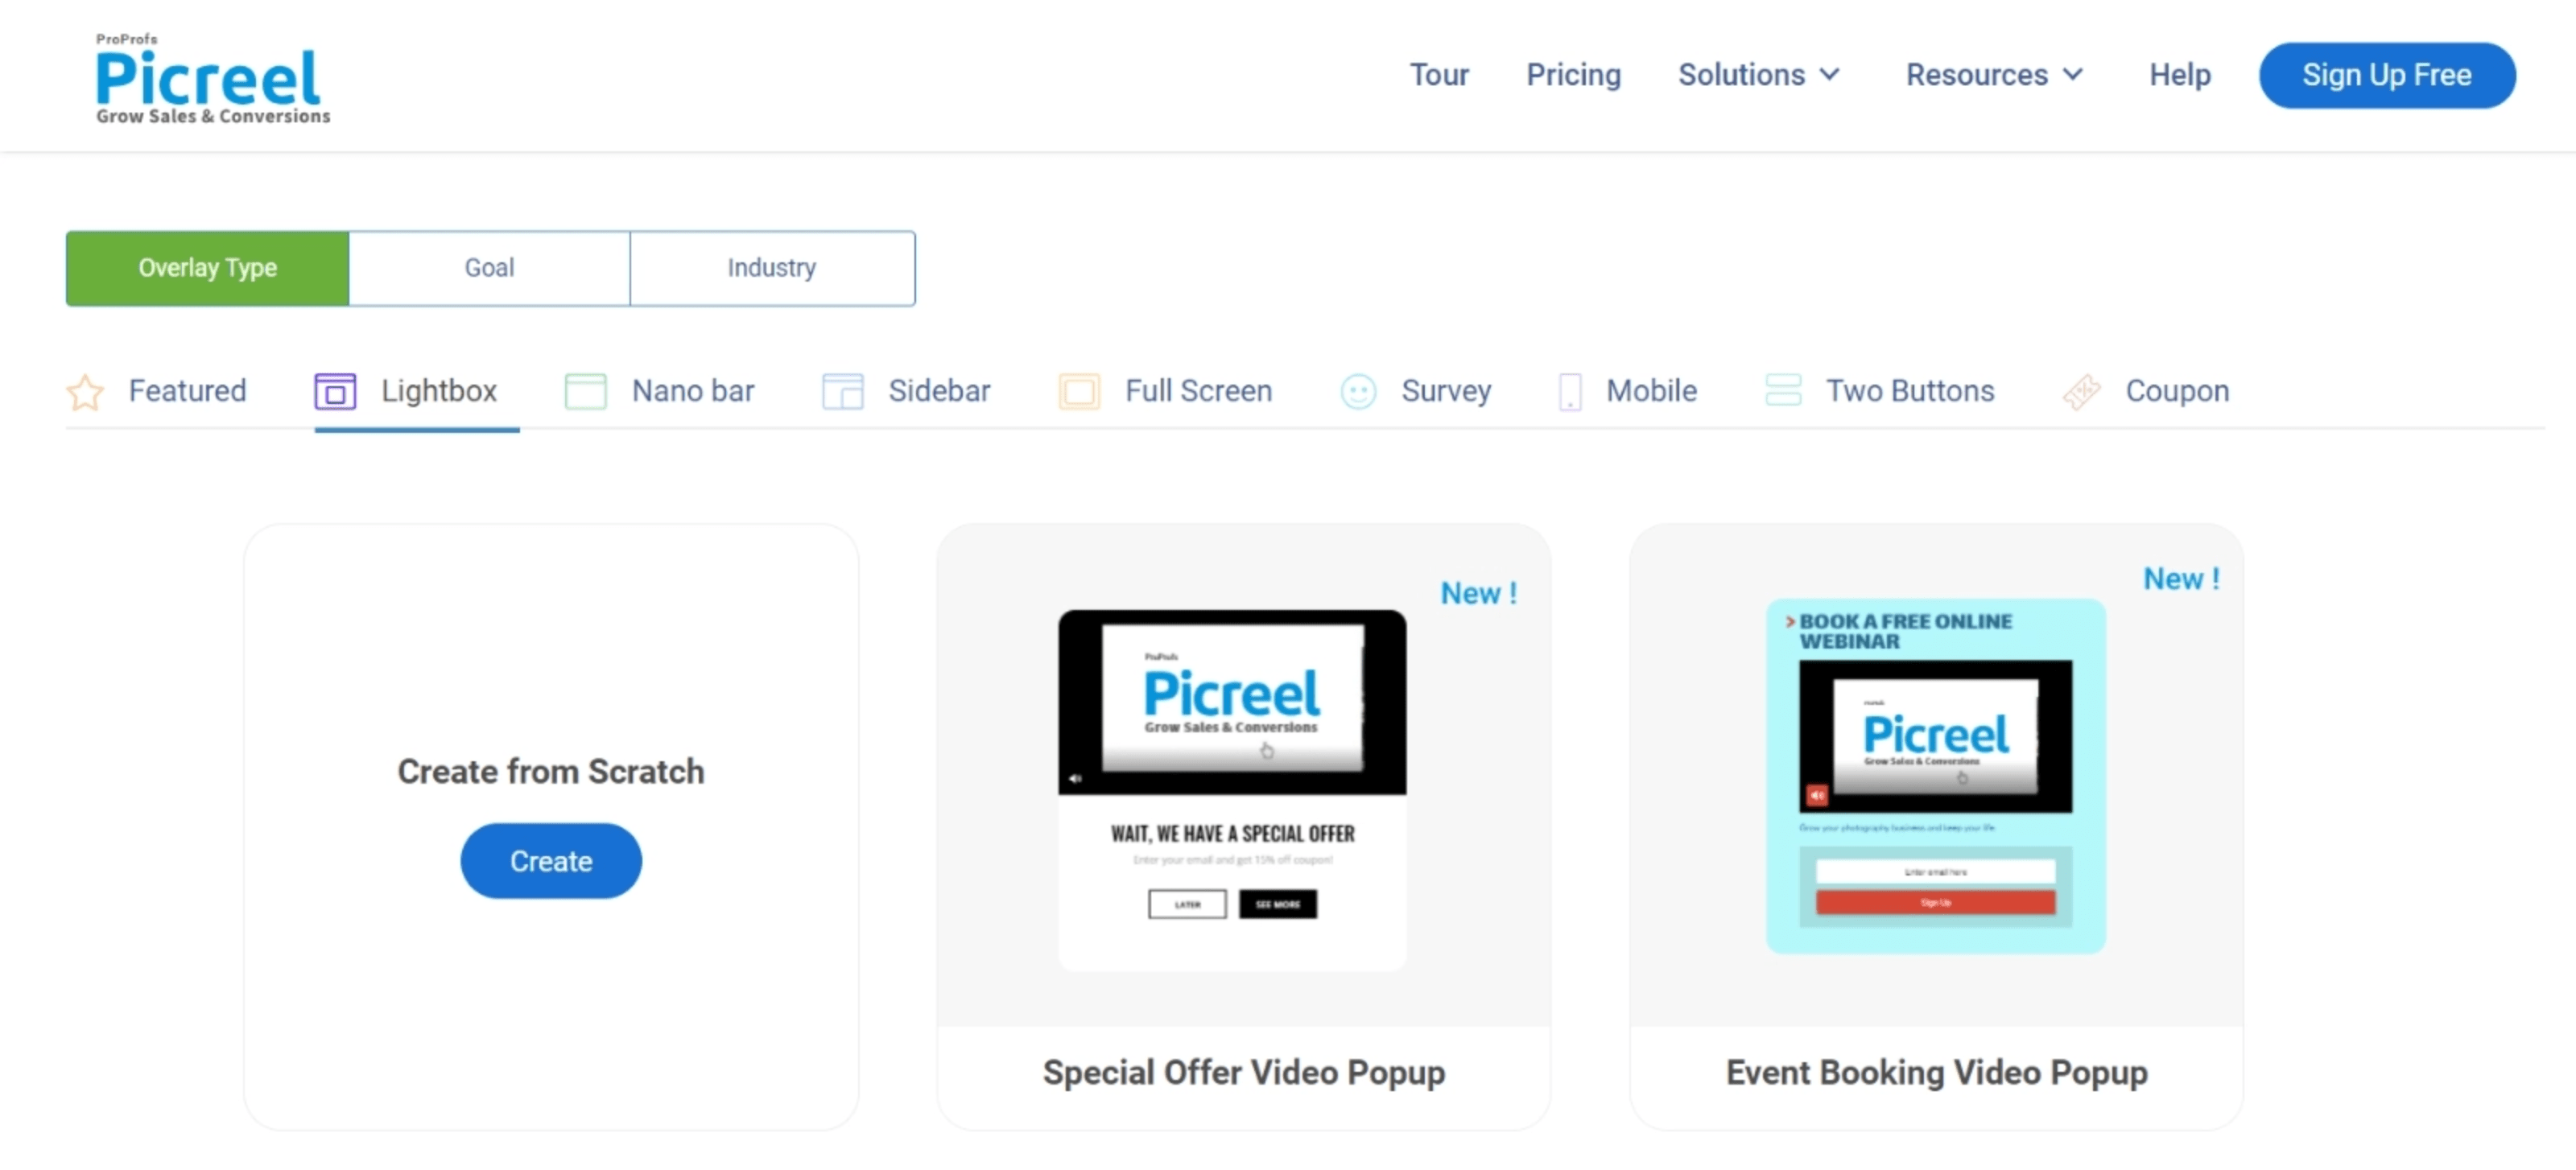
Step 3: Select a Popup Template
From the 100+ ready-to-use popup templates menu, choose the type of popup you want to create, such as a spin-to-win, timed discounts, or lead capture form.
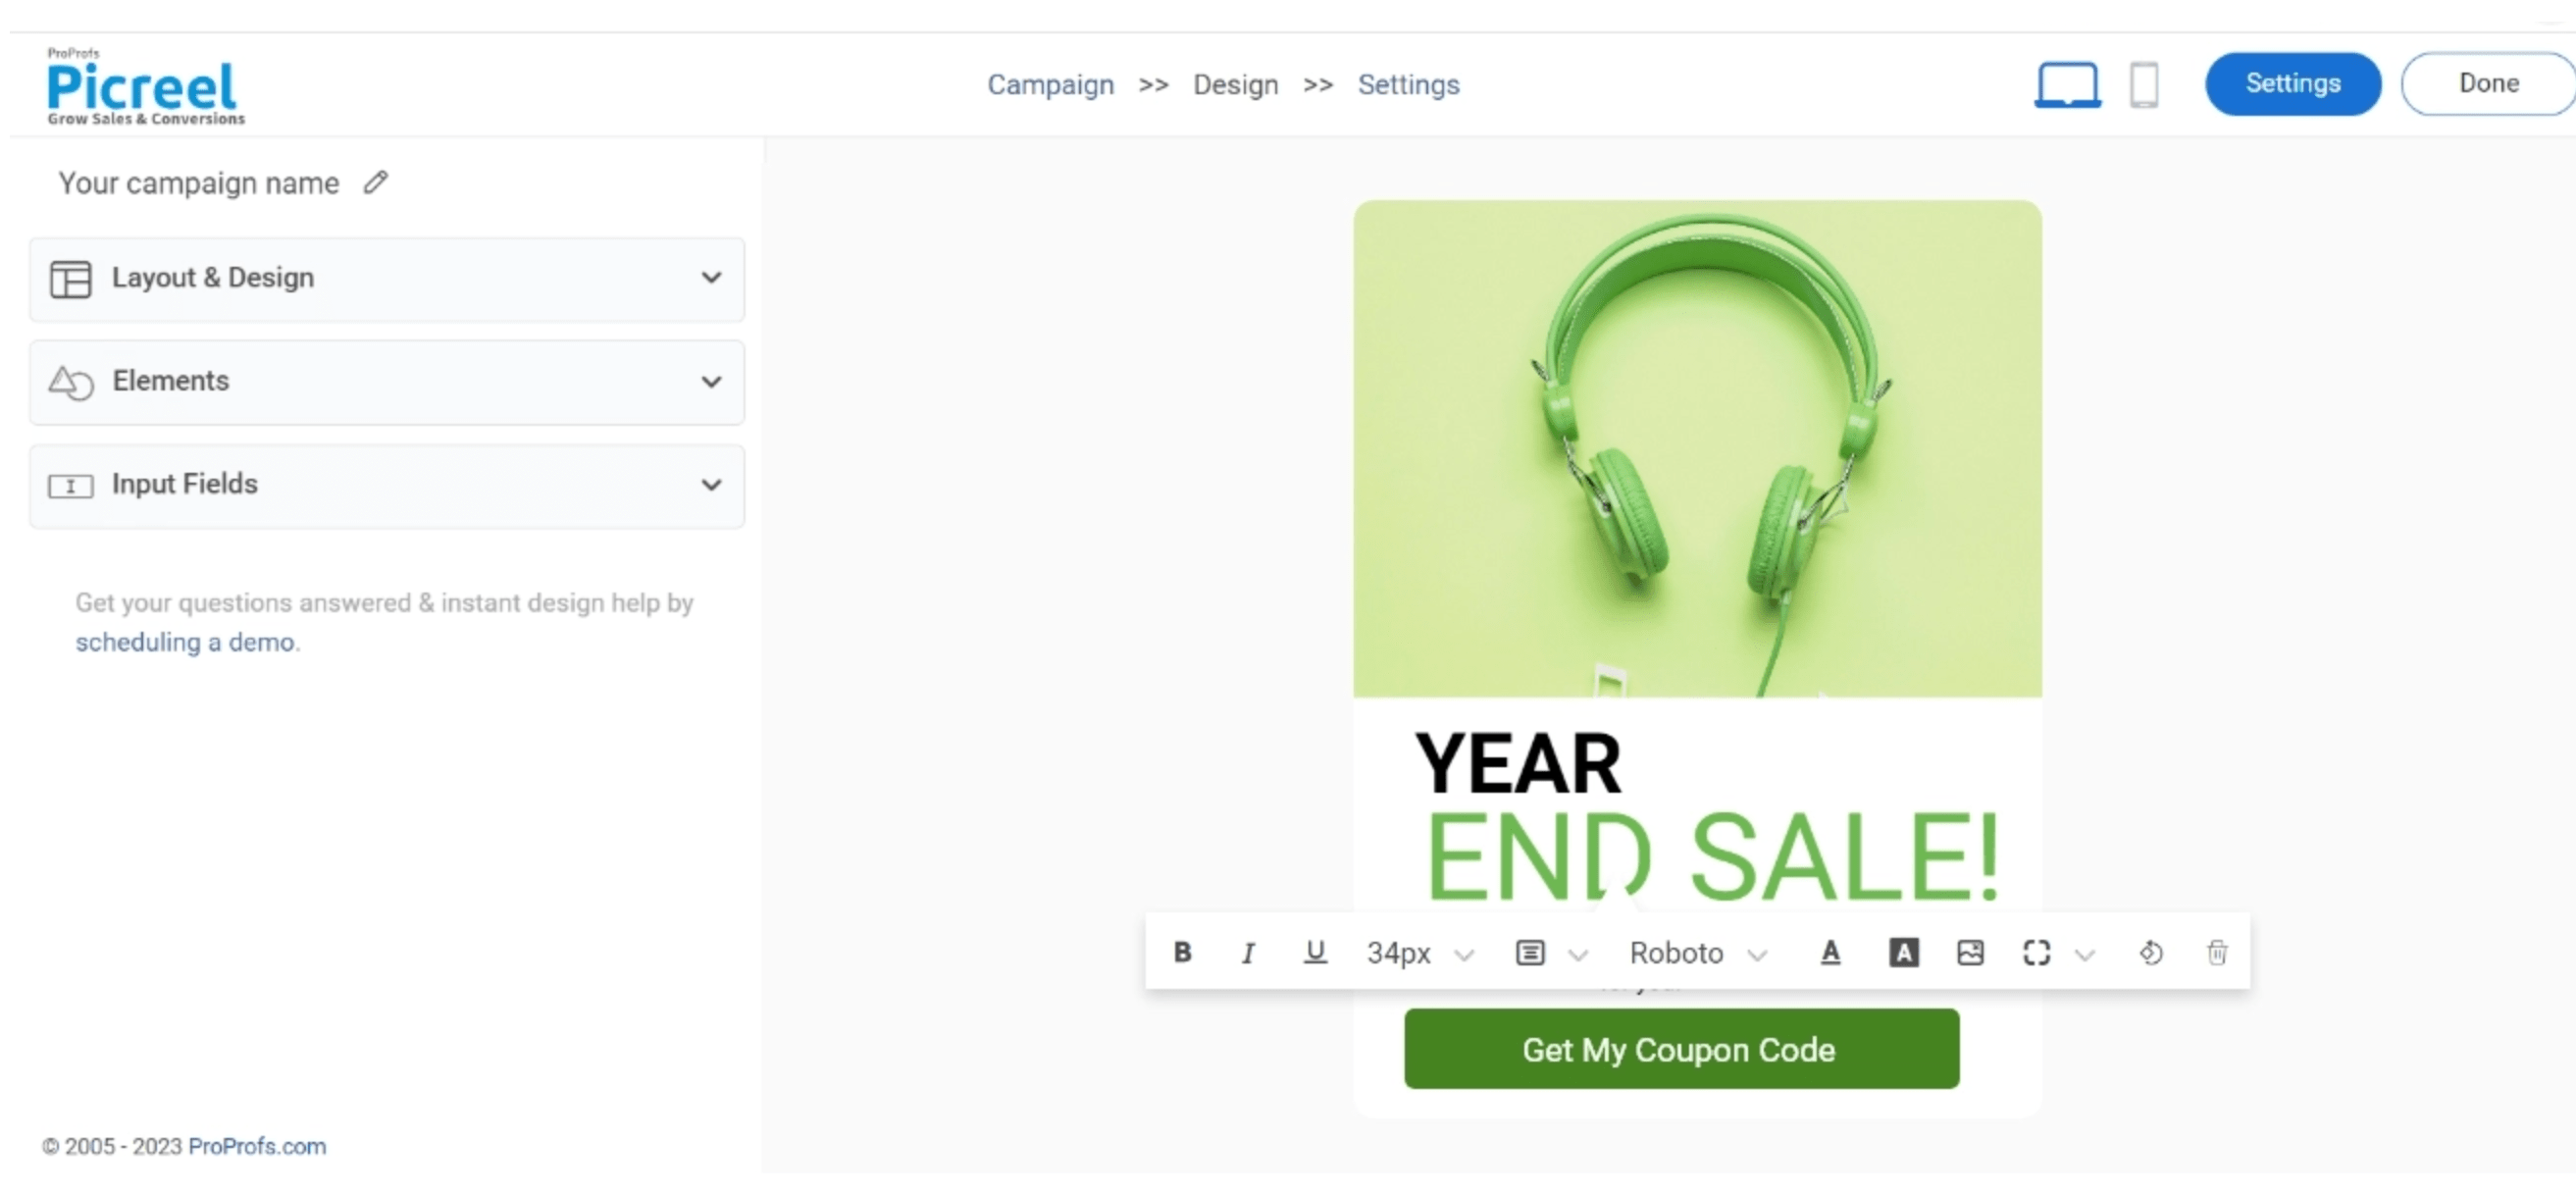
Step 4: Customize Your Popup Design
Once you select a template, tailor it to your needs by editing the visuals, text, form fields, and adding strong CTA buttons using Picreel’s campaign builder.
If you’re looking for design inspirations, here are some of my favorite popup designs that convert.
Step 5: Set Targeting and Triggers
Head to the settings panel to configure when and where your popup appears by adjusting trigger and targeting options.
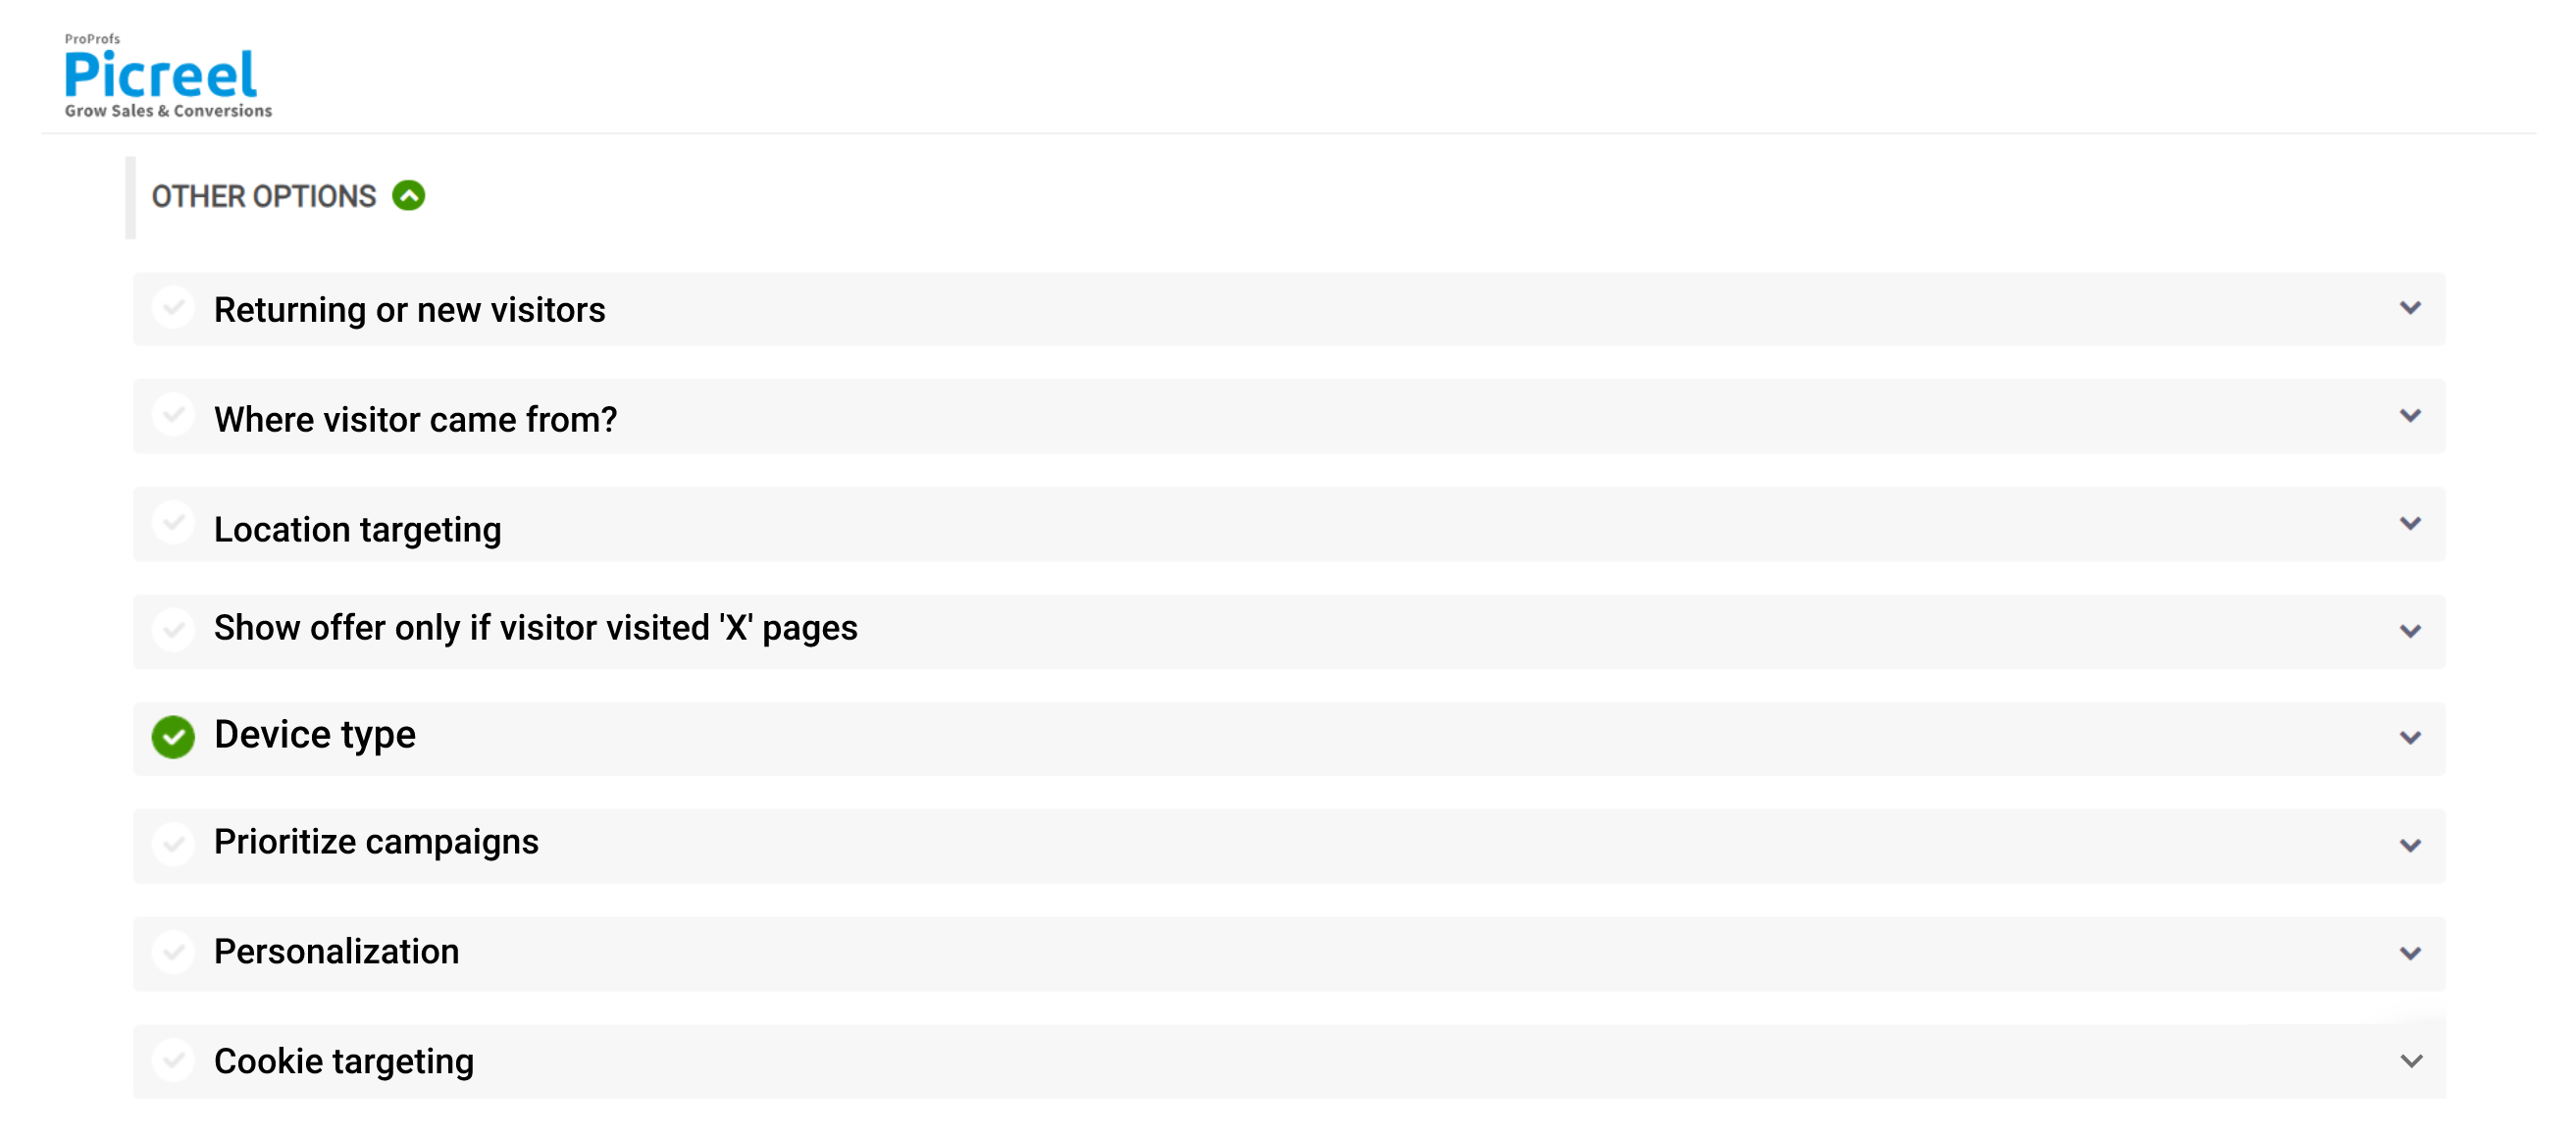
Customize Popup Timing and Audience:
- Audience Targeting: Show popups to new visitors, loyal customers, or users based on location.
- Scheduled Display: Time popups for peak sales seasons, product launches, or holiday promos.
- Behavior-Based Triggers: Trigger popups on exit intent, scroll depth, or time spent on page.
Step 6: Optimize for Mobile Devices
Use Picreel’s mobile-friendly templates and “all device” settings to ensure your popups look great on any screen.
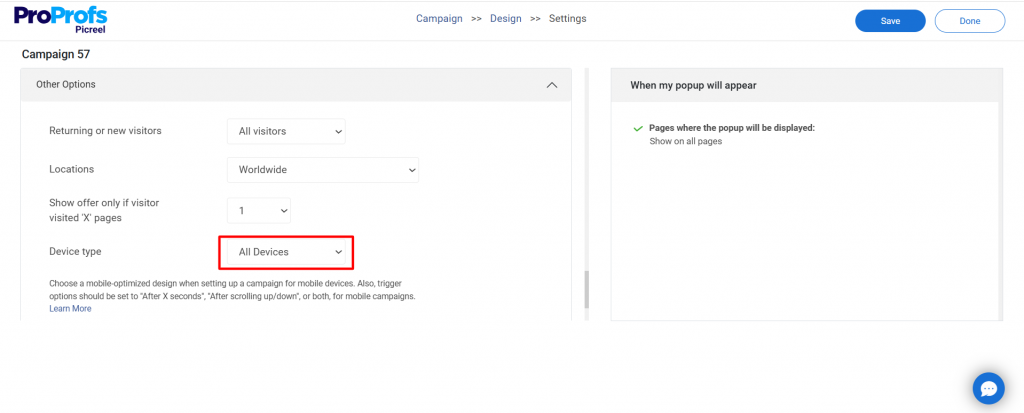
With over 54% of website traffic coming from mobile, optimizing for smaller devices is essential.
Pro Tip: Use thumb-friendly buttons, short copy, and one-click actions to boost mobile conversions.
Step 7: Run A/B Tests to Optimize Performance
Use Picreel’s built-in A/B testing feature from the side panel to experiment with different designs, triggers, and targeting settings to see what works best.

It’s an easy way to boost performance. In fact, 71% of marketers say A/B testing is key to increasing conversions.
Pro Tip: Focus on testing one element at a time, such as the headline, CTA, or trigger timing, to get clear, actionable insights. Also, always run tests long enough to reach statistical significance before making changes.
How to Embed Picreel HTML Code
Still confused about how to show popups in WordPress or HTML websites? Once your Picreel popup is ready, embed it on your websites and campaigns using these simple steps:
Step 1: Navigate to campaigns and click on “View Code.”
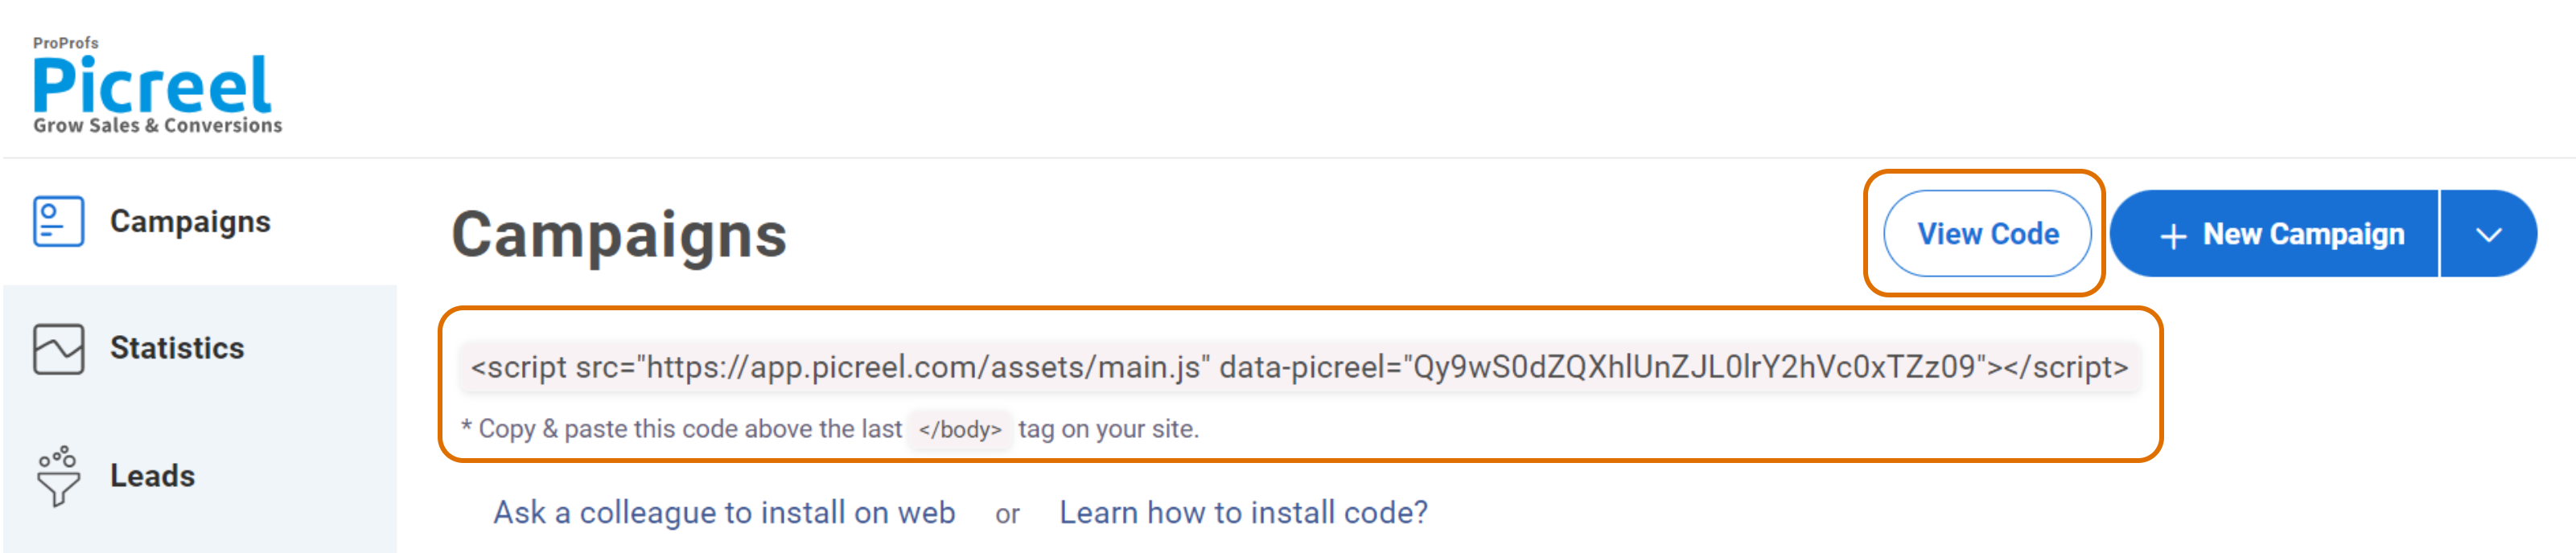
Step 2: Copy and Paste the Code
In the side panel, click on the campaigns section, select your campaign, and copy the code. Next, just paste the code before the closing </head> tag in your website’s HTML file.
This will show your Picreel popup on your website exactly where you want it!
After launch, check the Picreel popup analytics dashboard for views, CTR, conversions, and form submissions, and then tweak your popup based on the data.
Which Is a Better Method: HTML Popups or No-Code Popups?
Before we wrap up, let’s quickly compare both methods side by side to see which one suits your needs better:
| Criteria | Popup with HTML/CSS/JavaScript | Popup with Picreel |
|---|---|---|
| Customization | ✅Offers complete control but requires coding skills for advanced designs and functionalities. | ✅Provides an intuitive drag-and-drop editor with pre-built templates for easy customization of layouts, colors, fonts, and styles. |
| Analytics | ❌ Does not include built-in analytics; external tools or scripts are required. | ✅Offers built-in analytics and reporting to track popup performance, conversions, and user behavior. |
| Targeting | ❌ Requires manual coding or external scripts for basic targeting functionality. | ✅ Includes dynamic targeting options like user behavior, time spent, scroll percentage, or specific pages. |
| Exit-Intent | ❌ Needs complex coding to implement exit-intent detection. | ✅ Integrates exit-intent technology to trigger exit-intent technology popups when visitors are about to leave the site. |
| A/B Testing | ❌ Has no built-in A/B testing; requires third-party tools. | ✅ Supports easy A/B testing, allowing you to compare different versions of your popups to optimize performance. |
If you enjoy coding and want full control, an HTML popup is great, but it takes time and solid skills. If you’re short on time or tech experience, no-code popup with Picreel is a smart alternative.
You can create popups in minutes using ready-made templates, launch them instantly with advanced targeting, and even start free with their forever-free plan.
I feel the free version works well; however, you can always upgrade to an affordable paid plan to access advanced features. To make an informed decision, consider your marketing goals, coding skills, and the level of sophistication you desire for your popups. Happy popup creation!
FREE. All Features. FOREVER!
Try our Forever FREE account with all premium features!
 We'd love your feedback!
What did you like & how can we make it even better?
 Thanks for your feedback!
 Ask Your Question
Have a question? Get expert help to make your decision easier.