I have always loved using MailerLite and have built my entire business on top of it. Recently, I discovered the potential of popups to significantly grow my email list and improve click-through rates (CTRs).
We will walk through two methods of creating popups in Mailerlite. For that, we’ll also discuss the differences between MailerLite’s popup builder and Picreel as a standardized popup tool. In fact, here’s how my Picreel popup looks within MailerLite:
But does MailerLite offer popups? Yes, it does.
In fact, there are two ways to create a popup in MailerLite: MailerLite’s built-in tool or an external popup tool like Picreel.
Before we dive into the methods, let’s compare MailerLite’s popup builder with Picreel.
| Criteria | MailerLite Popup | Picreel Popup |
|---|---|---|
| Multi-platform support | ❌ Limited to websites directly integrated with MailerLite | ✅ Supports multiple platforms, including various website builders and CMSs |
| More features | ❌ Basic features suitable for simple popups | ✅ Advanced features like A/B testing, analytics, and more |
| Better customization options | ❌ Limited customization with predefined templates | ✅ Extensive customization options with a wide range of templates and design tools |
| Integrates with various platforms | ❌ Primarily integrates with websites using MailerLite’s embedded forms | ✅ Seamlessly integrates with various website platforms such as WordPress, Shopify, Magento, and more |
| Advanced targeting options | ✅ Basic targeting options based on user behavior and time-on-site | ✅ Advanced targeting options, including geolocation, device type, and user behavior triggers |
In my personal experience, I recommend using Picreel. Here are the top three reasons why:
- Multi-platform support: Picreel works across multiple platforms, ensuring your popups remain effective even if you change your website platform.
- More features: Picreel offers advanced features like A/B testing and detailed analytics, which are crucial for optimizing popup performance.
- Better customization options: Picreel offers extensive customization options, allowing you to create visually appealing and highly effective popups.
Nevertheless, in this tutorial, I will explain step-by-step how to create a popup using both methods.
Method 1: Using MailerLite’s Built-in Popup
MailerLite offers a built-in popup maker. Here’s how to create it:
1. Visit the MailerLite website and enter your credentials to access your account.
2. Once logged in, locate and click on the “Forms” option in the main navigation menu on the left side of the dashboard.
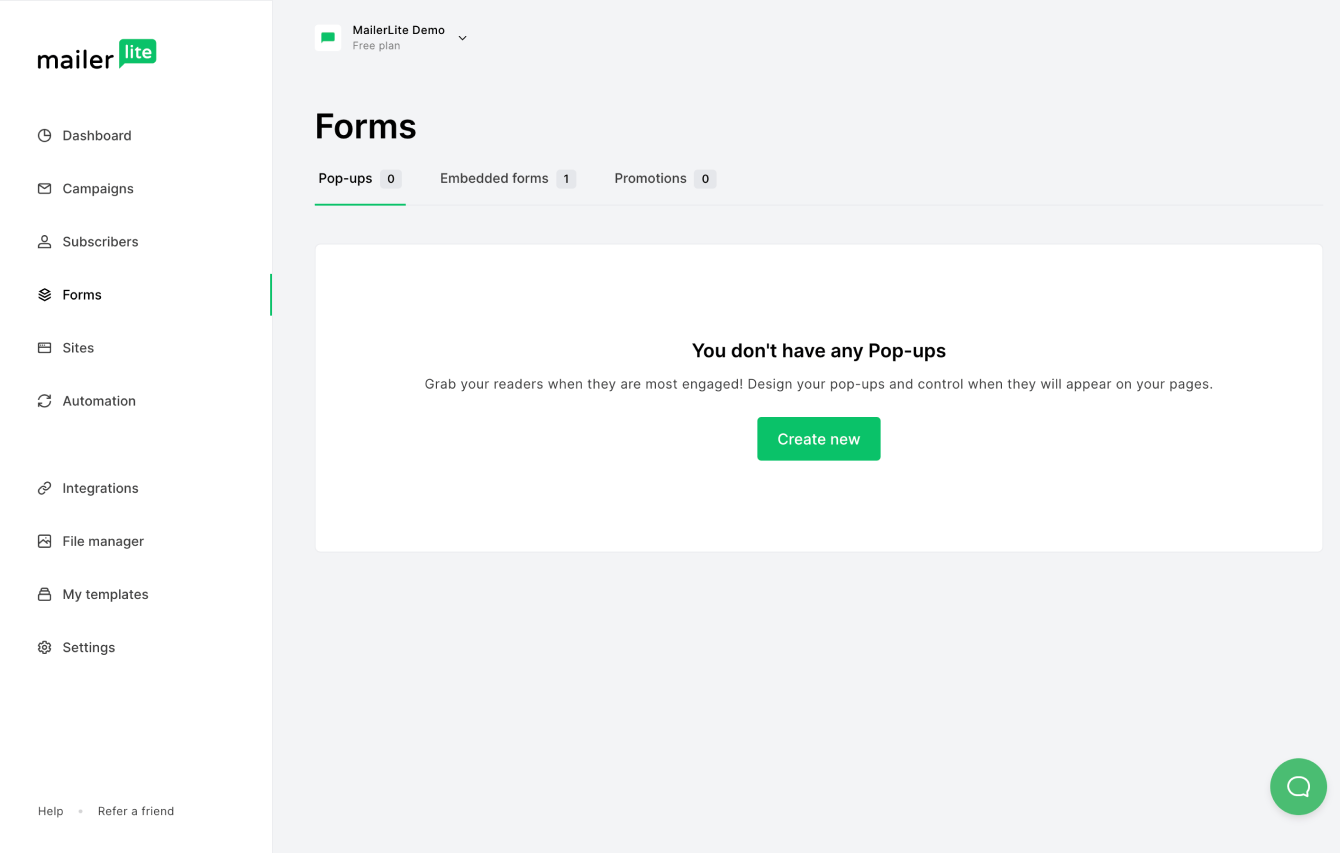
3. In the “Forms” section, click on the “Create form” button. A new window will appear with form-type options. Select “Popup” from the available choices.
4. Browse through the list of popup templates. Select a template that fits your needs and click the “Next” button to proceed.
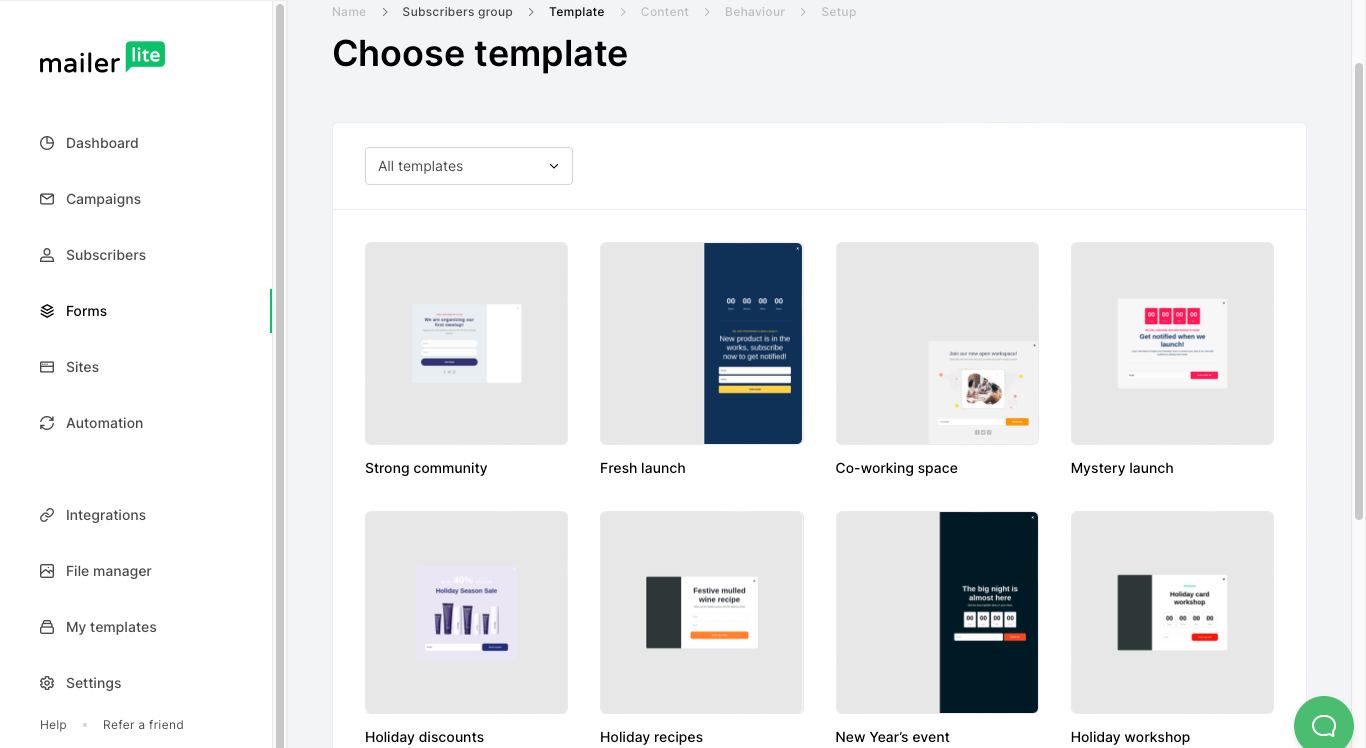
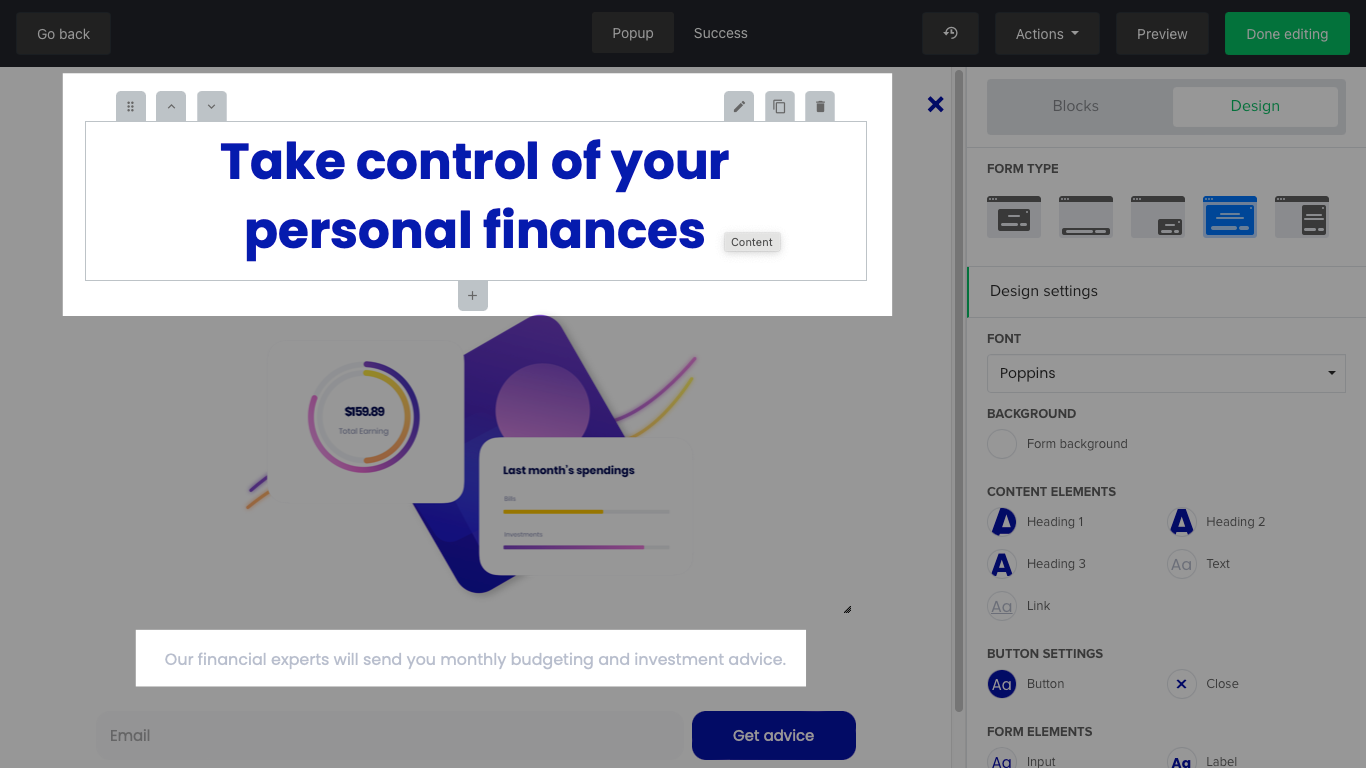
5. Use the customization tools provided to modify the content and design of your popup. You can add and edit text, upload images, change colors, and adjust the layout to match your branding.
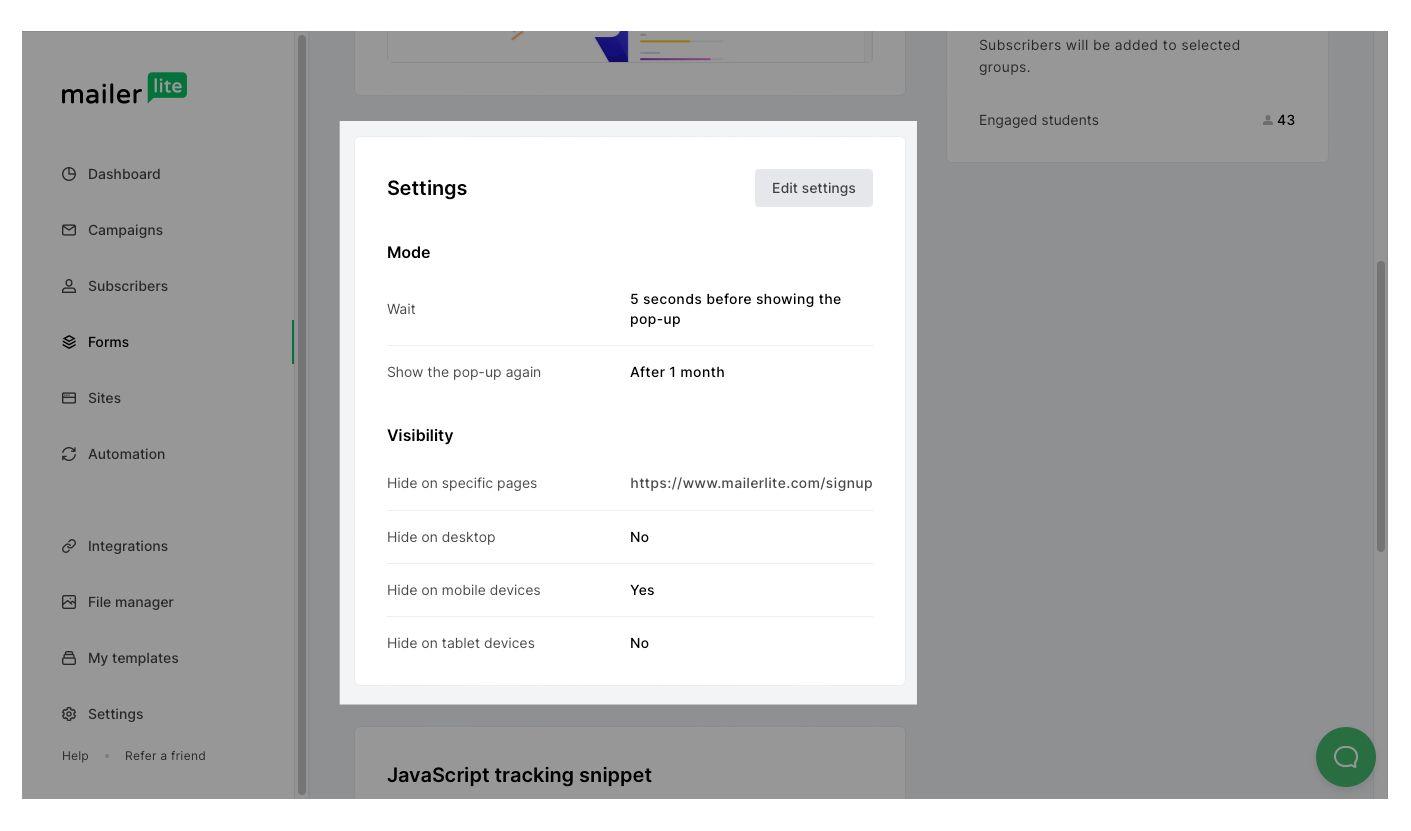
6. Click on the “Settings” tab to configure the display rules for your popup. You can set conditions such as time-based triggers, scroll-based triggers, and exit-intent triggers:
7. After customizing the popup and setting the display rules, click the “Save” button.
Method 2: Using Picreel Popup Builder
Picreel is a popup maker that works across multiple platforms, providing you with a versatile solution for creating popups. Here’s how you can create a popup using Picreel:
1. Sign up for a Picreel account and log in.
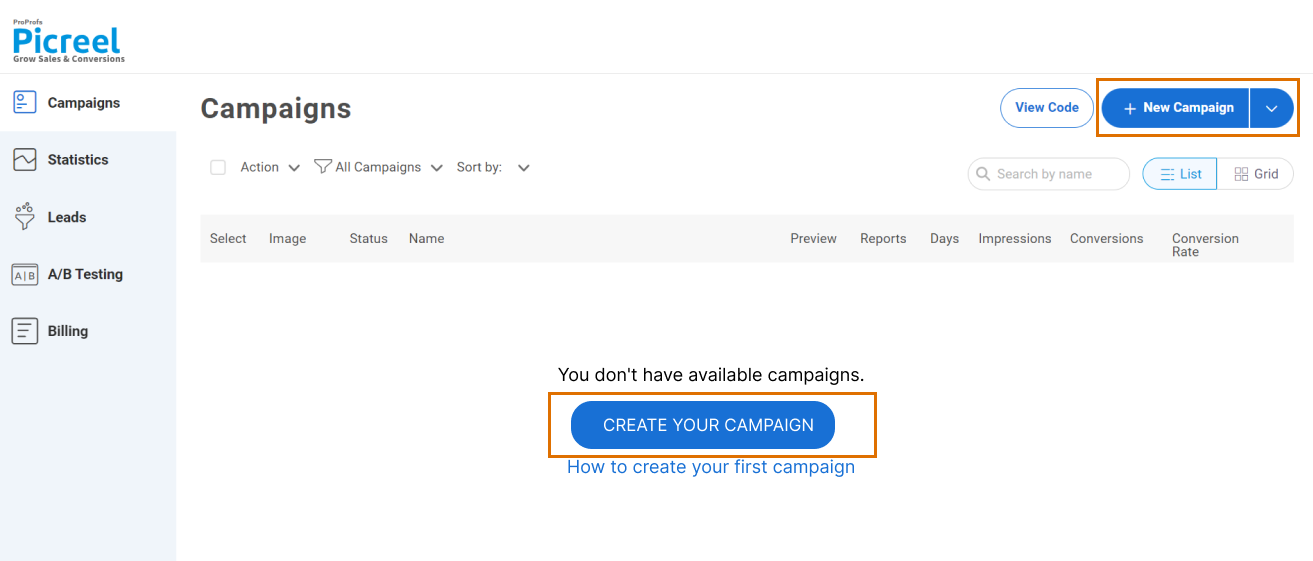
2. Go to the “Campaigns” menu and click “New Campaign” from the top right. You can select the templates option from the drop-down or start from scratch.
3. From the templates menu, choose the type of popup you want to create.

4. Once you select the design, customize it according to your preferences.
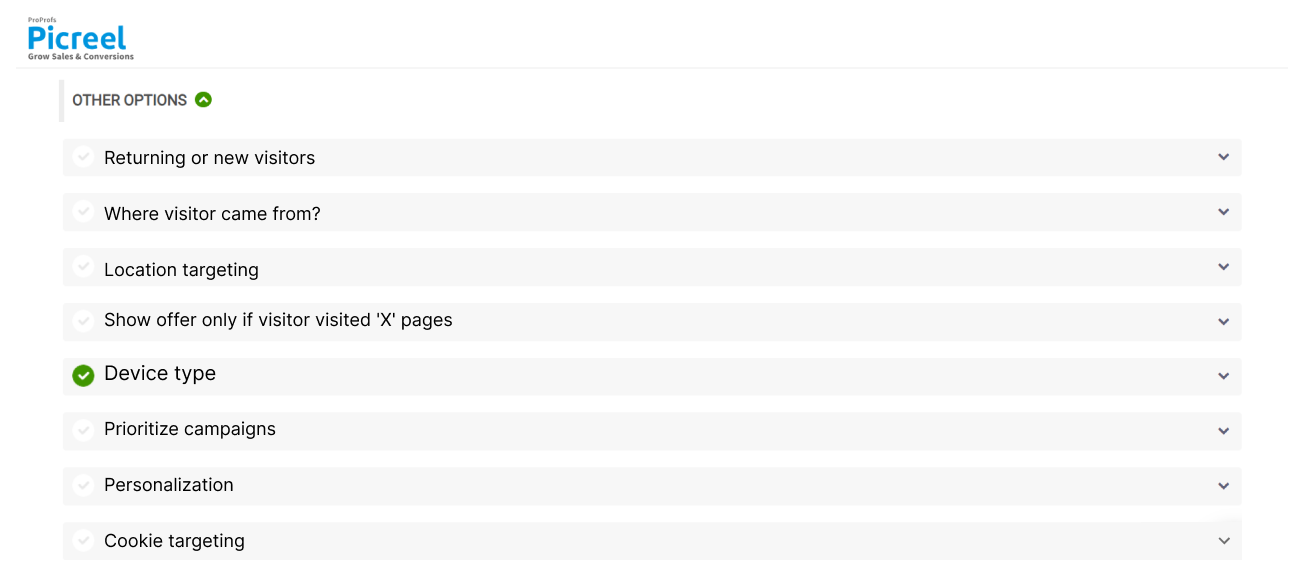
5. Configure your targeting and trigger options to specify when and where you want your popup to appear.
6. Click “Save” to activate your popup.
Embedding Picreel HTML Code Inside MailerLite
To embed a Picreel popup on your MailerLite website, follow these steps:
1. Navigate to campaigns and click “View Code.”
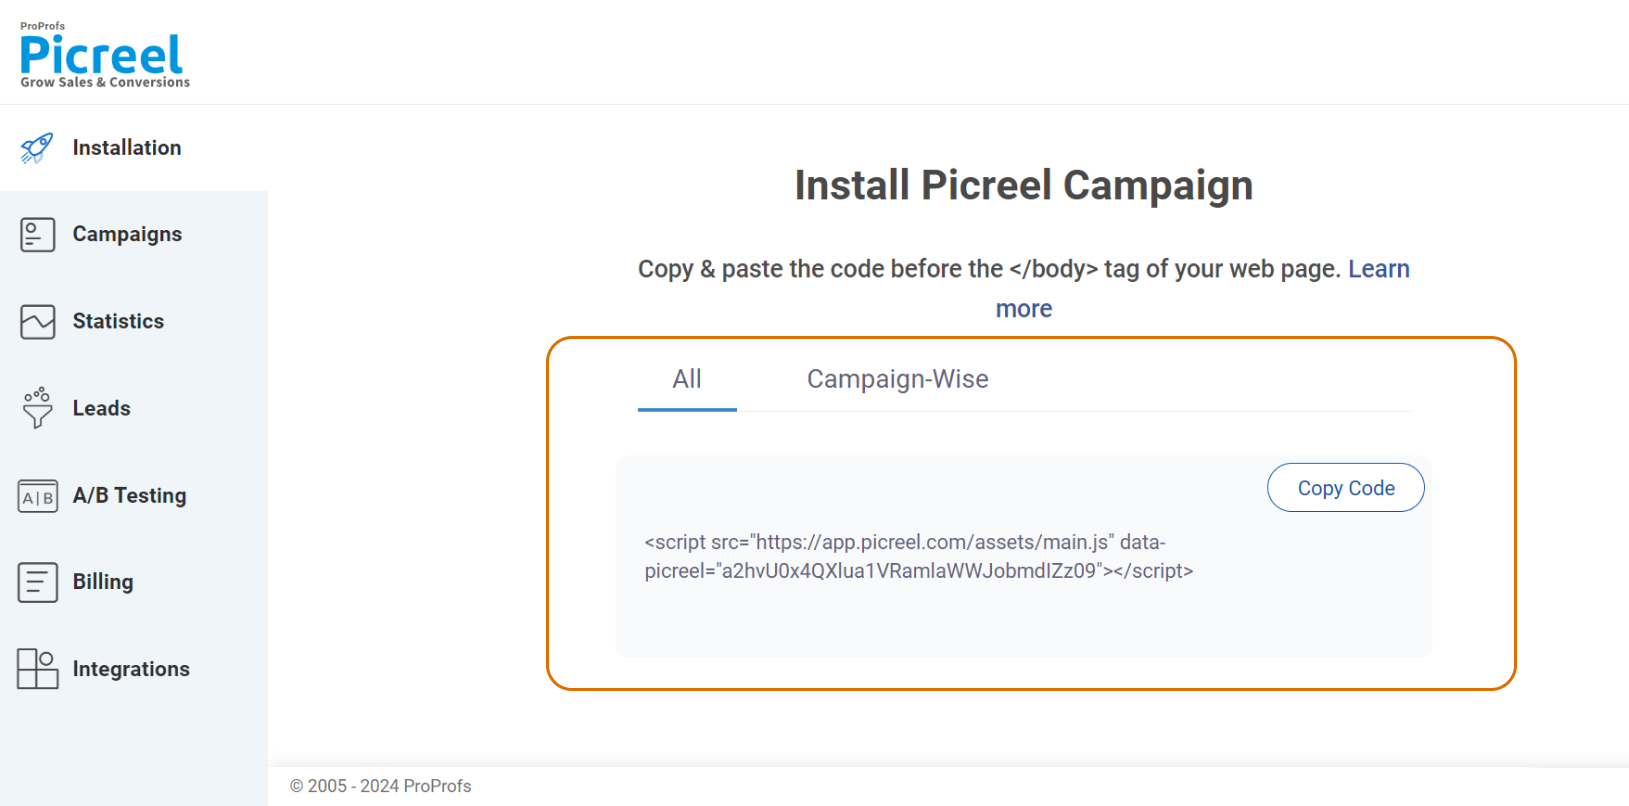
2. Click on the code to copy it.
3. Visit the MailerLite website and enter your credentials to access your account.
4. Once logged in, locate and click on the “Campaigns” option in the main navigation menu on the left side of the dashboard.
5. Click on the “Create campaign” button to start a new campaign or choose an existing campaign from the list.
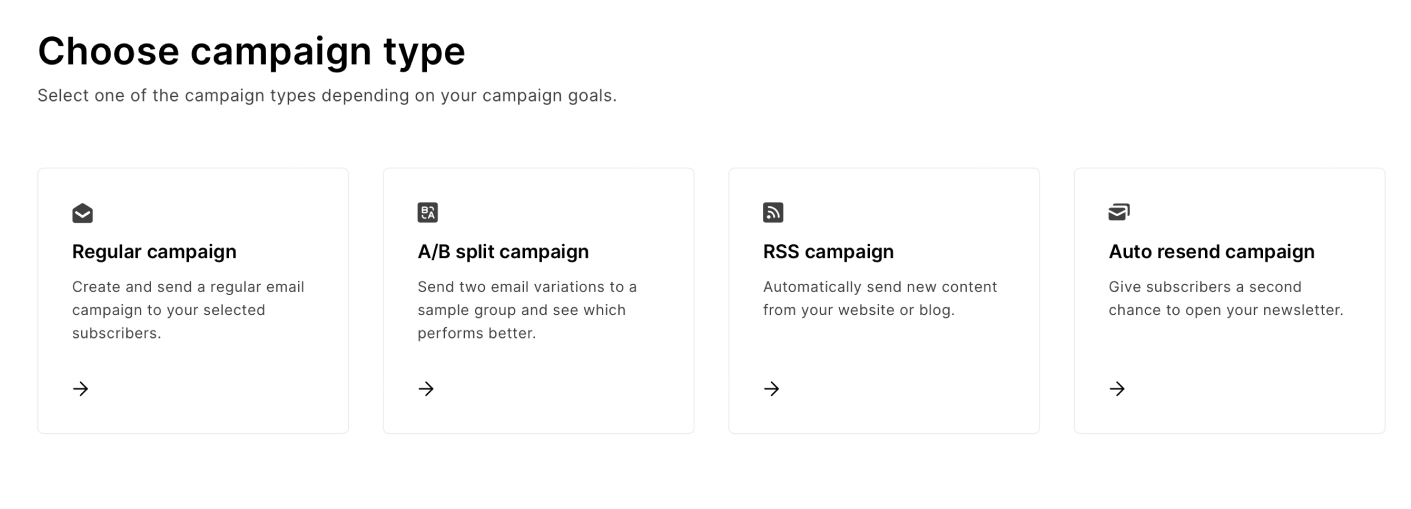
6. Choose the “Drag & drop editor” option to start designing your email campaign. This will allow you to add custom HTML code later.
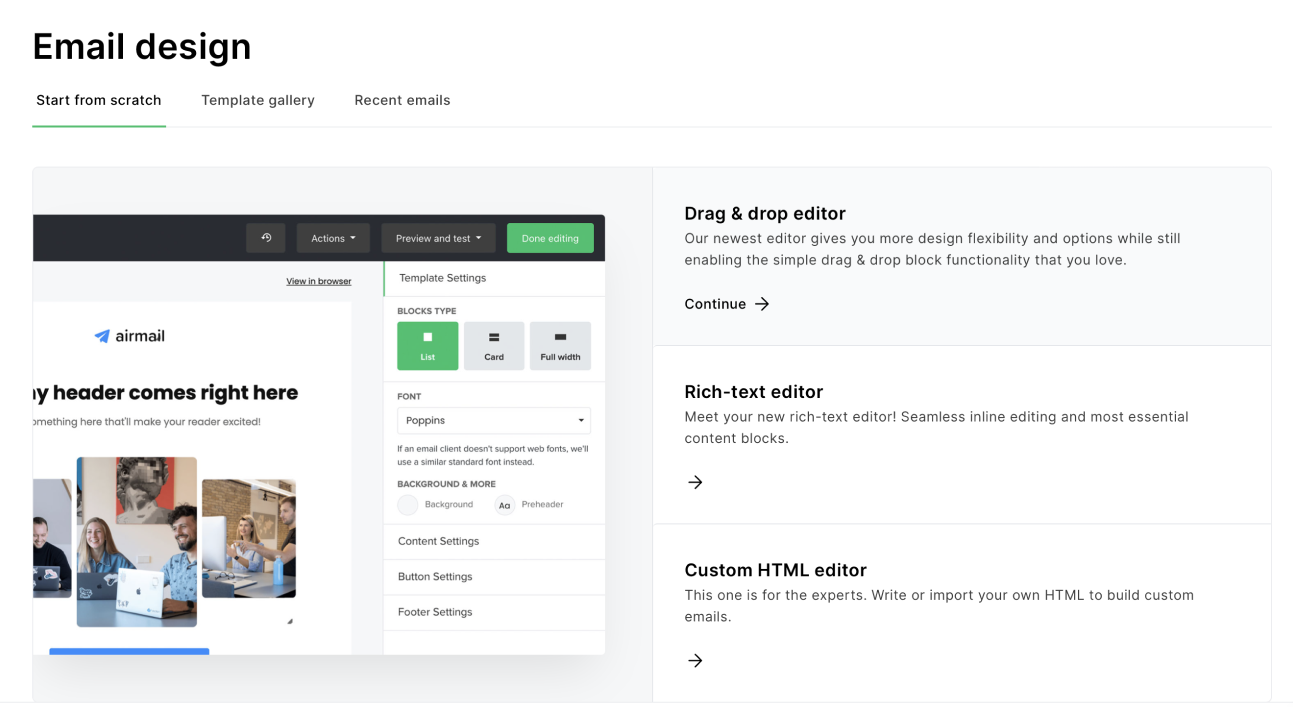
7. In the drag-and-drop editor, look for the “Custom HTML” block. This is usually found in the content blocks section on the right side of the editor.
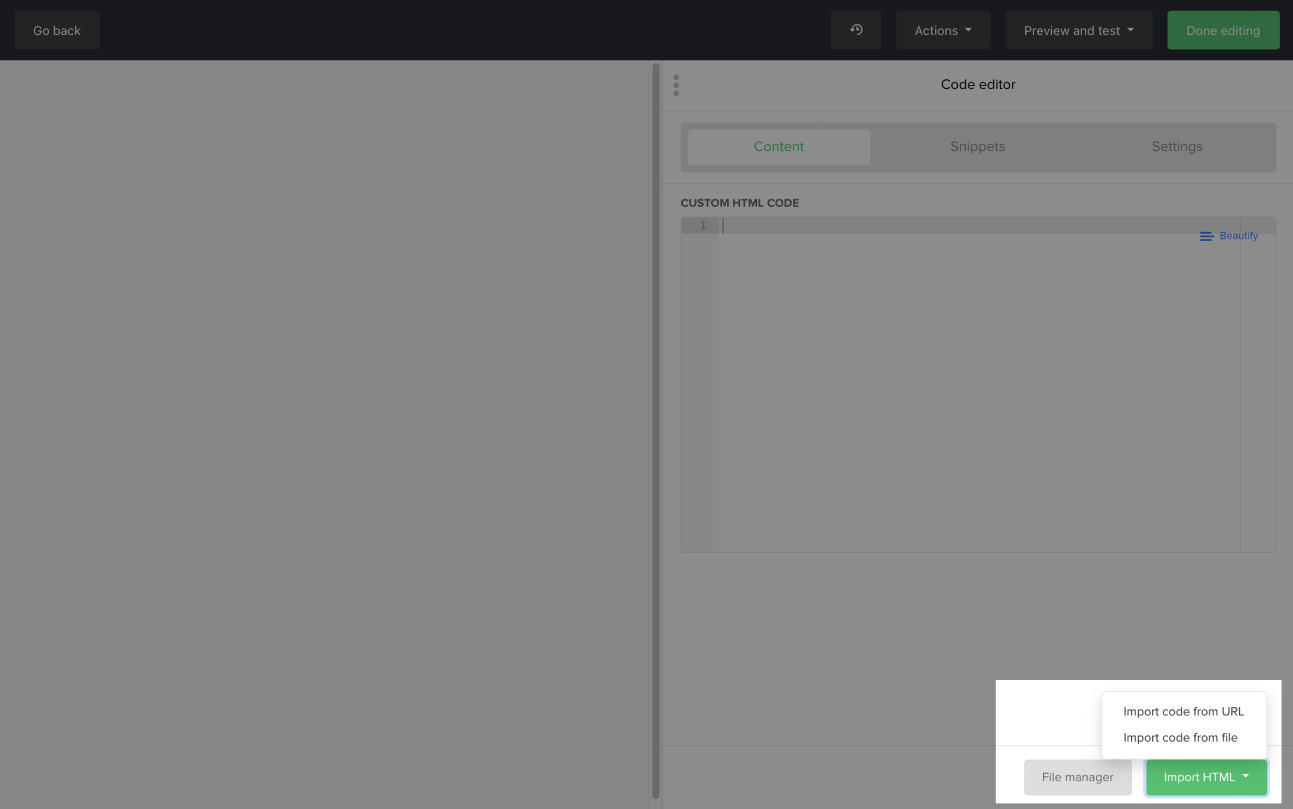
8. Drag the “Custom HTML” block and drop it into the desired location within your email design.
9. Once the custom HTML block is in place, click on the “Edit HTML” button that appears within the block.
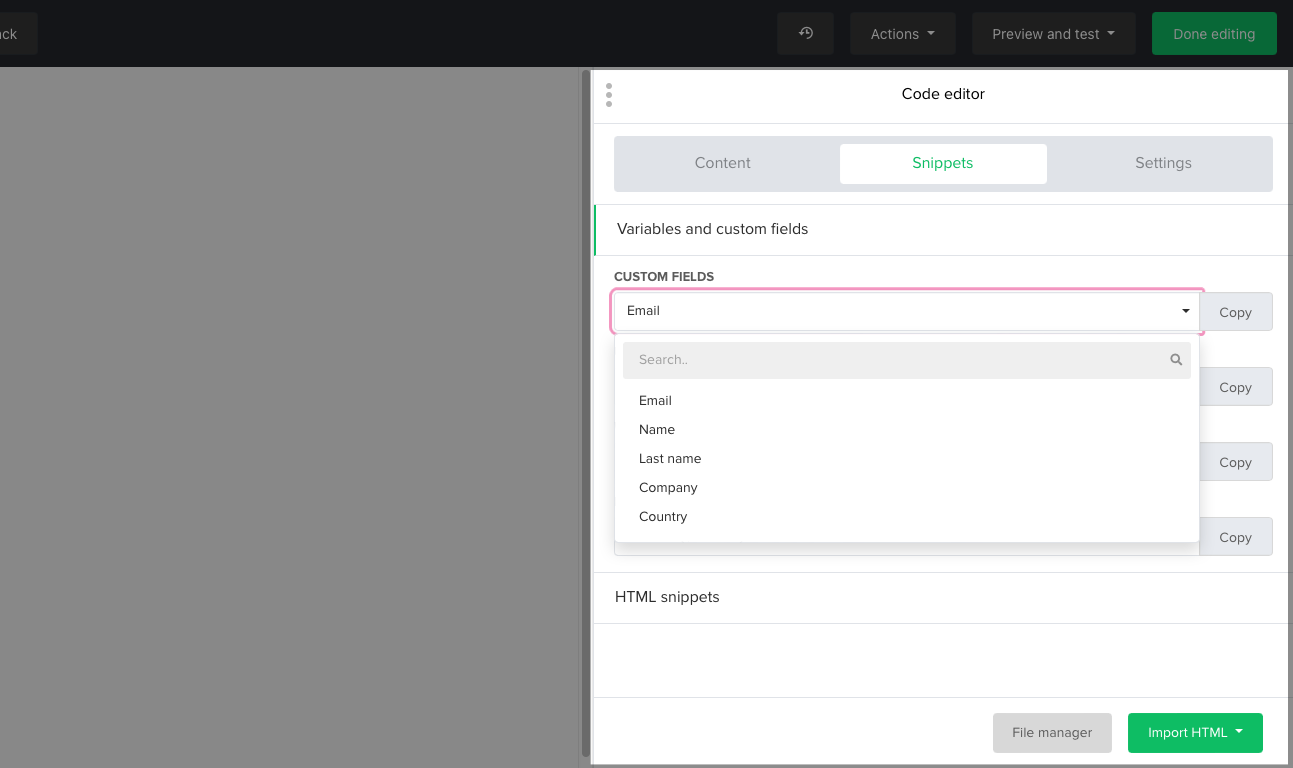
10. A new window will open, allowing you to enter your custom HTML code. Paste your code into the provided space.
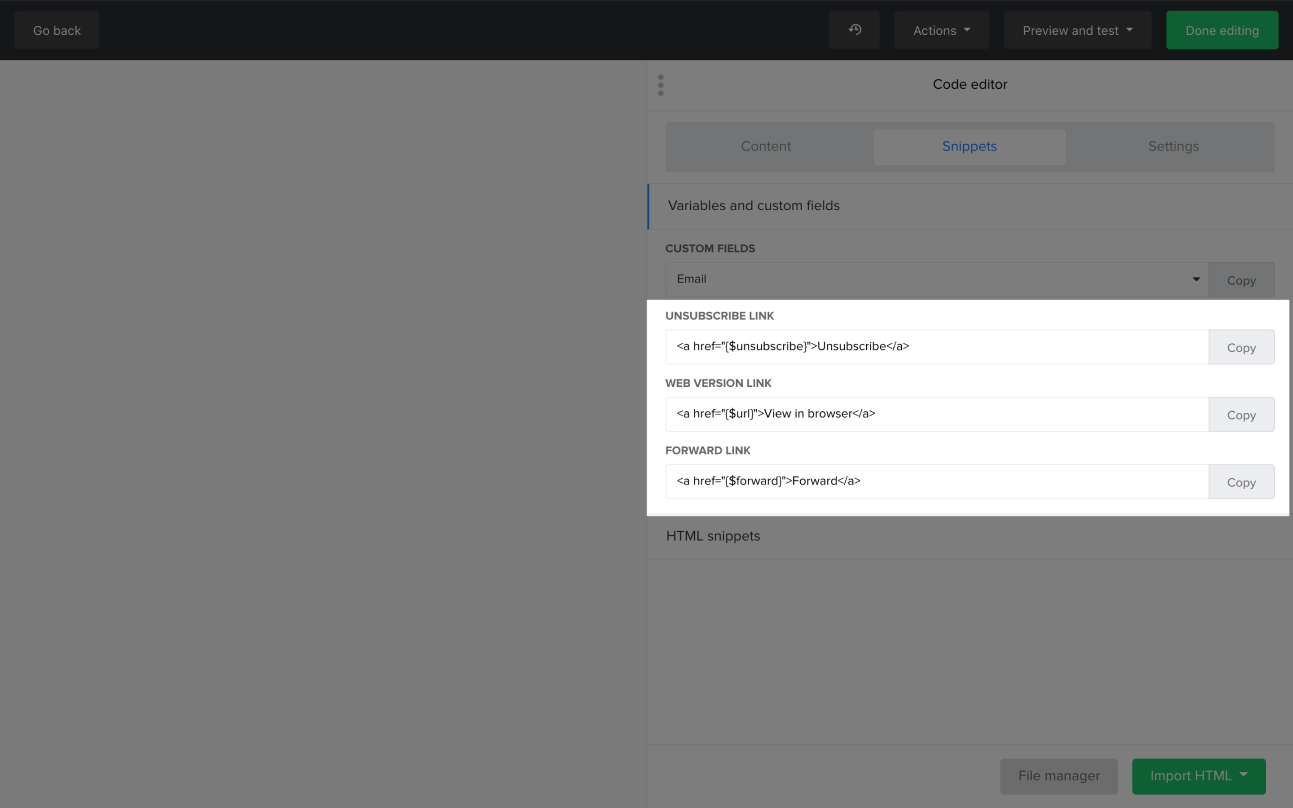
11. After pasting your custom HTML code, click on the “Save” button.
Which Is a Better Method: Method 1 or 2?
Keeping a long-term view, Picreel is probably better because your popup tool remains intact despite changing platforms, and you get more sophisticated popup options and more triggers.
Picreel offers a forever-free plan for startups and small businesses, allowing you to create unlimited popups with all premium features. The free version does the job, but you can always opt for paid options starting as low as $9.99/month.
On the other hand, if you prefer to use the limited options available with MailerLite’s built-in popup without incurring any additional integrations, it can still serve your needs just fine.
Remember, the goal is to create compelling popups that drive user engagement and conversions, regardless of your chosen method. Ultimately, the choice is yours.
 Tips
Tips
We’d love to hear your tips & suggestions on this article!
FREE. All Features. FOREVER!
Try our Forever FREE account with all premium features!

 We'd love your feedback!
 Thanks for your feedback!


